
To create a Custom Fee Schedule (CFS), follow the below-given steps.
1. Select Advanced Setup ->Fee Schedule. The Fee Schedule page opens up as shown in Image 1.

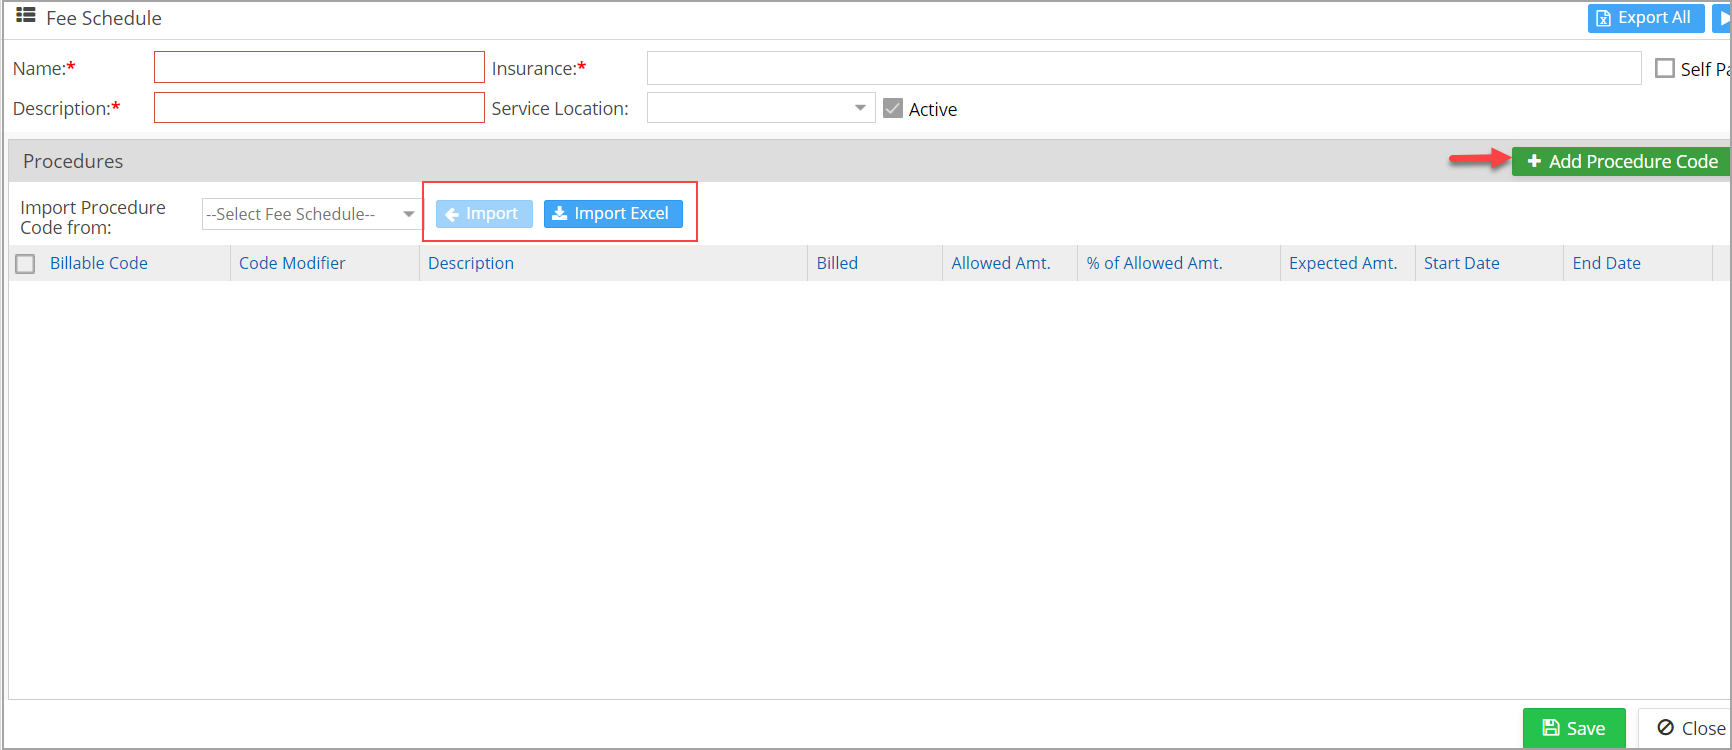
2. Click on the ![]() button. The Custom Fee Schedule screen will appear as shown in Image 2.
button. The Custom Fee Schedule screen will appear as shown in Image 2.
3. Update the following information before importing or adding procedure codes to the fee schedule
Name: Unique name to identify this new fee schedule.
Description: Description of this fee schedule.
Insurance: Select the insurances to be mapped with this CFS.
Self Pay: Check this checkbox if this is a self-pay fee schedule applicable only for Cash cases.
Service Location: Select the Service Location to map to this CFS, if needed.
Active: Select this checkbox to activate this CFS.
5. There are 3 options to add procedure codes to this CFS:
5a. ![]()
This option can be used to add a single procedure code to the Fee Schedule. On clicking this button, the system adds a new row on the procedure code list where a specific procedure code can be searched and updated to the CFS. See Image 2.
5b. ![]()
This option is used to import procedure code Information from an existing Fee Schedule. Select an existing fee schedule from the ‘Import Procedure Code From’ drop-down, and click on the Import button to copy all procedure code information from the selected fee schedule to the new one.
5c. ![]()
This option is used to import procedure code Information from an Excel file.
Note: The Excel file should be in a standard format as specified by PracticeSuite. To view the format, click the Download a sample file link on the Import Excel page.
Click the Import Excel button, select, and upload the Excel file to import the procedure code information to the fee schedule. Refer to Image 4.

6. Click ![]() after adding the procedure code information to create a new fee schedule.
after adding the procedure code information to create a new fee schedule.