Key Features
1. The To-Do List can be used to view the action items of all users in the system. The task assignment can be done from any one of the screens listed below
-eFax Screen
-Lab Hub Screen
-Collections Manager Next Action Screen
-To-do Screen
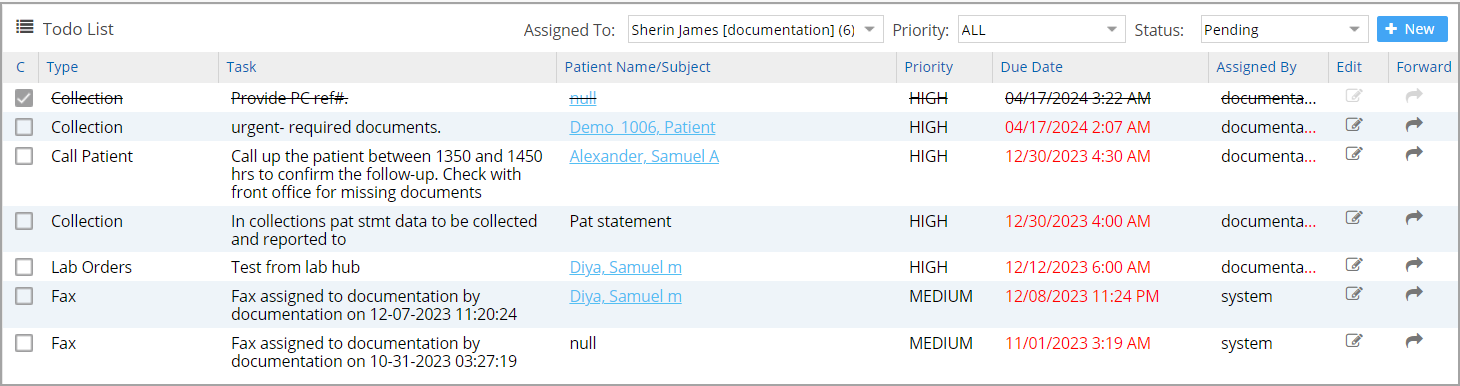
2. The “To Do” (Task Management) screen can display all users’ tasks. A “User” filter is provided at the header to enable users to list tasks by a user, and the filter is always defaulted to the logged-in user (see Image 1). The user list will only have the users who have tasks assigned, along with the count of tasks (shown in parentheses). The current user will always be defaulted to in the drop-down list, regardless of whether there are any tasks assigned to the user.
3. The “Priority” filter is used to filter tasks based on priority( High, medium, and low).
4. The two main statuses for a task are completed and pending. The status search filters tasks by their statuses. To view tasks in all statuses, select ALL.
5. Only the first three lines of the task/message will be visible on the listing screen. Clicking on the task will open the task editor screen to either review the task or modify it.
6. The “Mark as Complete” check box is provided at the beginning of each row. Users cannot mark the tasks of other users as complete. To complete another user’s task, assign the task to oneself and then mark it as complete.
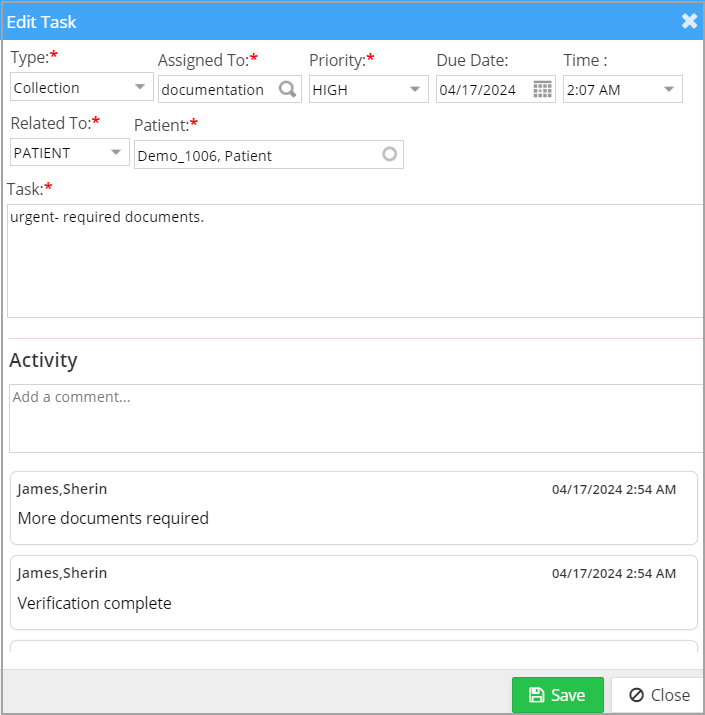
7. The users can add a note or log an activity from the task edit screen. Activity history is displayed as a running list and includes the date and time stamp (see Image 4). A delete icon is also provided beside each activity line of the user and, if needed, can be used to delete the activity.
How to Access
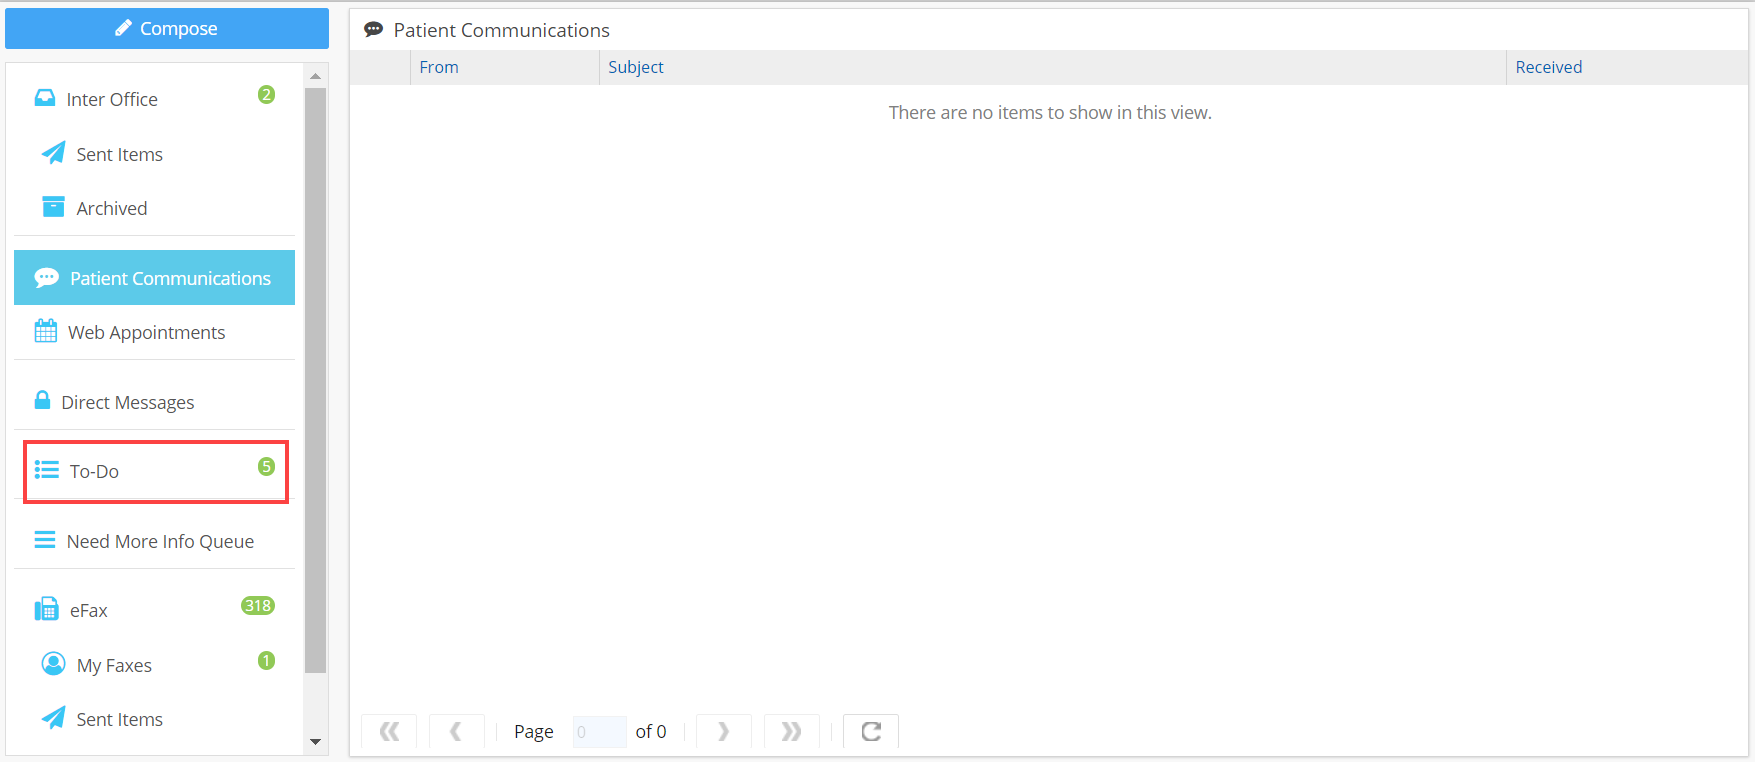
1. To access the To-Do List, click on the ![]() icon on the top right part of the PracticeSuite screen. The inbox of the user opens up. Click on the
icon on the top right part of the PracticeSuite screen. The inbox of the user opens up. Click on the ![]() (highlighted in Image 1).
(highlighted in Image 1).
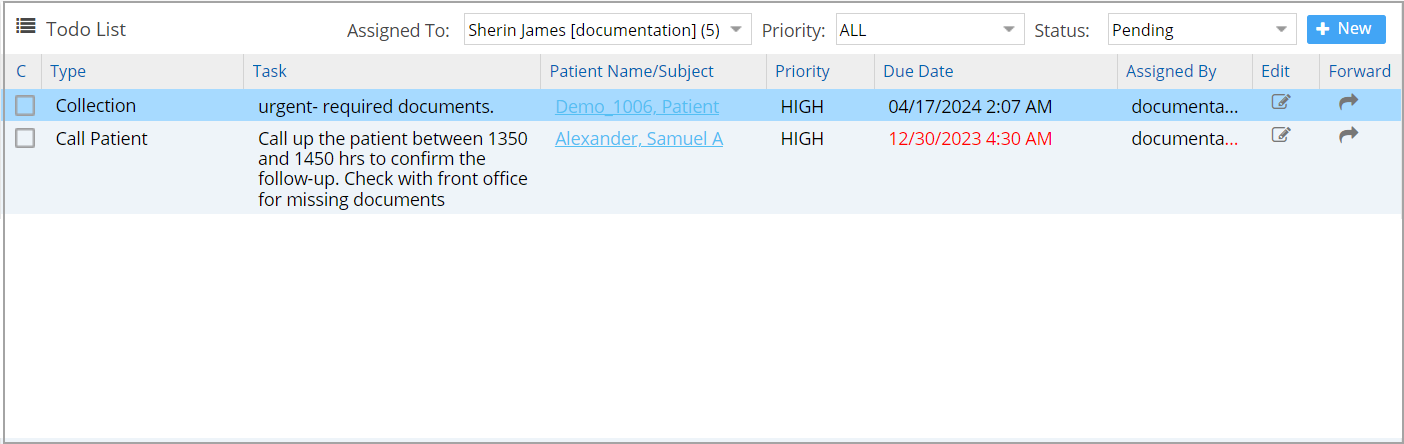
2. By default, the screen lists the current user’s tasks. Select another user from the drop-down to view the tasks of that user.
How to Create a New To -Do task
1. To create a new task, click on ![]() button and Image 3 opens up.
button and Image 3 opens up.
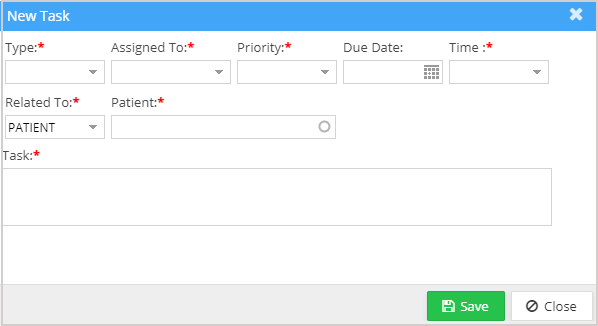
2. Enter the required fields.
a. Type: The type of task to be added.
b. Assigned To: The user to whom the task is assigned.
c. Priority: Priority of the task (HIGH/MEDIUM/LOW).
d. Due Date & Time: Date and time to do the added task.
e. Related to: To indicate whether the task is related to a patient or others. Select either patient or others from the drop-down. If a patient is selected, provide their name in the Patient field.
f. Task: Enter the task details to be done.
3. Click the Save button to save the task and add it to the list.
Task Edit
Click on the ![]() icon on the right side of the listing to update any task. The edit screen opens with the option to enter comments. Any user can enter a comment, and it will be logged with the user name along with the date and time stamp.
icon on the right side of the listing to update any task. The edit screen opens with the option to enter comments. Any user can enter a comment, and it will be logged with the user name along with the date and time stamp.
Task Forwarding and Completion
Tasks can be forwarded to another user through the ![]() button. If a task is complete, tick the checkbox to indicate completion, and the task will have a strikethrough to indicate that it is no longer in the TO-DO List; see the first row in Image 5.
button. If a task is complete, tick the checkbox to indicate completion, and the task will have a strikethrough to indicate that it is no longer in the TO-DO List; see the first row in Image 5.