

What is a Case?
A case is a mapping between a patient’s insurance and an encounter. A case is established for every patient and is necessary for every visit. A case identifies who the payer is for the patient’s visit.
Each patient can have multiple cases, depending on the class, coverage type, or contract.
Before adding a case, patient information and insurance information must be completed.
Case Auto-creation
1. A case is automatically created when primary insurance is added to the patient’s profile.
2. A cash case will be automatically added for patients whose account type is either self-pay or self-pay-ins (if the Auto-case Creation setting is enabled in the Billing Options screen).
Claim-Based Insurance Edit Permissions
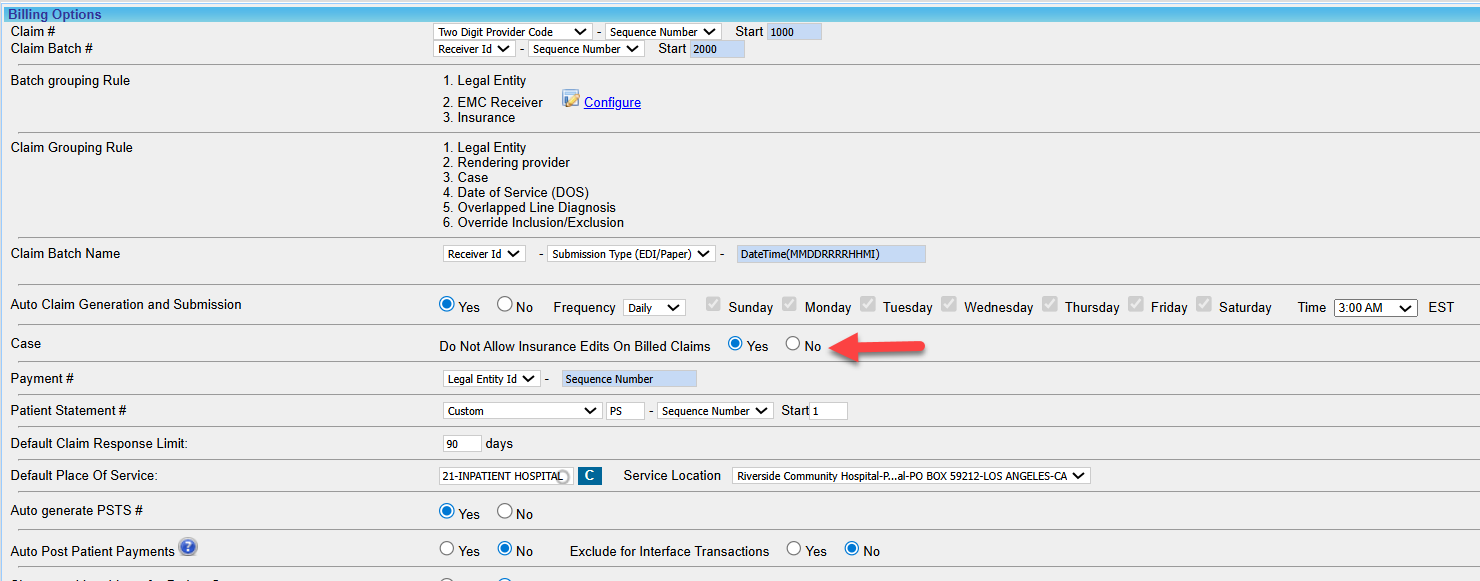
The Billing Options page under Advanced Setup has an entry, Do Not Allow Insurance Edits on Billed Claims. User input in this field will determine whether insurance in a case can be updated after claim generation. Selecting Yes would mean that patient insurance in the case cannot be updated after claims have been sent to the insurance. Conversely, the No option would allow users to edit insurances on the case, even after claim generation in the case.
Adding a Case
The following are the steps for creating a case manually:
1. Select Patient from the main menu and search for the patient in the Patient Search screen to open the Demographics page (see Image 1).
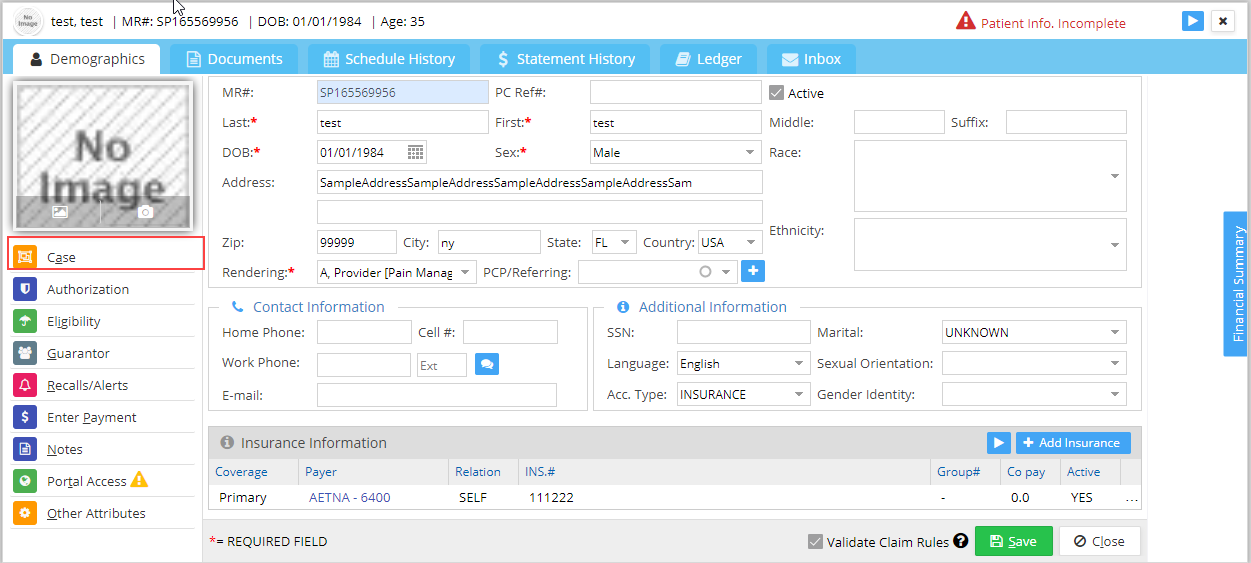
2. Click the ![]() button to open the Case window, as shown in Image 2.
button to open the Case window, as shown in Image 2.
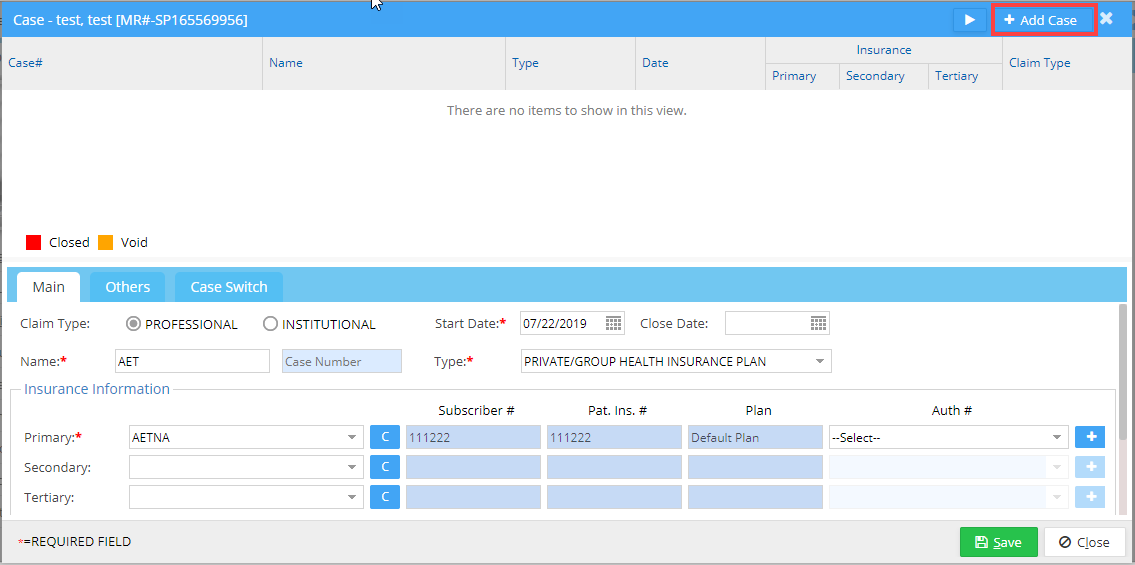
3. Click on ![]() button. On clicking the
button. On clicking the ![]() button, the new case information can be entered in Main tab. The fields marked with * are mandatory. These are Name, Start Date, Type, Primary, and Fee Schedule. The Name, Type, Status, Start Date, etc. are automatically filled in, except when the patient has multiple Primary/Secondary/Tertiary insurances. The system generates a name for the case; you can change it or opt to keep the system-generated name.
button, the new case information can be entered in Main tab. The fields marked with * are mandatory. These are Name, Start Date, Type, Primary, and Fee Schedule. The Name, Type, Status, Start Date, etc. are automatically filled in, except when the patient has multiple Primary/Secondary/Tertiary insurances. The system generates a name for the case; you can change it or opt to keep the system-generated name.
4. For creating cash cases, select Type as Cash. The fee schedule will then be defaulted to the latest active self-pay fee schedule.
5. If you wish to add additional information related to the case, like Associations, Condition, Accident, Diagnosis, etc., click on the Others tab.
Under the Others tab, enter the following information:
| Association |
| a) Enter the POS (Place Of Service) and the Service Location. |
| b) Select the Rendering Provider and Supervising Physician from the lists provided. |
| c) Click on the |
| d) Choose the PCP by entering the name and selecting it from the list. |
| e) Enter the details of the Employer and Attorney if required. |
| Condition |
| a) If the patient is unable to work, fill out the Patient Unable to Work From and To dates. |
| b) Enter the Adm. Date From and Adm. Date To if required. |
| c) Also, enter details of the Last X-ray Type and Last X-ray Date. |
| d) If relevant, key in the Date of Pregnancy (LMP). |
| e) Also enter details like Last Seen Date, Initial Treatment Date, Onset Date of Current Illness and Similar Illness Onset. |
| Accident |
| Enter details related to accidents here, like Employment-related, Auto Accident, Other Accidents etc. |
| Attachment Information |
| Enter details like Control Number, Type Code, and Transmission Code. |
| Diagnosis |
| If required, add diagnoses for the case, click on the D1 box, and select the required diagnosis. You have the option to add up to eight diagnoses from this screen. This diagnosis can be changed if required while entering charges. |
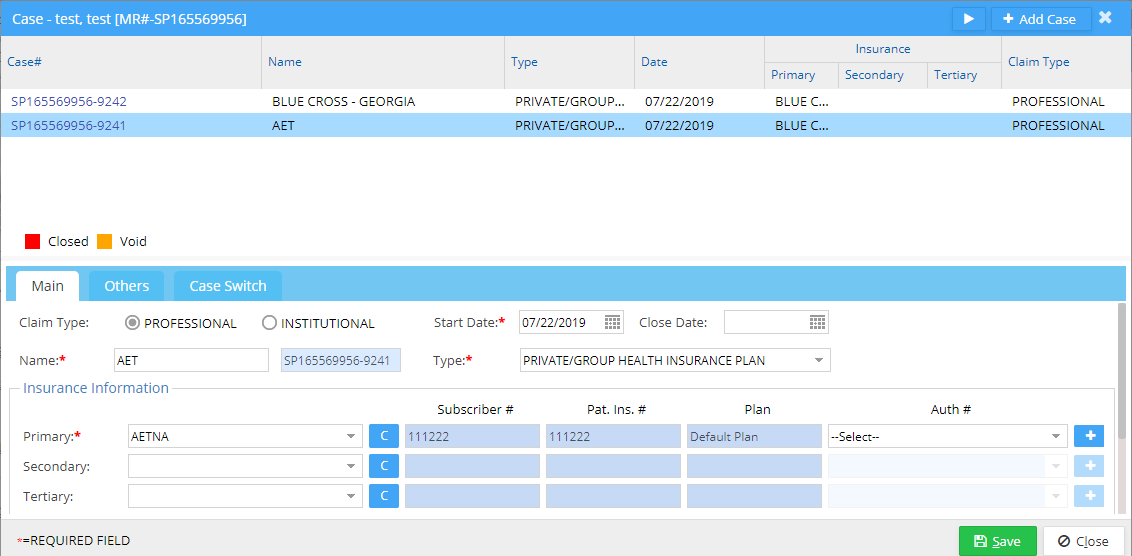
6. Click the Save button to save the case; the case is displayed, as shown in Image 3.

Searching and Editing a Case
1. The patient’s cases are displayed at the top section of the case screen. This is the place where you can search for cases related to the patient. Select the case you wish to edit from the list.
2. The details of the case, like Case Name, Case Type, Case Status, Fee Schedule, Start Date, etc., would be displayed below. The primary, secondary, and tertiary insurances of the case are listed in the Insurance section. The listed insurances would be the payers in the selected case. After performing the required edits, click the Save button to update the changes to the case.
3. You can also view the case details from the Charge Master screen, as shown in Image 5.

Closing a Case
1. From the list of existing cases displayed in the top portion of the case screen, select the case you wish to close.
2. Enter the Close Date in the field highlighted in Image 6.
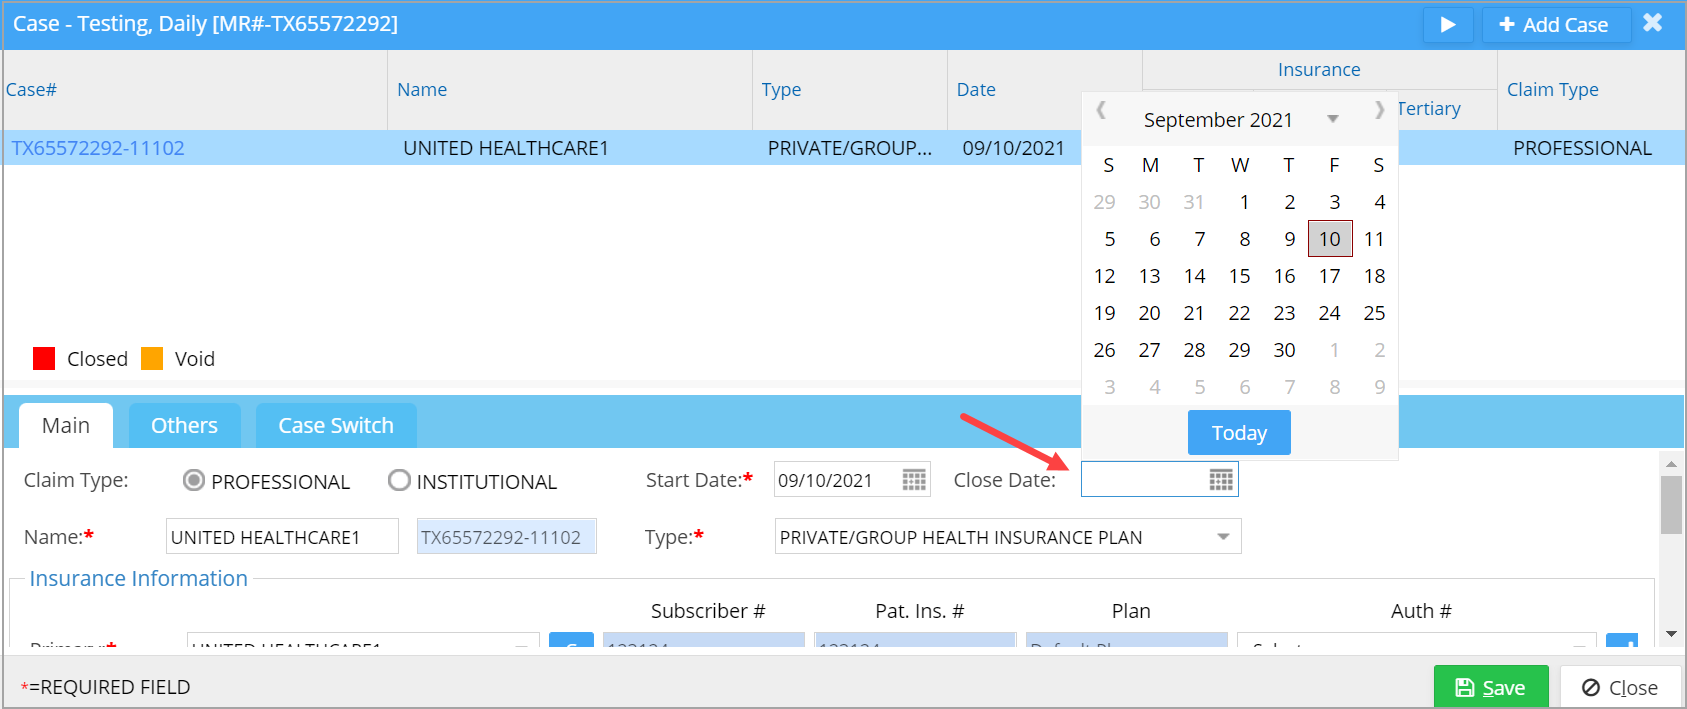
3. Click the Save button to update the changes, and the case will be closed after the given Close Date.