

Case Switch
A case serves as a link between the patient’s insurance and the Date of Service (DOS). It is essential to switch to a new case in the following situations:
- When the patient’s current insurance coverage changes
- When a claim for a specific DOS needs to be submitted to a different insurance provider
Important
1. You can switch cases even for paid encounters.
2. You can switch cases even if the target case has a primary insurance different from the original one.
3. However, if secondary payment is posted for the encounter, the system will not permit case switching.
4a. When switching an encounter from insurance to a cash case, the system will change all lines in the encounter to BILL_TO_PT status.
4b. When the case for an encounter is switched from a cash case to an insurance type of case, the line(s) in the encounter will automatically be placed in a RE_BILL_TO_PR (rebill to primary) status.
How to Switch Cases
1. Invoke Patient Menu to enable the patient search (see Image 1).
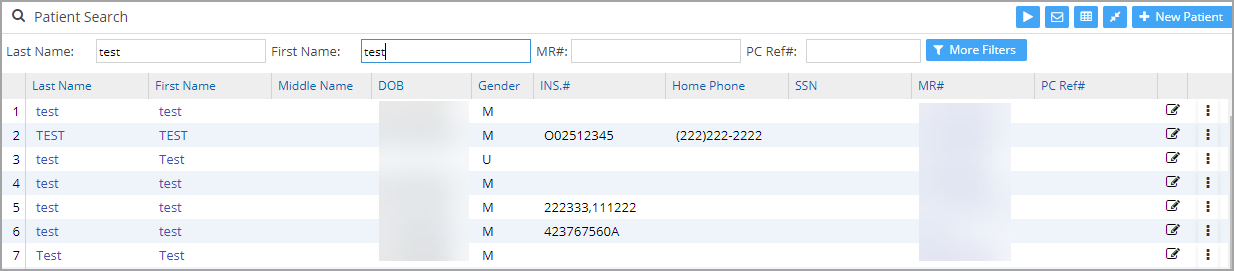
2. Select a patient from the search result to go to the patient demographic page.
3. Click on the case button (highlighted in Image 2) from the patient demographics page.
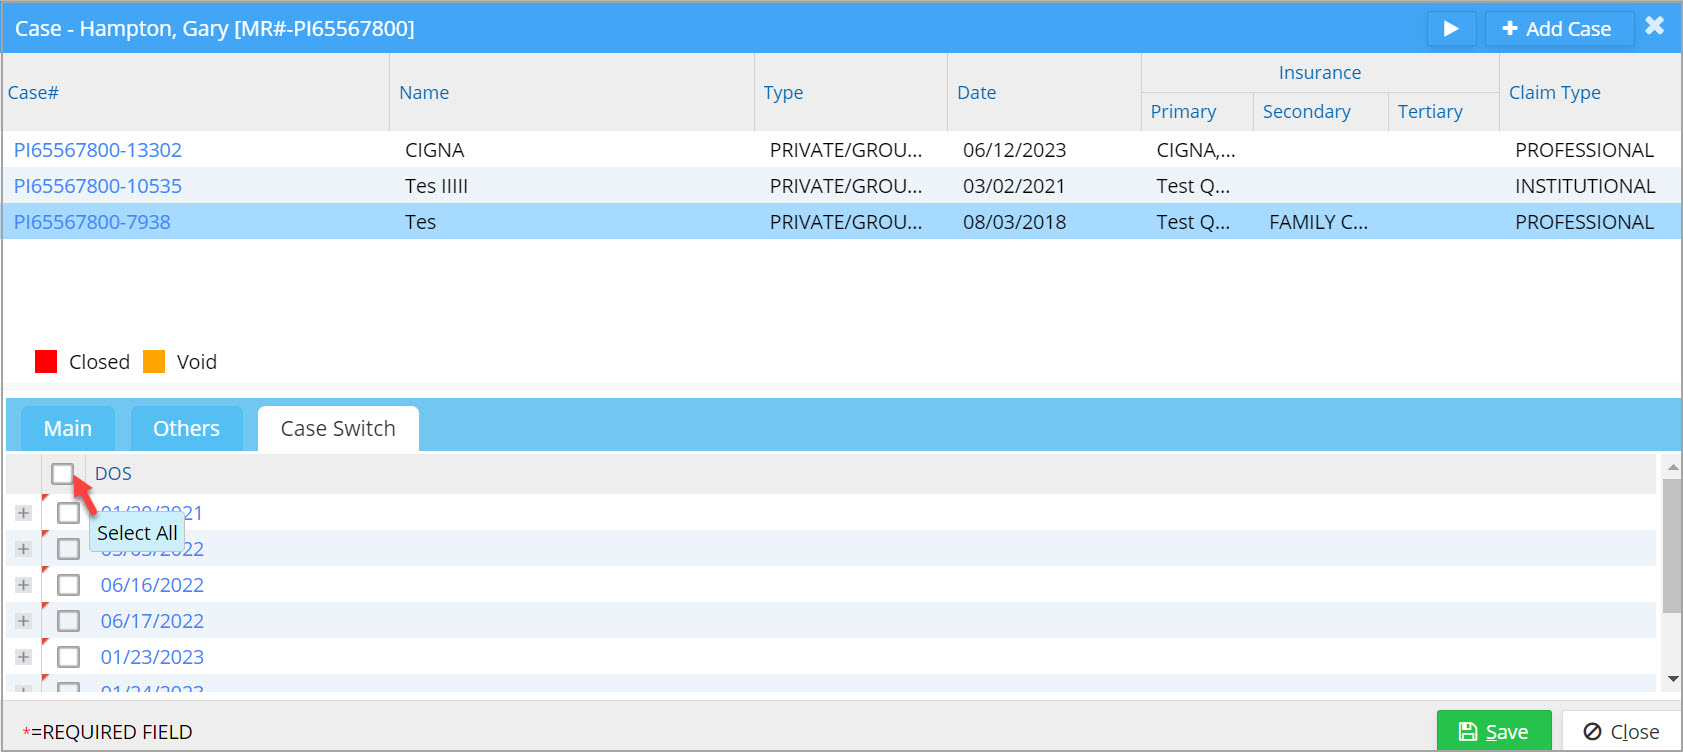
4. When the Case button is invoked, the Case window appears, where all the existing cases are listed. Refer to Image 3.

5. Case switching allows you to switch Date of Service (DOS) between cases. Hence, it needs to identify the case to which the DOS should be switched.
6. Click on the required case and invoke the Case Switch tab to view the DOSs. Click on the ![]() to view information regarding the DOS. Select all the DOSs that need to be switched by using the checkbox provided. You can select all DOSs in one go using the Select All check box in the DOS header (see arrow mark in Image 4).
to view information regarding the DOS. Select all the DOSs that need to be switched by using the checkbox provided. You can select all DOSs in one go using the Select All check box in the DOS header (see arrow mark in Image 4).
7. Once the required DOSs are selected, click on the Switch To drop-down. The drop-down would list all possible cases for switching along with Case Type, Fee Schedule, Primary, Secondary, Tertiary insurance names and effective dates, Case Number, and Case Name. Check the box Include Other Insurance Cases (highlighted in Image 5) to include cases with a different primary insurance.
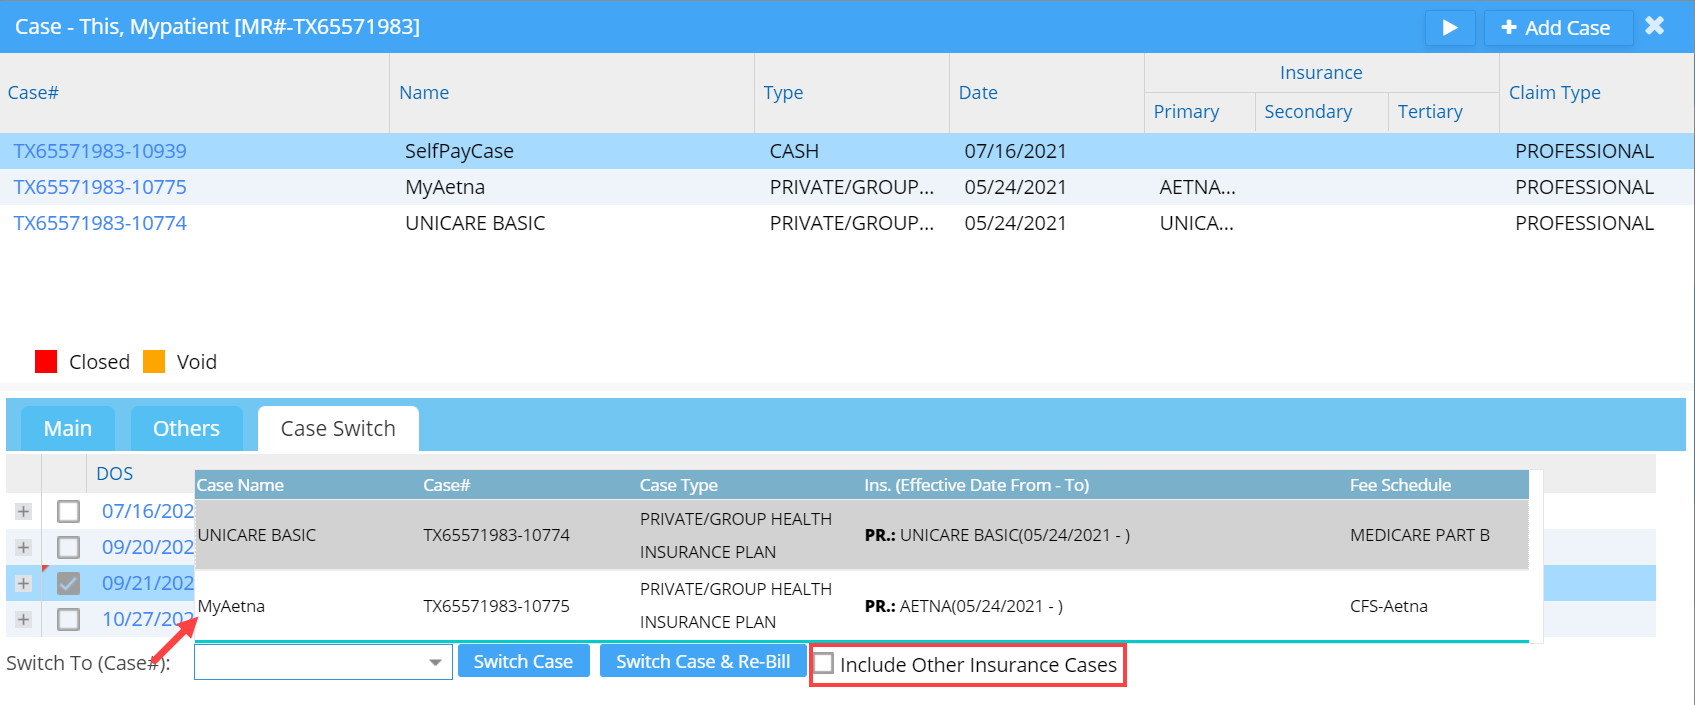
8. Select the target case from the drop-down and click on the Switch Case button (see Image 5) to switch the case. Upon completion, click on the Save button to save the changes.
9. After saving the changes, you can find the switched DOS under the target case.