

Description
Direct messaging has been introduced to ensure an easy and secure way to transfer EHR data between systems. It is easy to learn, it’s secure, and promotes interoperability.
Easy to Learn: Direct messaging gives medical practices the ability to exchange EHR data using the familiar functionality and convenience of email without any of the risks. This helps reduce the learning curve for medical practices that choose to adopt direct messaging.
Secure: The biggest advantage of direct messaging over email is its security. Direct messaging services ensure the data being transmitted is encrypted and that users are verified in compliance with HIPAA privacy regulations.
Interoperability: Direct messaging is compatible across all systems. Healthcare interoperability through Direct messaging ensures a safer and more secure way to exchange sensitive information, whether it’s clinical summaries, lab results, or immunization records.
Setup
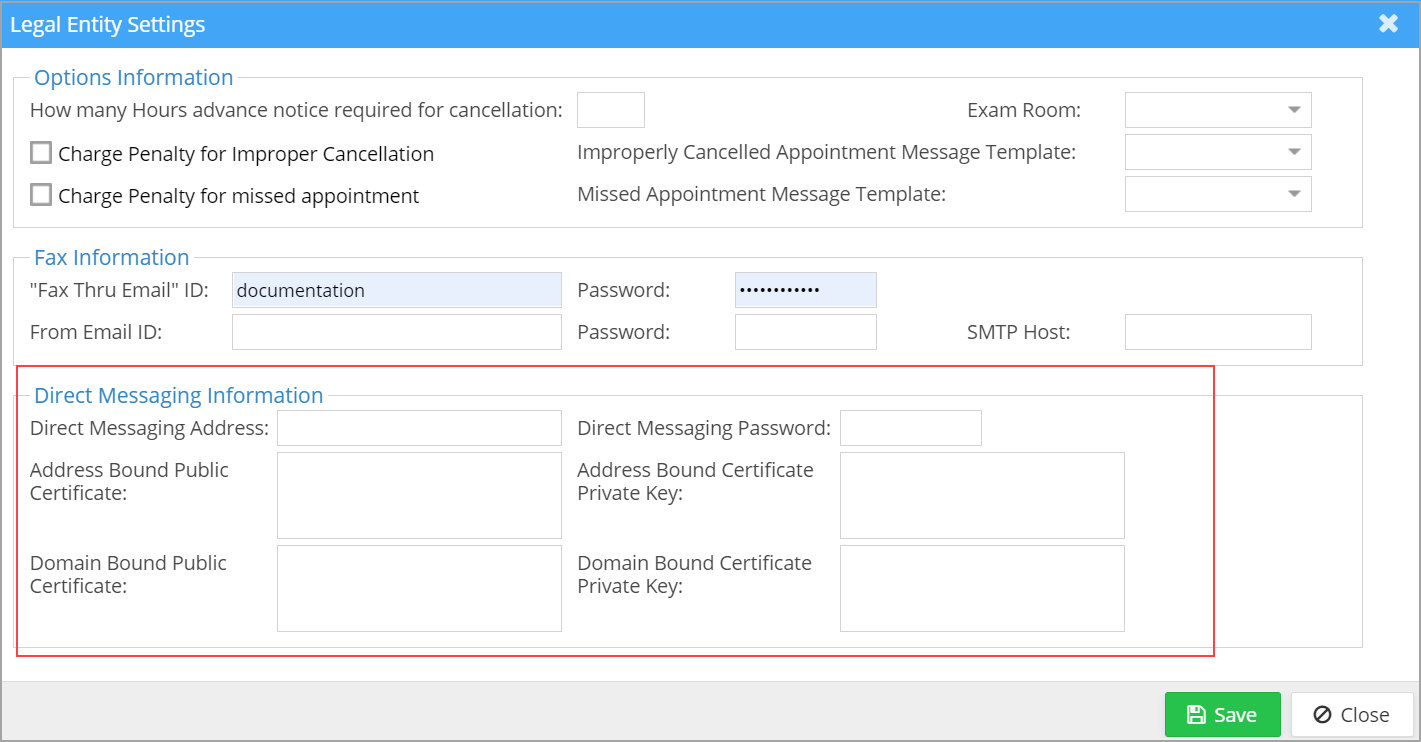
Setup is done by any user in an administrative role. Go to Setup->Legal Entity and click ![]() to open the Direct Messaging Settings.
to open the Direct Messaging Settings.
Receive Messages
Click on ![]() on PracticeSuite Home screen to open user inbox. Click on
on PracticeSuite Home screen to open user inbox. Click on ![]() on the left pane. Click on the
on the left pane. Click on the ![]() button on the top right to pull all received messages to the inbox. Click on any message to view the contents. A sample message is shown beneath.
button on the top right to pull all received messages to the inbox. Click on any message to view the contents. A sample message is shown beneath.
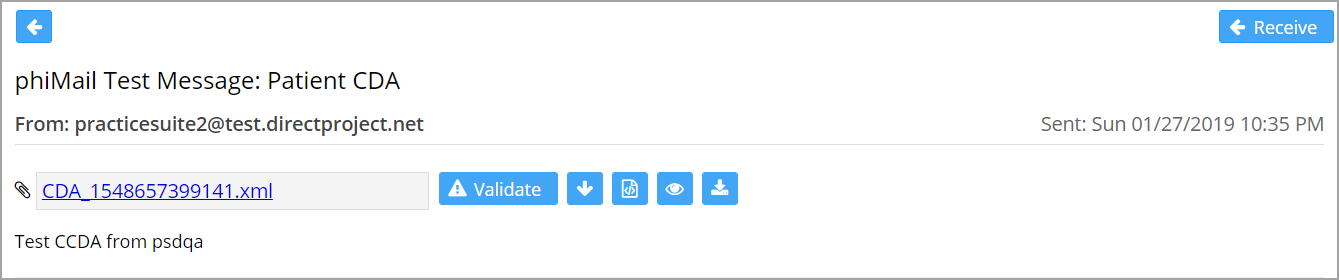
Options Available in the Direct Message
| Option | Description |
| To validate the attachment received | |
| Import Document; this will copy the contents to the patient’s face sheet. Typical C-CDA docs contain problems, allergies, meds, vitals, immunizations, plan of treatment, and other components. Once copied, Facesheet will display the source of such content as ‘External’. | |
| View the document in Readable Format | |
| View as a sortable file | |
| Download |
Send Messages
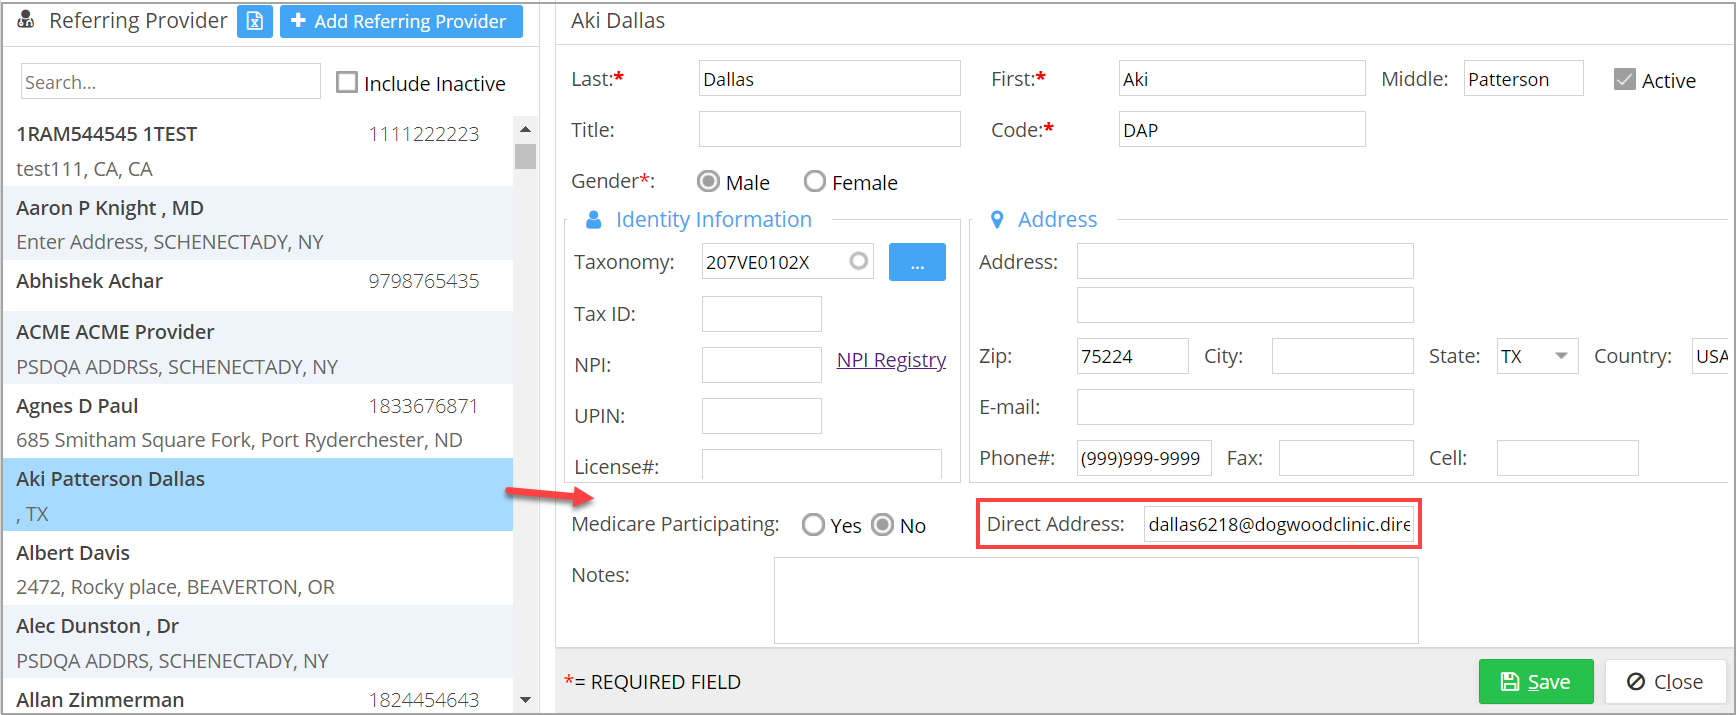
To send messages to providers outside the practice, their Direct message address should be saved in PracticeSuite. Go to Referring Provider Setup Screen, select the required provider from the left pane, and provide the address in the Direct Address field (highlighted in the image beneath).
Sending Messages-Method 1 (From CCD/CCR menu)
A. Go to EHR Advanced-> CCR/CCD.
B. Select a patient from the patient drop-down.
C. Provide the date range. This is needed if you want to send CCDA of a specific time period, like previous year, previous month, etc.
D. Click on Transmit ![]() on the top right.
on the top right.
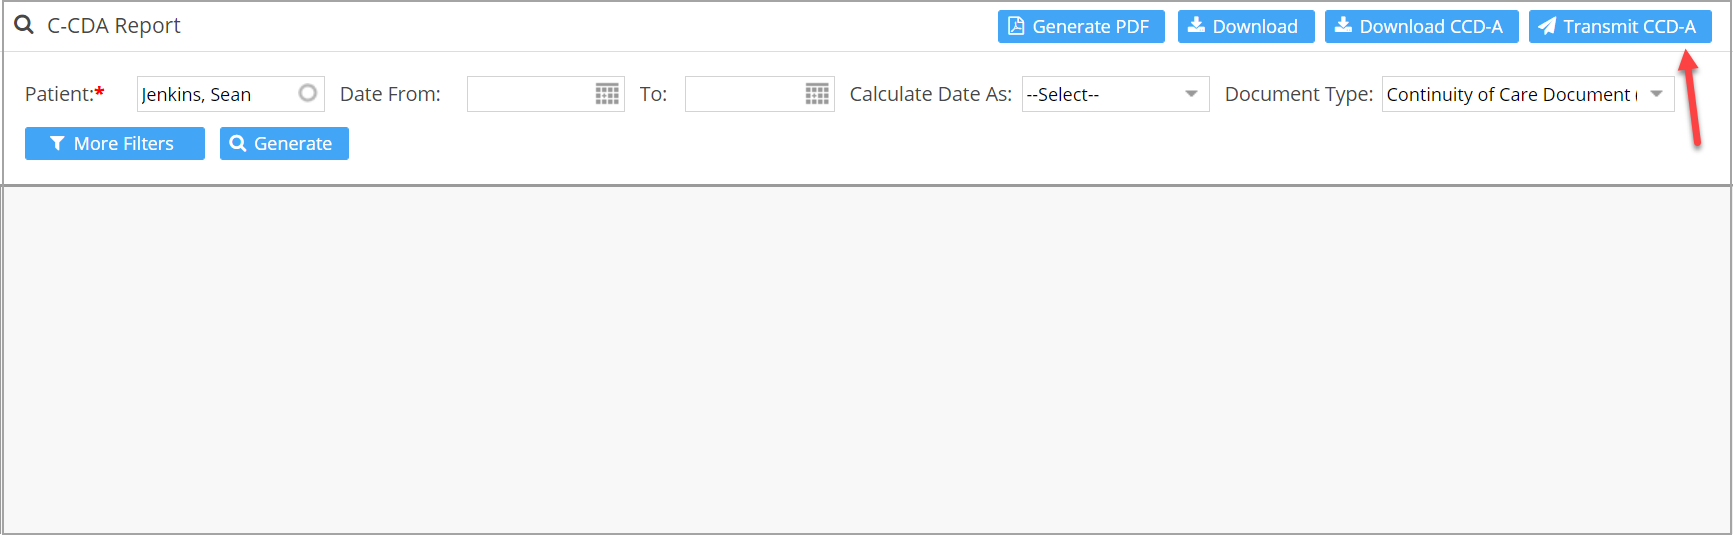
E. Transmit C-CDA screen pops up, where the user needs to select the mail ID of the referring provider to whom the document is to be sent. Attach the document and type in a message. Click on Send.
![]()
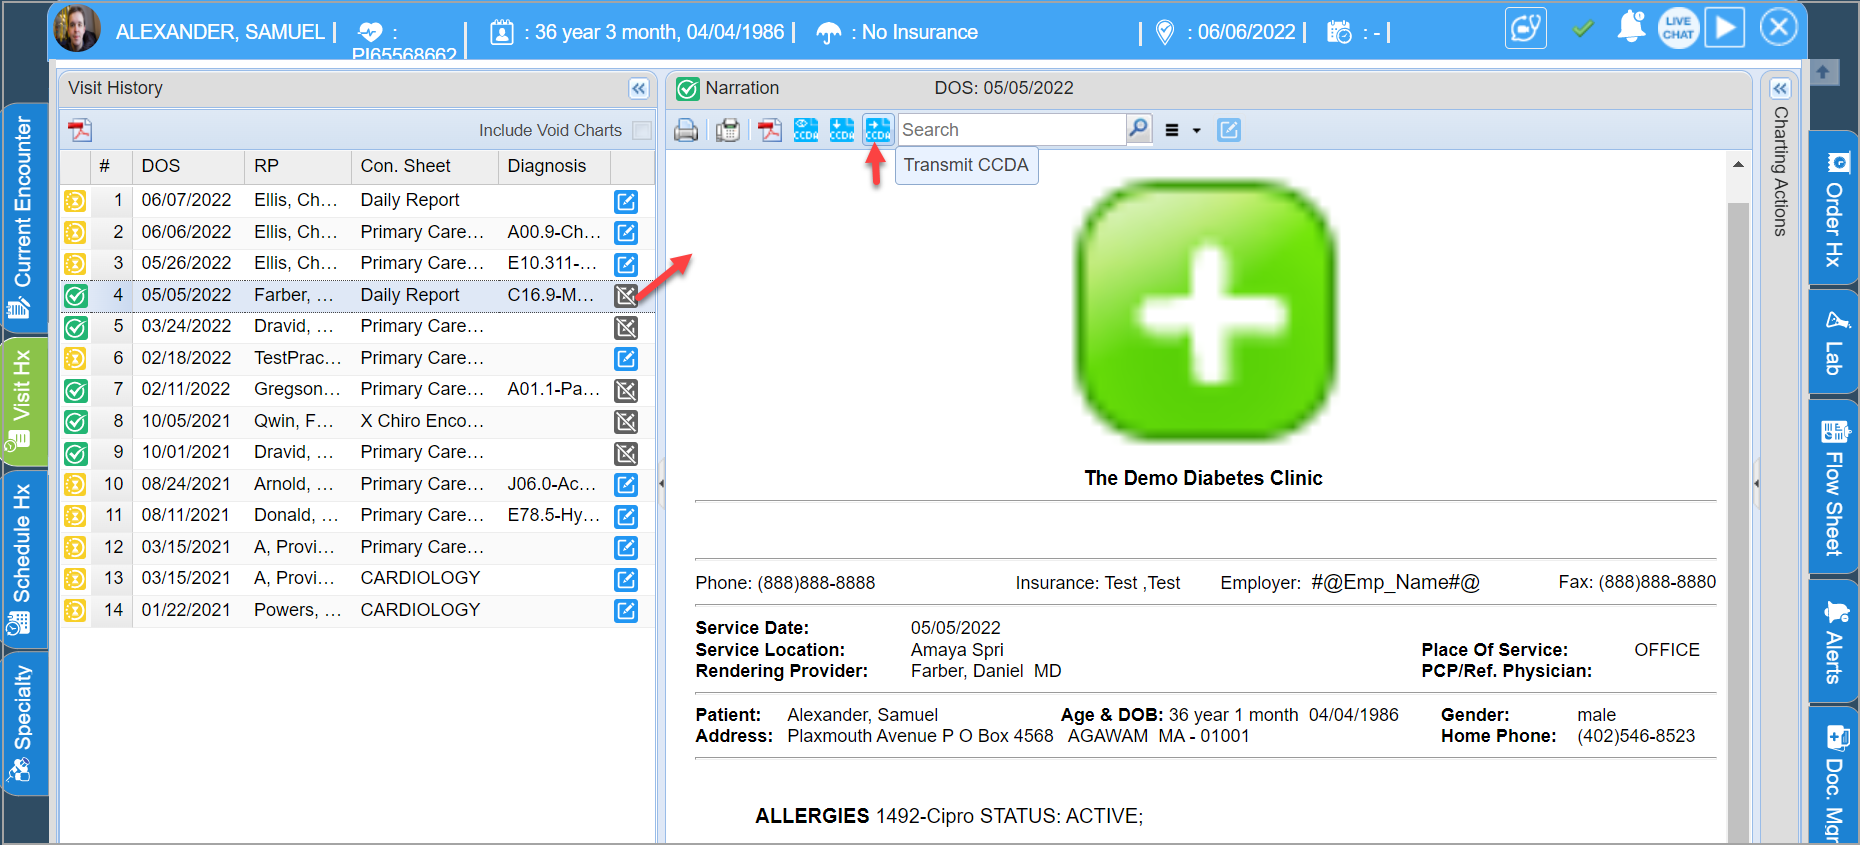
Sending Messages-Method 2 (From a Patient’s chart)
A. If you need to send a CCDA related to a specific DOS only, you can send the document from within the patient’s chart. Go to Visit Hx tab of the patient, and click on a chart on the left pane to open the narration. The header part has options to view, download, and transmit CCDA (highlighted in the image below).
B. Transmit C-CDA screen appears as in Method 1. Provide the details and click on Send.