Document Manager
All the documents and images of a patient are available in the Documents tab of the Patient Demographics page. Categorization of documents aids in easy search and retrieval. To access the documents/images of a patient, follow the steps below.
How to Access Documents
1. Invoke the Patient Menu from the Main Menu to search for the patient. Patient search can be done using the patient’s last name, first name, patient insurance, SSN, home phone, MR#, or DOB (date of birth).
2. Select the appropriate patient from the search result and go to the patient demographics.
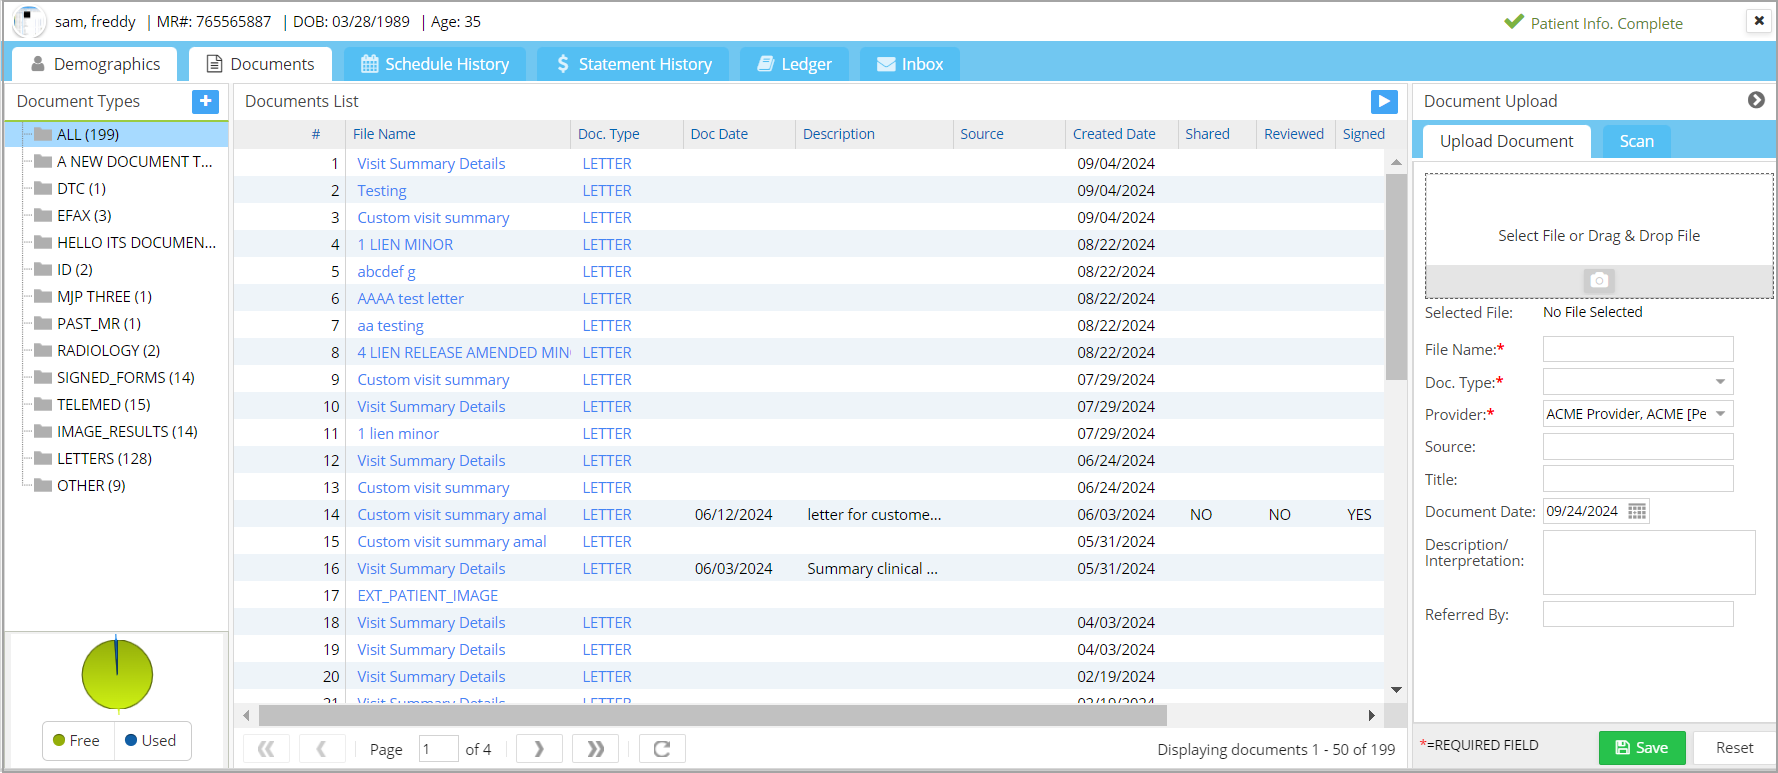
3. Once the patient demographic page opens, invoke the Documents tab to open the Document Management page. The document management page has three main sections: document types, document lists, and document uploads (refer to Image 1).
Documents Manager Screen
Documents List

The central listing pane displays all documents associated with the patient.
By default, the document list presents all records associated with the patient. To view documents of a specific type, select the appropriate document type from the Type dropdown menu. Documents completed via the Kiosk are also accessible within this section and are categorized under the SIGNED_FORMS document type.
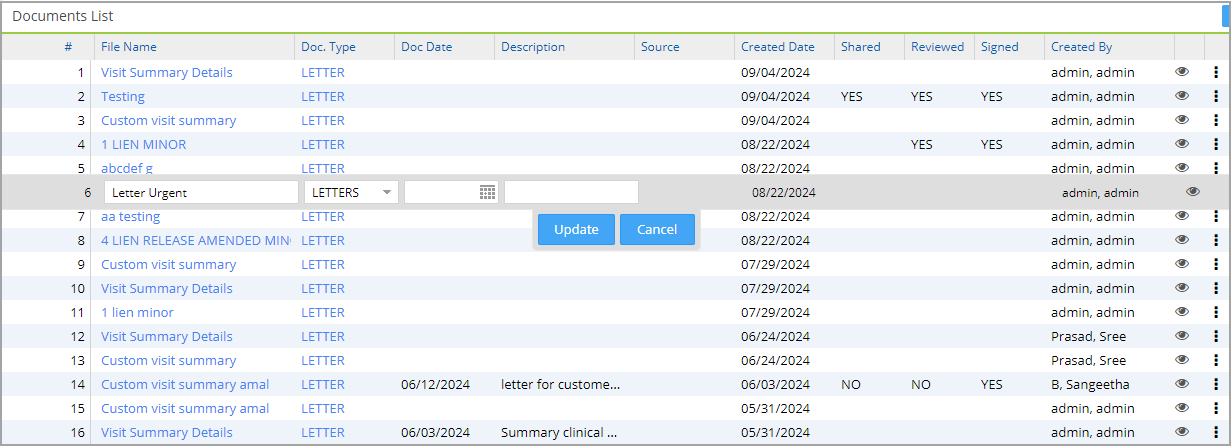
Editing Files in the Doc Manager
Users can edit the document date, description, file name, and document type.
To make changes, double-click on a row and click Update when done.
Document View Page
To view a document, click on the ![]() icon seen on the far right of the document listing. In the document view page, users can sign documents electronically, share them with patients, and mark them as review completed.
icon seen on the far right of the document listing. In the document view page, users can sign documents electronically, share them with patients, and mark them as review completed.

Share with Patient
The Share with Patient checkbox lets users mark documents that can be shared with their patients. If the majority of the documents are to be shared with the patient, it can be defaulted to Yes from the portal options page so that users do not have to check the box every time a document is to be shared.

Sign Electronically: Users can use the Sign Electronically option to sign documents. When a document is signed, the remarks section will show who signed it and when.
Review a Document: Users can mark a document as reviewed using the Mark as Reviewed check box.
Print: The document can be printed using the print icon provided in the top-right corner.
The document list in the middle pane will show each document’s review, share, and signed status; see Image 3.
Document Types
The doc types that have patient files associated will be displayed here. New document types can be created in the system using the ![]() button in the Document Type pane.
button in the Document Type pane.
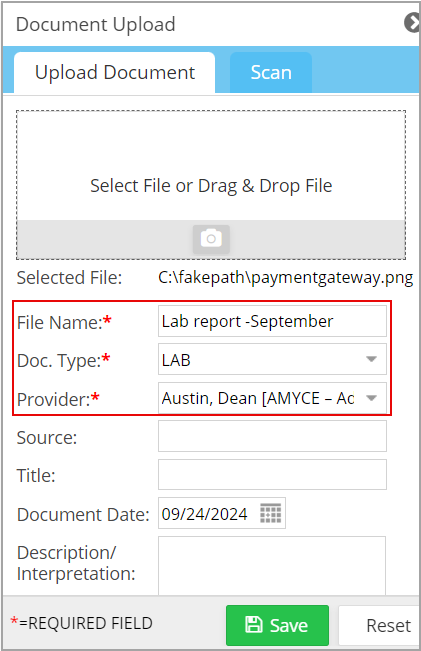
Document Upload
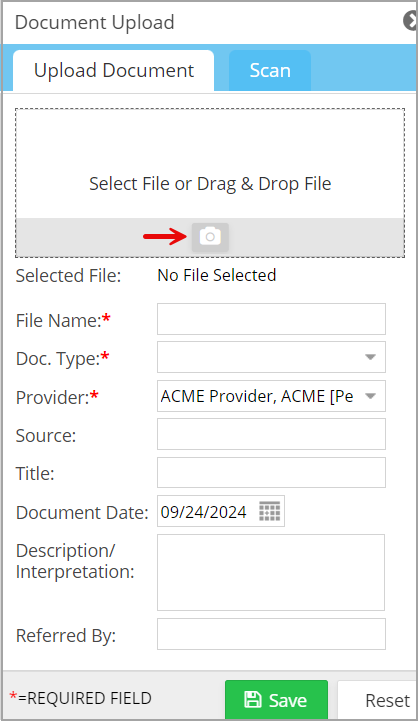
This section is for uploading documents onto the system. Click on the drag-and-drop area in Image 5. Either select documents from the Open dialog box that appears or drag and drop them into the area.
A camera button is also provided, whereby users can quickly open the camera on their device and capture live images.
The following screenshot (Image 8) illustrates the steps in selecting files to be uploaded into the system.
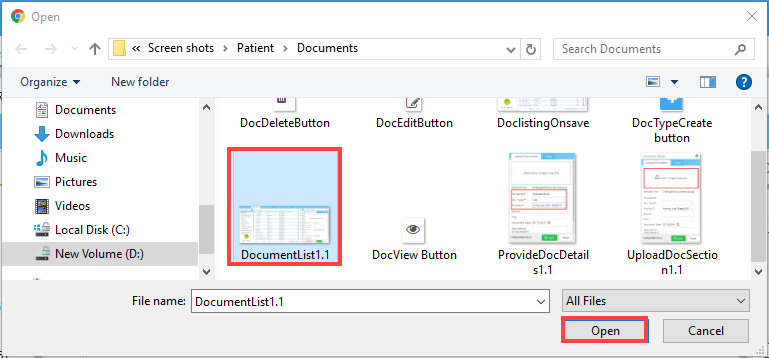
Click on the Open button to upload the file.
Once the file is uploaded, fill out the mandatory fields, such as File Name, Document Type, and Provider.
Provider Defaulting
When a user opens the document manager screen from within the EHR, the provider field will automatically default to the rendering provider listed in the patient’s chart. If it is opened from the Patient Demographics, the field will pick the rendering provider assigned to the patient on the demographics page. If opened from within the WorkQueue or the Collection Manager, the provider field will be automatically filled based on information from the claim.