In medical billing, Fee Schedule and Encounter Procedures (procedure code/HCPCS) go hand in hand. Hence, these modules have been incorporated under Fee Schedule. To add, edit, deactivate and filter procedure codes in SFS, follow the below-given steps.
1. Select Setup from the main menu and choose Fee Schedule. The Fee schedule window opens to manipulate the Fee Schedule and Encounter Procedures (procedure code).
2. A default Standard Fee Schedule is created at the time of Account Creation. Users can add more procedure codes to the existing standard fee schedule.

Adding New procedure code to the Standard Schedule
Click on the ![]() button from the Fee Schedule window. A window appears where new procedure code information can be furnished; see Image 2.
button from the Fee Schedule window. A window appears where new procedure code information can be furnished; see Image 2.

Fill in all the mandatory fields to create new procedure code-
-
- Billable Code (A procedure code or A HCPCS code)
- Billable Code Description
- Billable Amount
- Category (Category of the Billable code, and it may either be a procedure code or an HCPCS)
Other information is not mandatory; however, it would help the billing to be easy if updated. For e.g., setting ordering provider as rendering provider, CLIA# or Mammography Certification# would facilitate the charge entry and billing process when the procedure code or HCPCS is selected.
Once these fields are updated, Click on Save button to save the procedure code into the Standard Fee Schedule.
Editing a procedure code
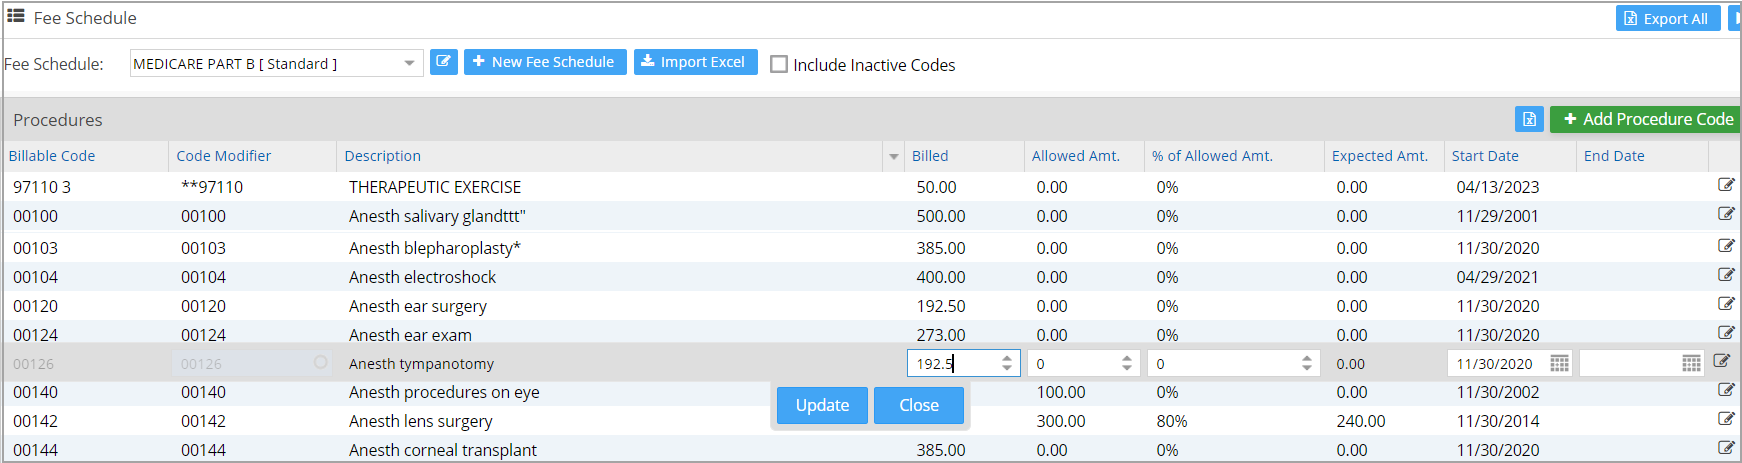
To update or to do a simple edit, double-click anywhere on the procedure code Line.
When the procedure code is invoked, the fields become editable and can be updated with the required details.
Click on Update Button to save the changes when completed.
Detailed Editing of Existing procedure code from Standard Fee Schedule
To do detailed editing on an existing procedure code from the standard fee schedule, select the procedure code to be edited.
Click on the edit symbol ![]() against the respective procedure code. The Procedure Code entry screen, as in Image 2, opens up.
against the respective procedure code. The Procedure Code entry screen, as in Image 2, opens up.
Once the required fields are updated, click the Save button to save the changes.
Note: Procedure code Add/Edit option will only be available in Standard Fee Schedule.
Filtering Procedure Code from Standard Fee Schedule
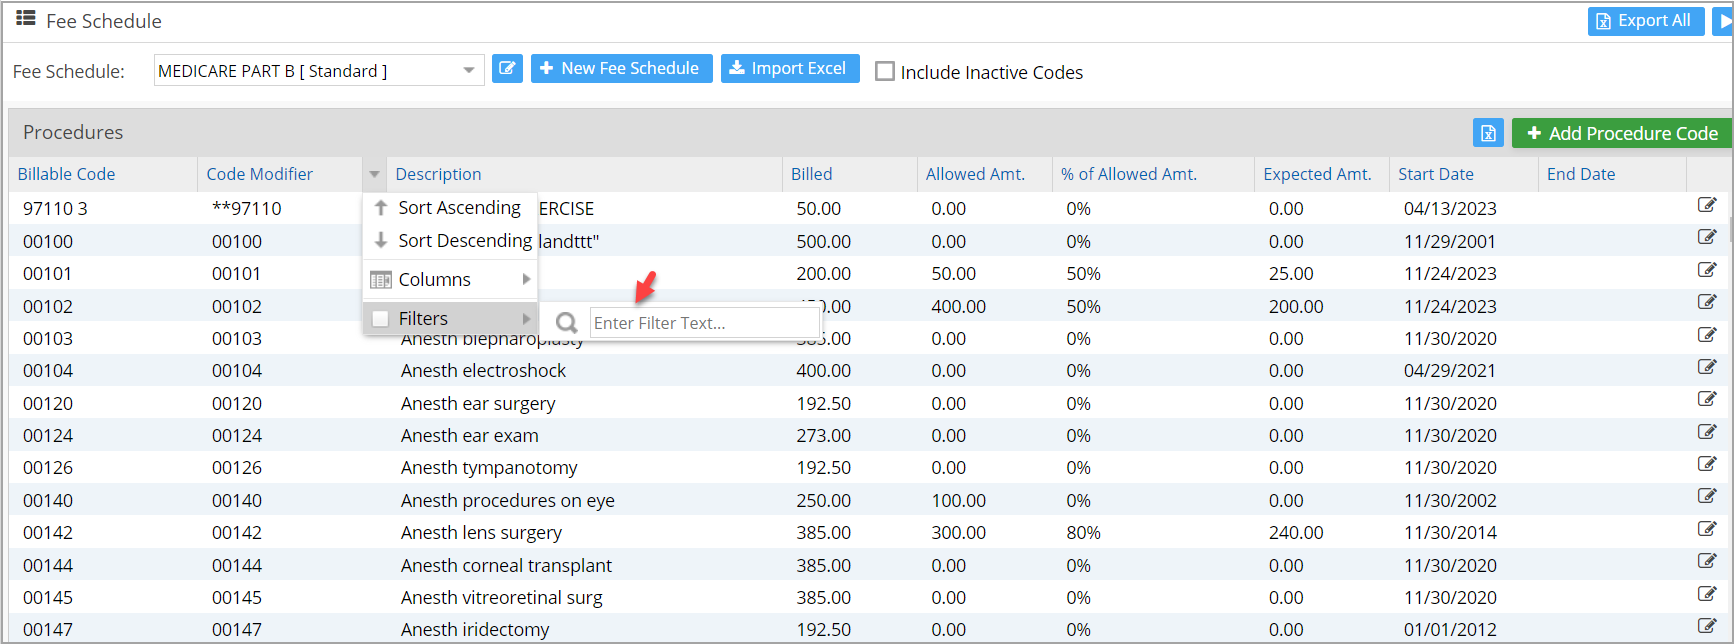
To filter a certain procedure code from the procedure codes listed in the Standard Fee Schedule, click on the down arrow mark in the procedure code Column, select Filters option, and enter the filter text in the field beside it; see Image 4.
Delete a procedure code
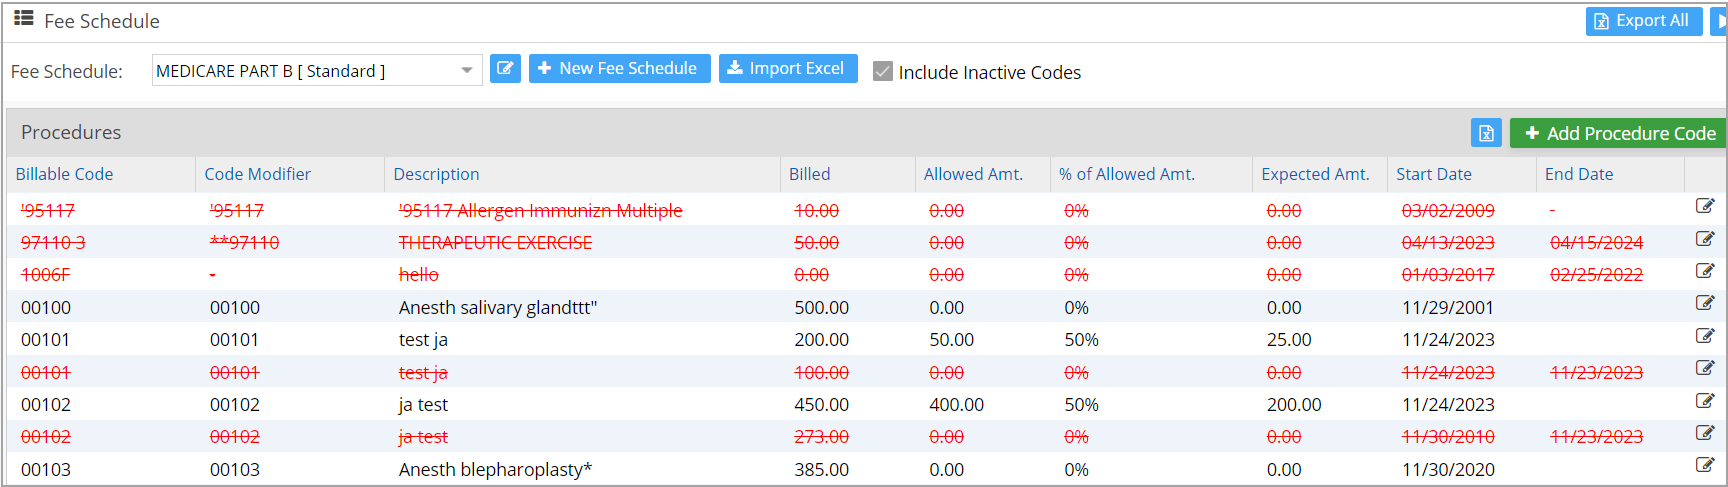
Identify and filter the procedure code that needs to be inactivated from the Fee Schedule. Double-click on the end-date field and provide a date. Click on ‘Update’ to save the changes.

Once the end date is reached, the procedure code will be removed from the listing and can be seen only by checking the box ‘Include Inactive codes’. The code will then display as red-texted as in Image 6.