The Patient Account Screen
A patient account is a consolidated view of the charges billed and the claims generated for the patient to date. To access the patient account, follow the steps below.
1. Choose Patient Account from the main menu.
2. Select the patient from the Patient field by entering the first three letters of the Last Name or the MR#. (Patient field is a smart search field. To learn more about smart search, click here.
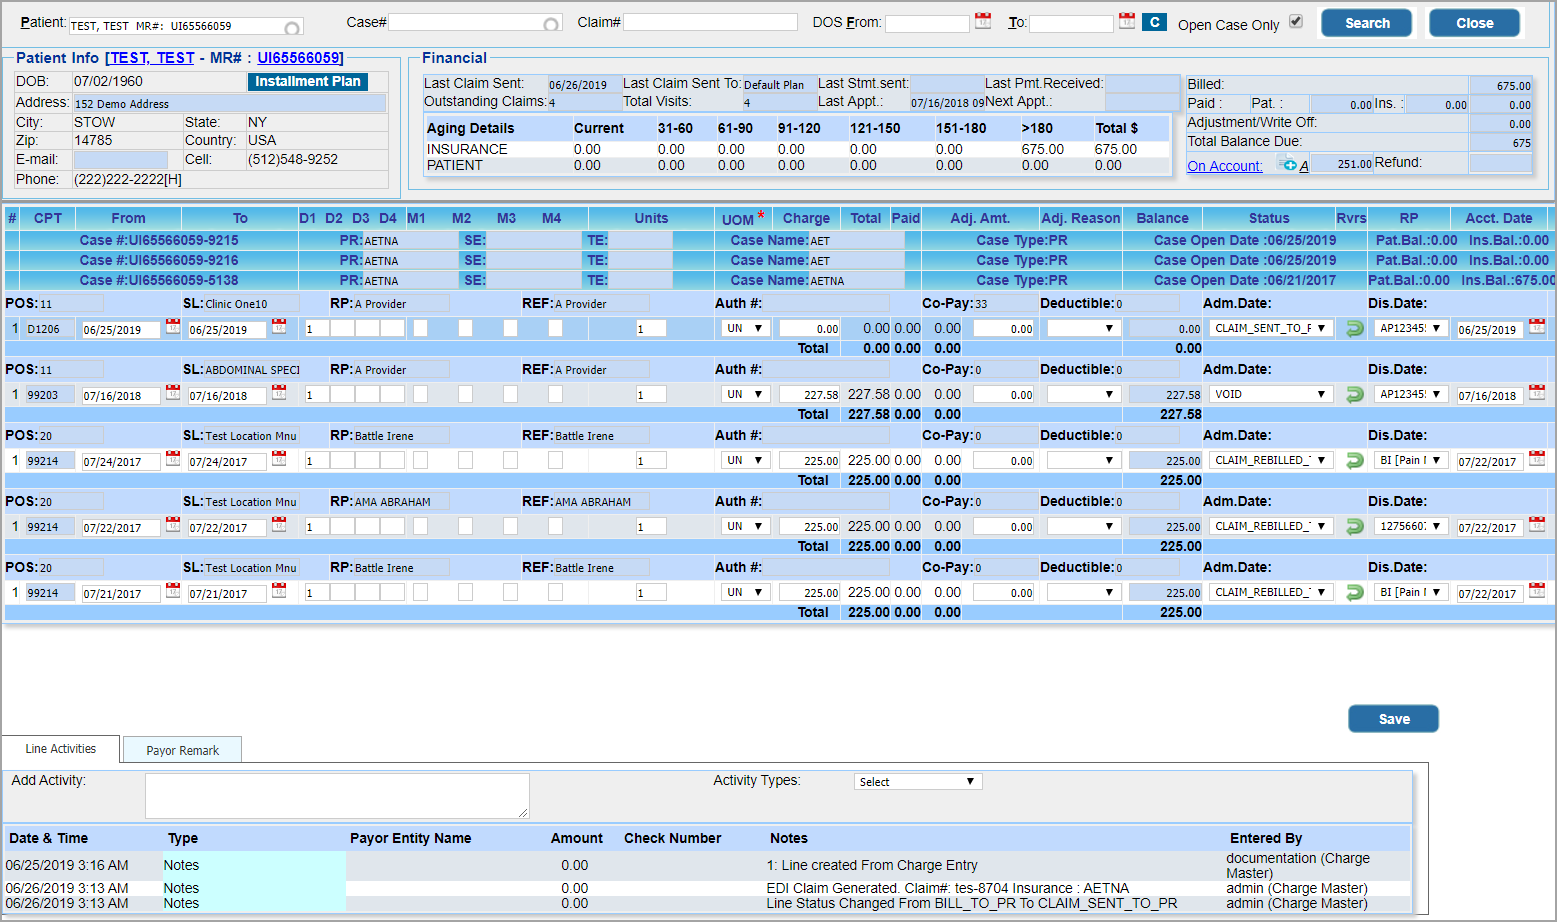
3. To filter the results, enter Case# to view the encounters and details under the selected case and DOS Date Range to view the encounters in the selected date range (see Image 1).
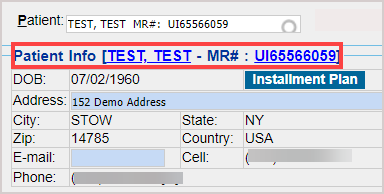
4. Patient information, like DOB, Address, Phone, E-Mail, etc., is shown under the Patient Info group. Click on the Patient Name or the MR# link in the Patient Info group (highlighted in Image 2) to view/edit the Patient Master details of the selected patient. Select the Installment Plan button to add/edit installment plans for the selected patient (see Image 2).
5. The financial details, like Aging Details, Last Claim Date, Last Claim Sent To information, Last Stmt. Sent Date, Last Payment Received Date, Visit and Appointment Details, etc. will be displayed under the group Financial (refer to Image 3). This group also contains fields like Billed Amount, Paid Amount, Adjustment, Balance, On-Account, Refund Amount.
6. The Case and Encounter Details of the selected patient are displayed as in Image 4. The Case details include the Case#, Insurance companies, Case Name, Case Type, Patient and Insurance Balance, etc. (highlighted in Image 4). Click on the ![]() icon against the case details to edit the case.
icon against the case details to edit the case.
7. Below each case, the corresponding encounters are listed. The Encounter details are the POS, Service Location(SL), Rendering Provider(RP), Authorization#, Co-Pay & Deductible Amounts, Admission & Discharge dates. Encounter line details include procedure code, Line Level DOS, Diagnosis Pointers, Modifiers, Units, Amounts, Line Status, Line Level Accounting Date, etc.
8. Click on the ![]() icon against the Encounter details to edit the Encounter-level details.
icon against the Encounter details to edit the Encounter-level details.
9. Click the Save button to save all modifications.


