

Customization of Schedule Status Dropdown and Color Coding
The Schedule Status dropdown in the Schedule screen can be fully customized within the system. Users can add additional schedule statuses to the dropdown list and assign a specific color to each status. When a schedule status is selected, its associated color is automatically applied for easy visual identification.
There are two methods available to personalize the Schedule Status dropdown and its corresponding color code within the Schedule screen.
Method-1
1. From the main menu, select Advanced Setup and then click on All Lookups.
2. To view the list of all Schedule Statuses, select SCHEDULED_STATUS from the list shown under Common Lookup Types on the left of the screen.
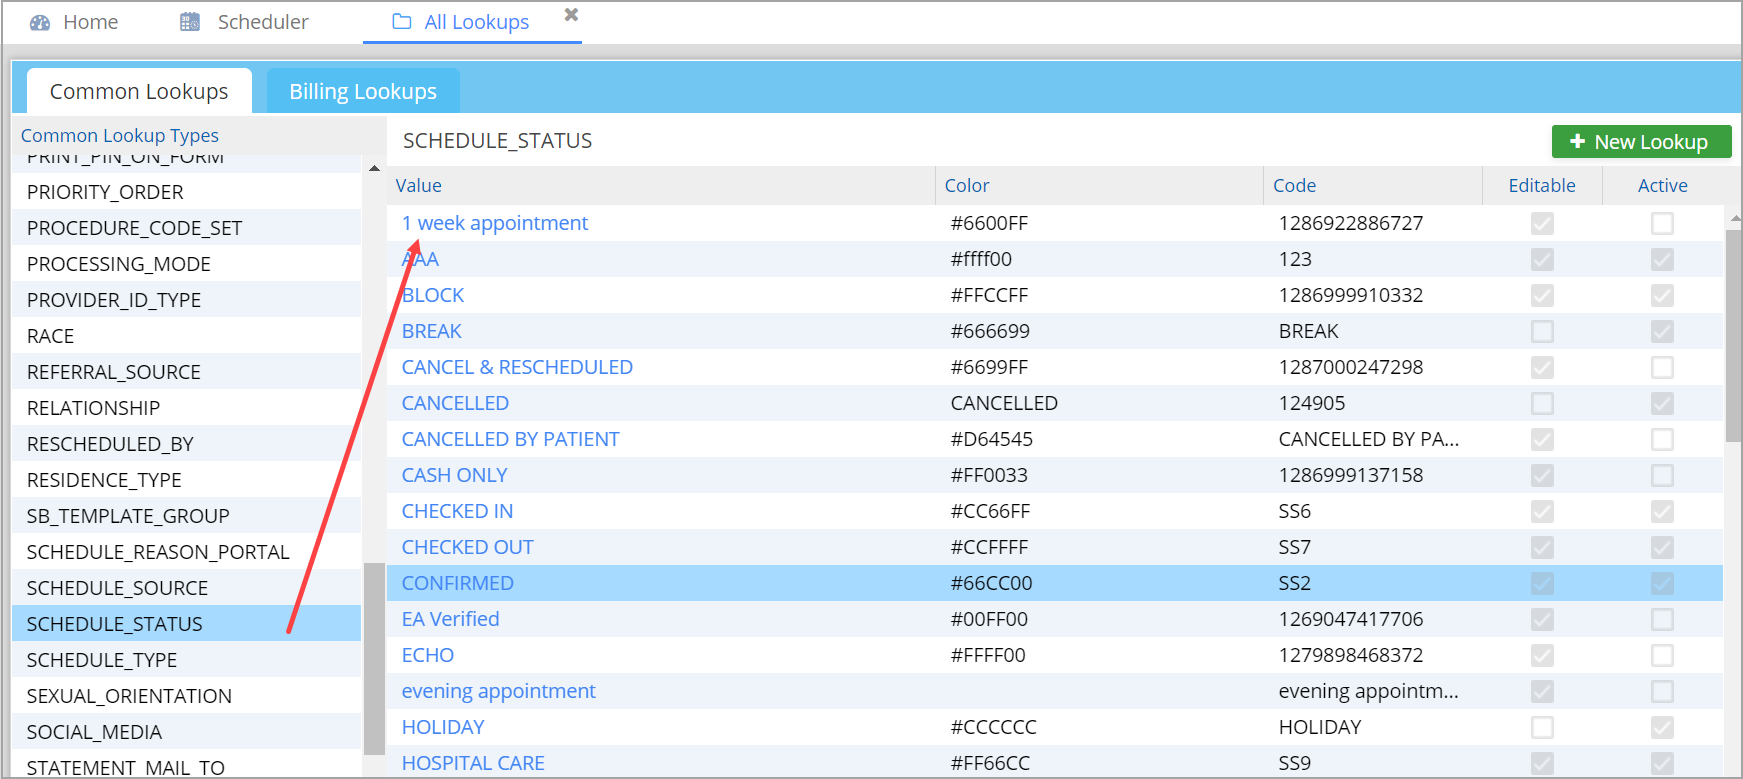
3. To add a new schedule status, click on the ![]() button.
button.
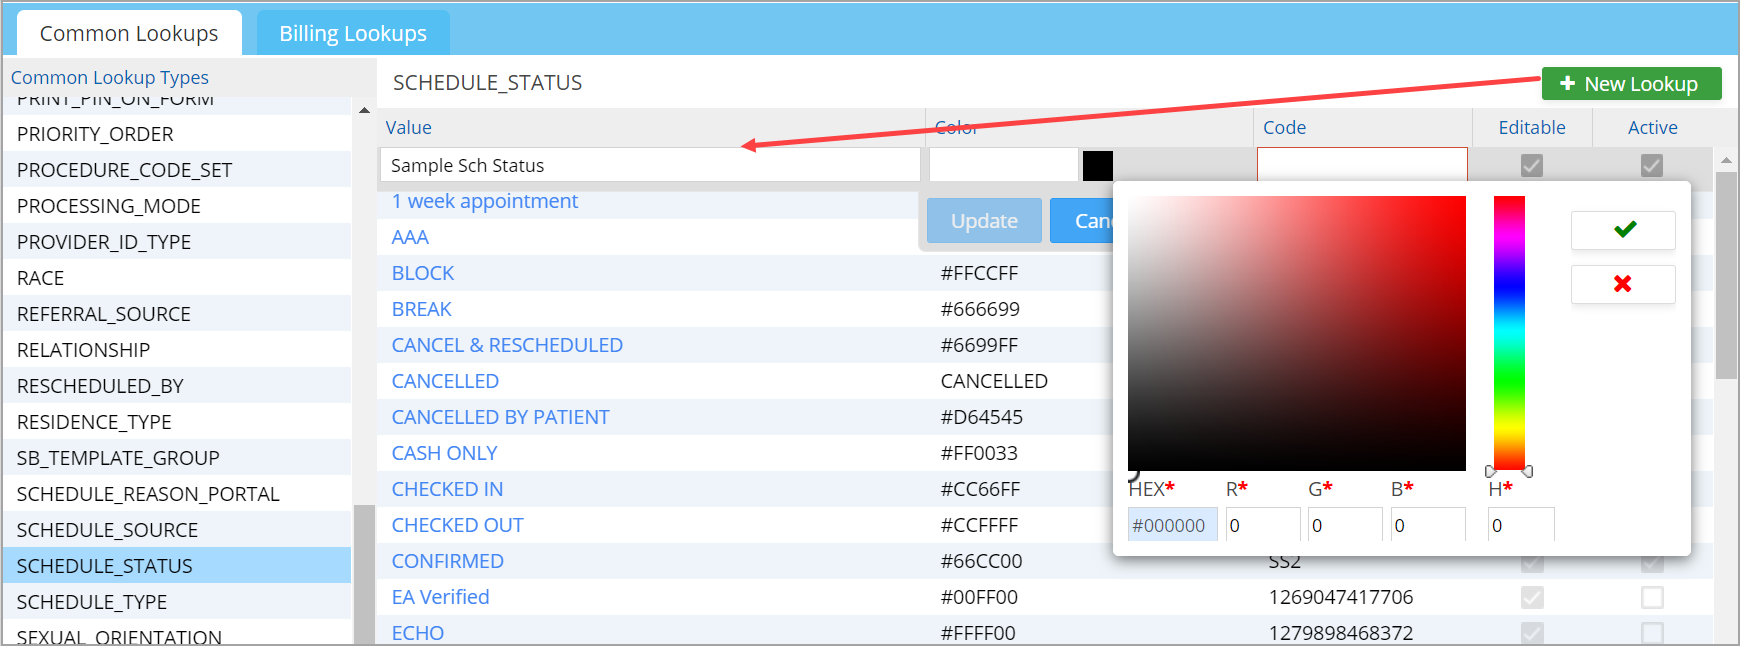
4. Enter a value and set the color. Image 2 shows setting the color for a new schedule status Sample Sch Status.
5. Enter a code for the schedule status. Choose a code according to your convenience. This field is not editable once created.
6. Click on the Editable checkbox to make a schedule status editable. Click on the Active checkbox to make a Schedule Status active.
7. Click on Update after entering all the required information.
Method-2
Go to Scheduler and click on the legend icon ![]() on the top of the screen. Click on the Appt. Status tab and hit the
on the top of the screen. Click on the Appt. Status tab and hit the ![]() highlighted in Image 3 to open the settings.
highlighted in Image 3 to open the settings.
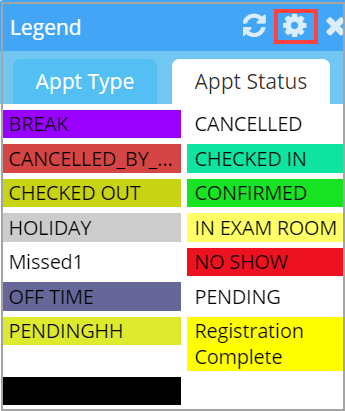 Image 3
Click on Add new Status to add a new Appt. Status.
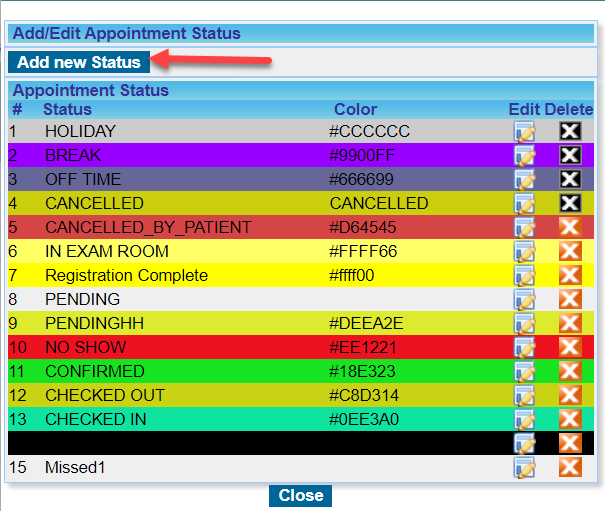
You can edit/delete the statuses using the icons provided (see Image 4).