

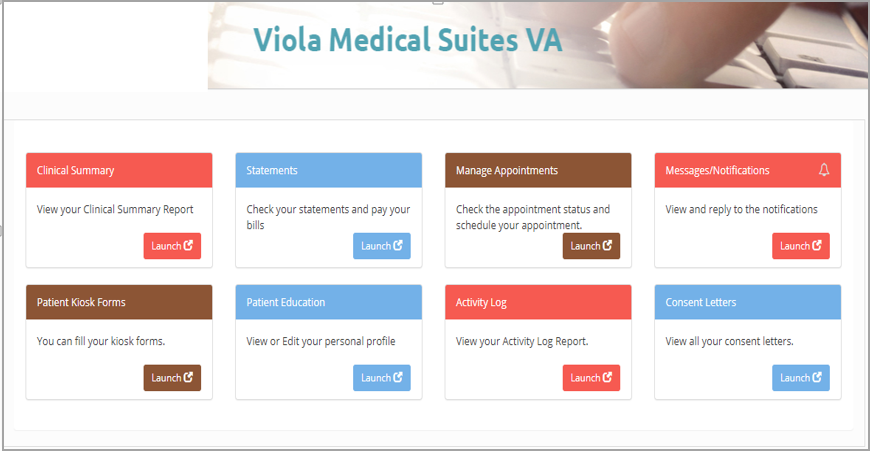
Major features of Patient portal are summarized in Table 1. (As indicated, some features are not available to Practice management-only clients.)
| Feature | Description | Platform Clients | PM-Only Clients |
| Clinical Summary | View Clinical Summary report and completed clinical notes. To know more click here | Yes | No |
| Statements | Check statements and pay bills | Yes | Yes |
| Manage Appointments | Schedule appointments, check appt. status | Yes | Yes |
| Messages/Notifications | View and reply to messages | Yes | Yes |
| Patient Kiosk Forms | Fill up patient kiosk forms | Yes | No |
| Patient Education | View or edit personal profile | Yes | No |
| Activity Log | View Activity log Report | Yes | Yes |
| Consent Letters | View All Consent Letters | Yes | Yes |
Table 1
How to Provide Portal Access to Patients
There are two ways Patient gets activated for Portal.
A. Providing Credentials from the Practice end.
B. From the Portal Login screen by filling the registration form.
A. Providing Credentials from the Practice end
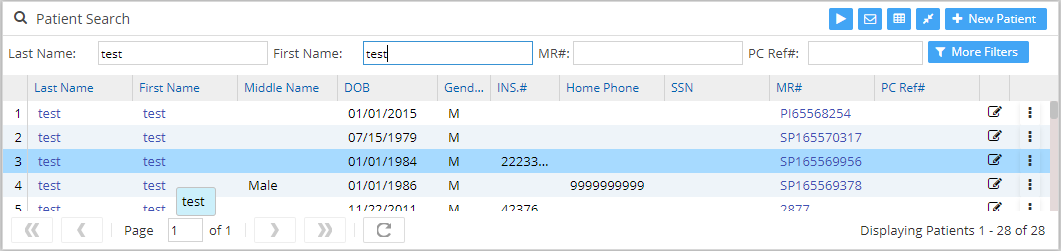
1. Login to PracticeSuite and select Patient from the main menu. In the Patient Search page, type the name of the patient or MR#, or PC Ref#, the patient list will be displayed below (see Image 1). Click on the required patient from the list to open the Patient Demographics page.
2. From the Patient Demographics page, click on the ![]() button. The portal setup screen (refer to Image 2) opens up. The
button. The portal setup screen (refer to Image 2) opens up. The ![]() sign indicates that the setup is not yet done for the patient.
sign indicates that the setup is not yet done for the patient.

The Email ID of the patient will be set as the User name. For the password field, either enter the password manually or click on ![]() button to have the system generate the password for you. Select the Show CCR Report option and click the Save button.
button to have the system generate the password for you. Select the Show CCR Report option and click the Save button.
3. Once the portal access setup is done, a tick mark appears as in ![]() .
.
4. This will activate the Patient for Patient Portal and trigger an e-mail to the patient that includes Portal URL, User Name and Password.
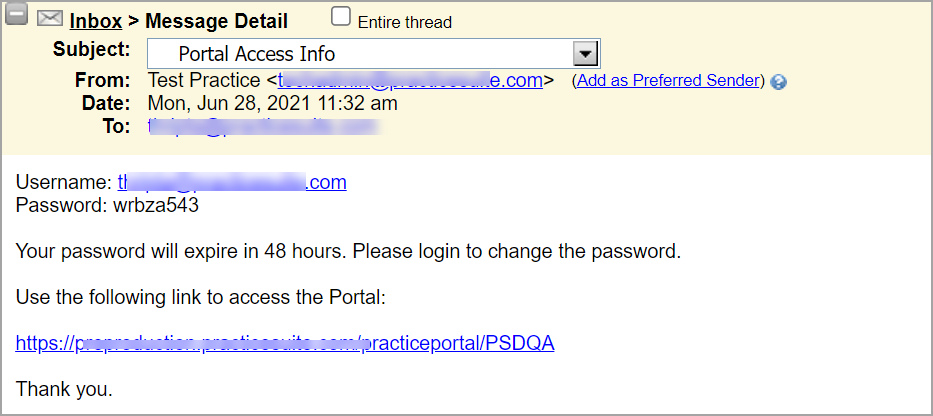
5. Patient can now login to the practice portal website by using the credentials received through email.

6. Patient logging in for the first time will find the below Consent form that they need to acknowledge.
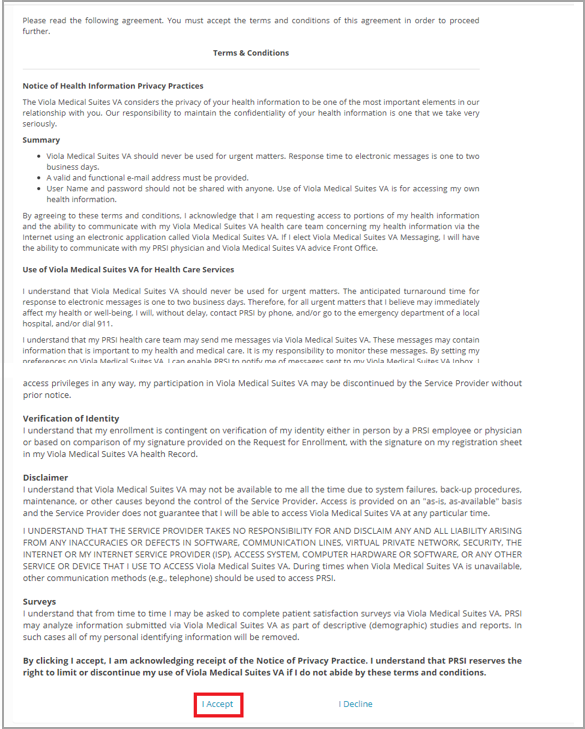
7. Click on I Accept option and click Continue on the following page.

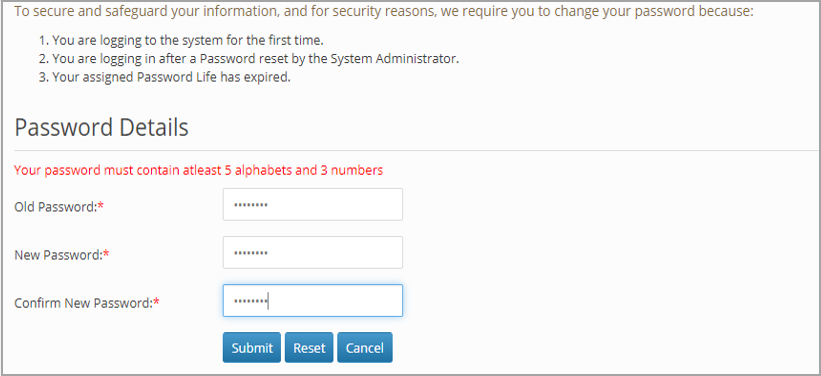
8. For users logging in for the first time, the system will request for password change if the password was set from the Practice end. Provide the new password and click Submit.
9. The following page shows that the Patient is now logged in. Platform clients (Using PracticeSuite EHR & PM) can access all the options available on the page and make use of the features. PM only clients can make use of statements, Manage appointments, Messages & Notifications, Activity log & consent letters.
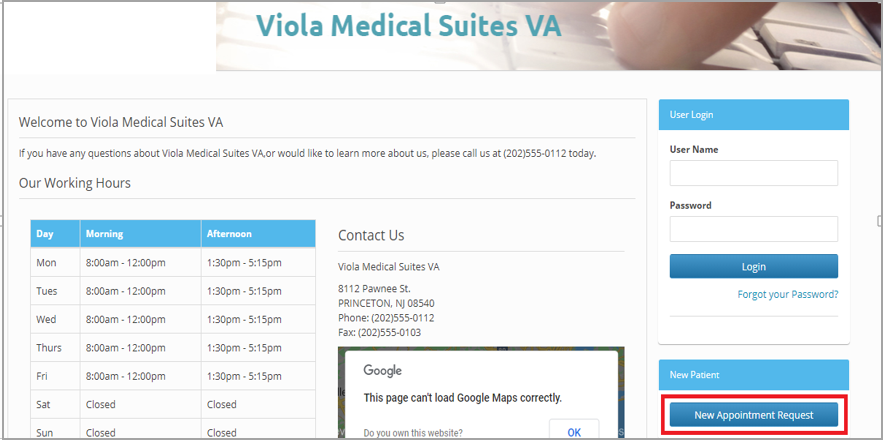
B. From the Portal Login screen by filling the registration form
1.On the Login URL, click the “New Appointment Request”.
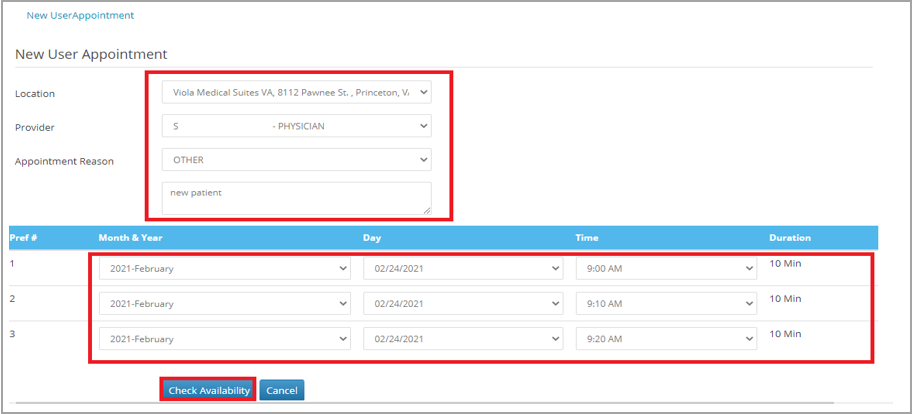
2. The below page loads. Fill all the sections as highlighted and click “Check Availability” on the bottom of the page.
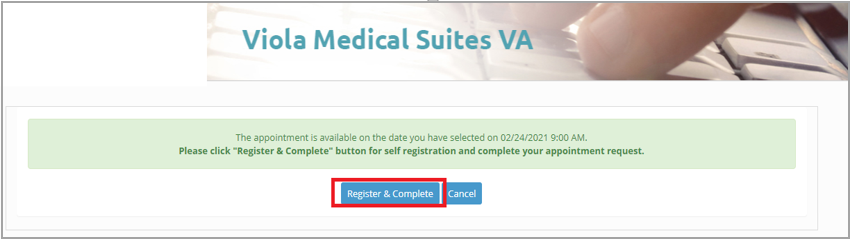
3. The following message pops up, click “Register & Complete”.
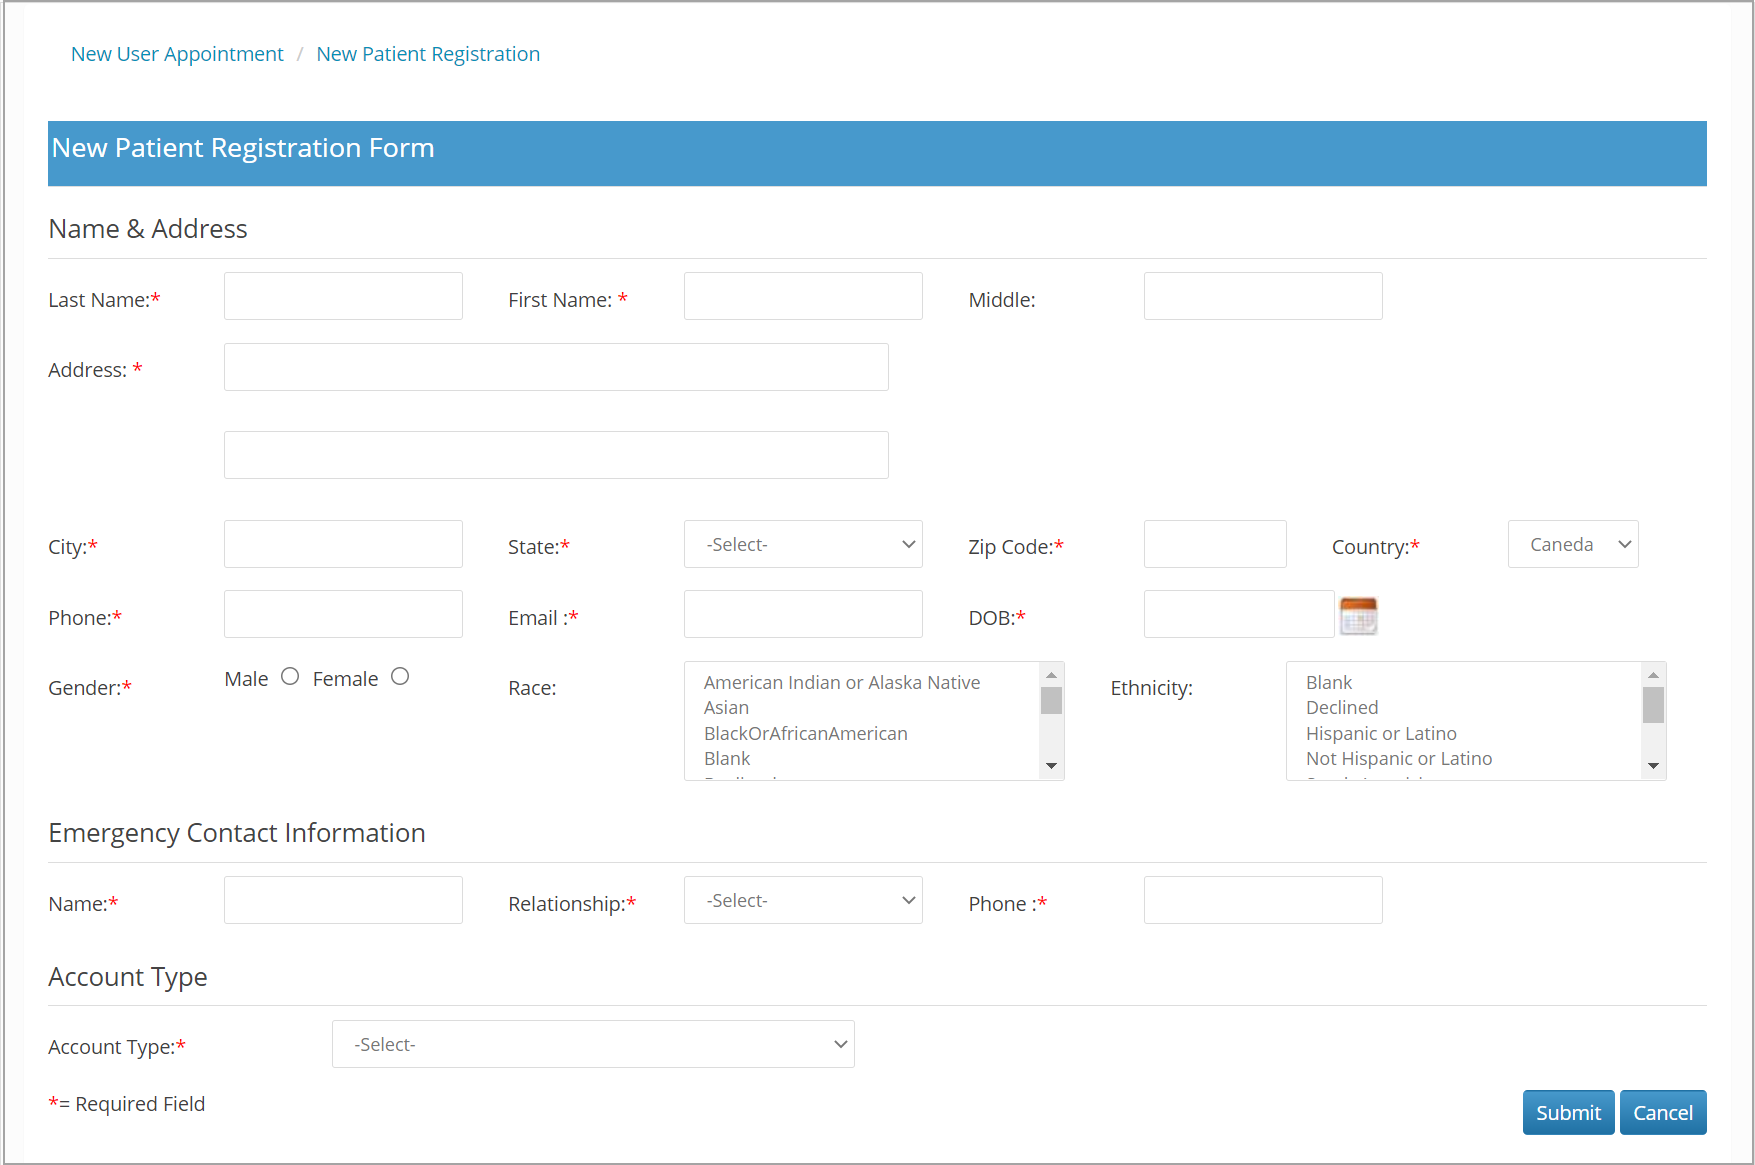
4. Fill all the mandatory fields of “New Patient Registration Form” and Submit.
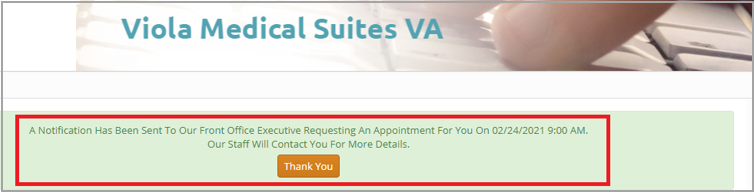
5. A “Thank You” message will appear as shown below. After this the Patient has wait to receive an e-mail from Practice which will provide them the information to Login in to Portal.
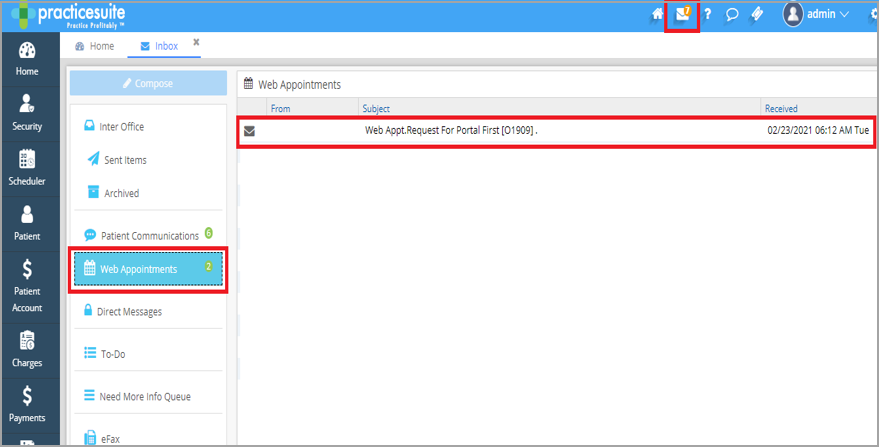
6. On the Practice end, the staff will receive a notification that reflects on the ![]() on top right side of the screen as shown below.
on top right side of the screen as shown below.
7. Click on the envelope ![]() and then the Web Appointments option as shown below.
and then the Web Appointments option as shown below.
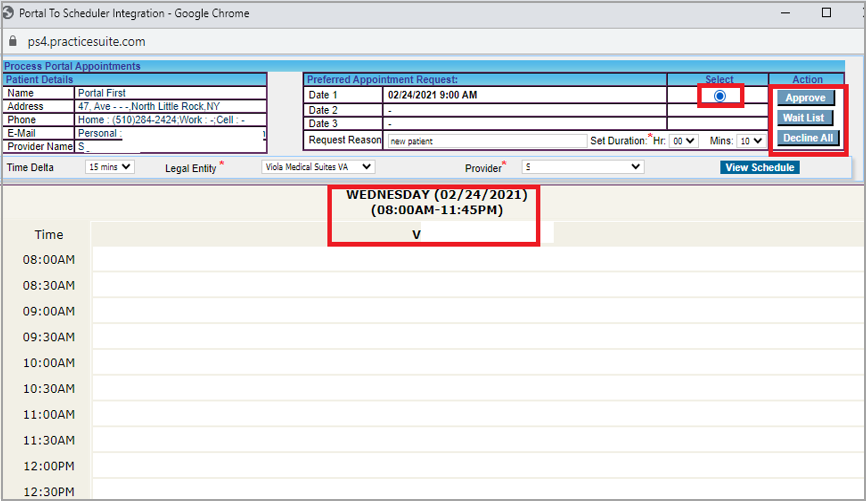
8. When we open the New message we received, we get the below screen. Click “Check Availability”.

9. From the below page the staff can view the Provider’s schedule and choose to respond by selecting one of the three options – “Approve, Wait List, Decline All”.
10. The Patient will receive an e-mail that includes the Portal URL, User name and Password to login to Patient Portal.
