Front Office Staff Workflow for New Patients
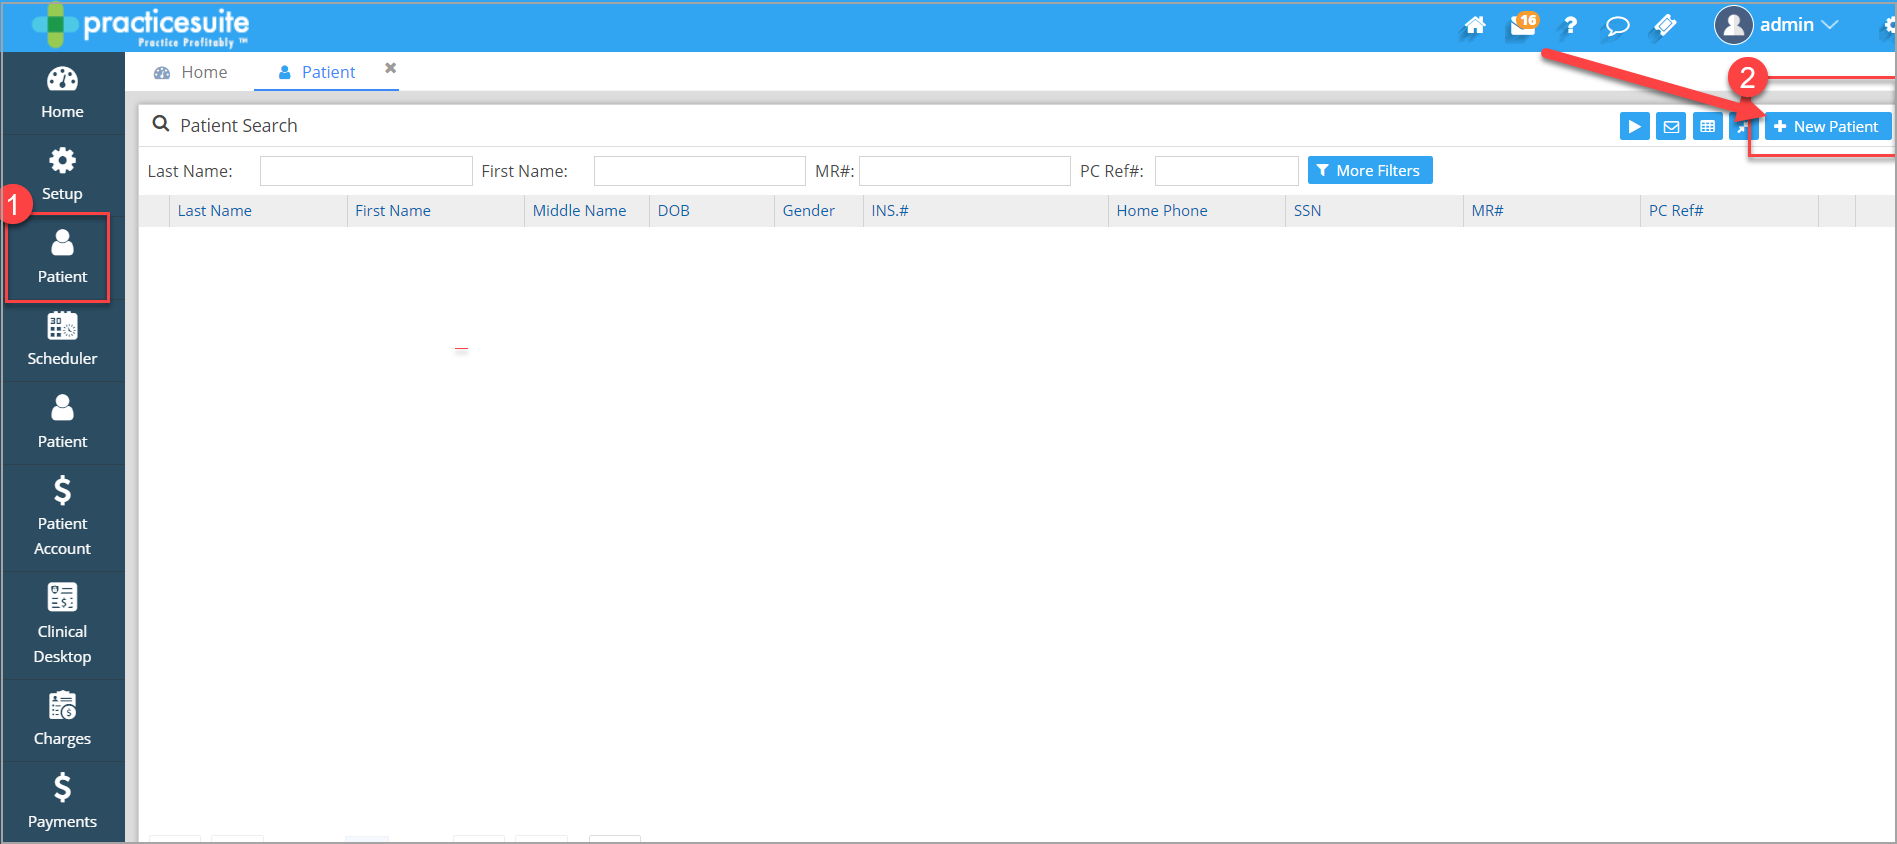
1. From the main menu on the left pane, click on the Patient module. When the patient screen opens up, click on ![]() button visible on the top right part of the screen to open the Patient Demographics screen.
button visible on the top right part of the screen to open the Patient Demographics screen.
2. Register the patient using Name, DOB, gender, Address, Zip, City, and state. Click on ![]() to save the patient record.
to save the patient record.
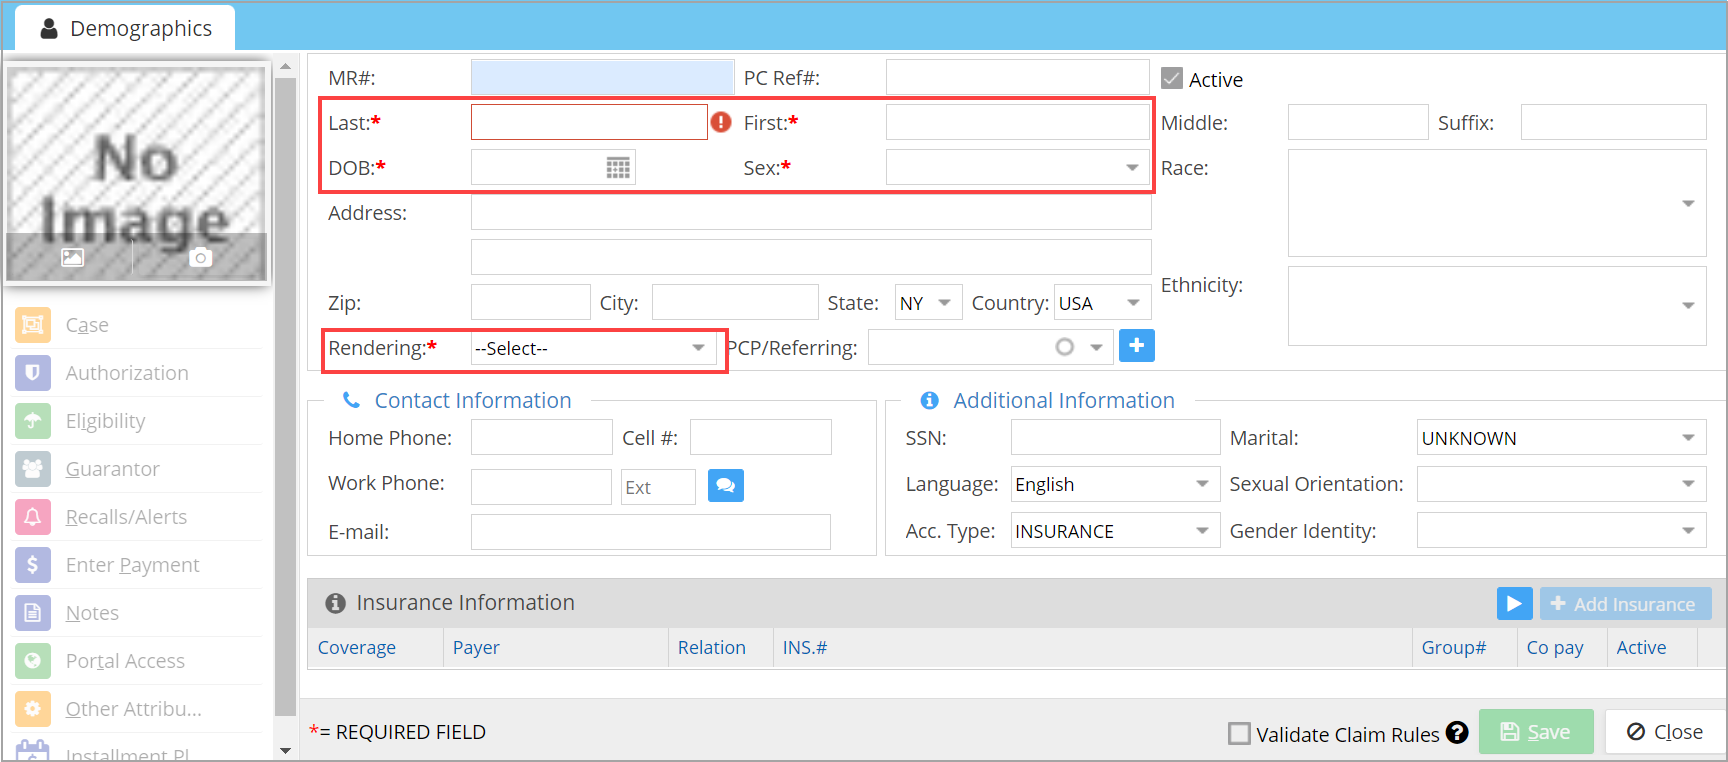
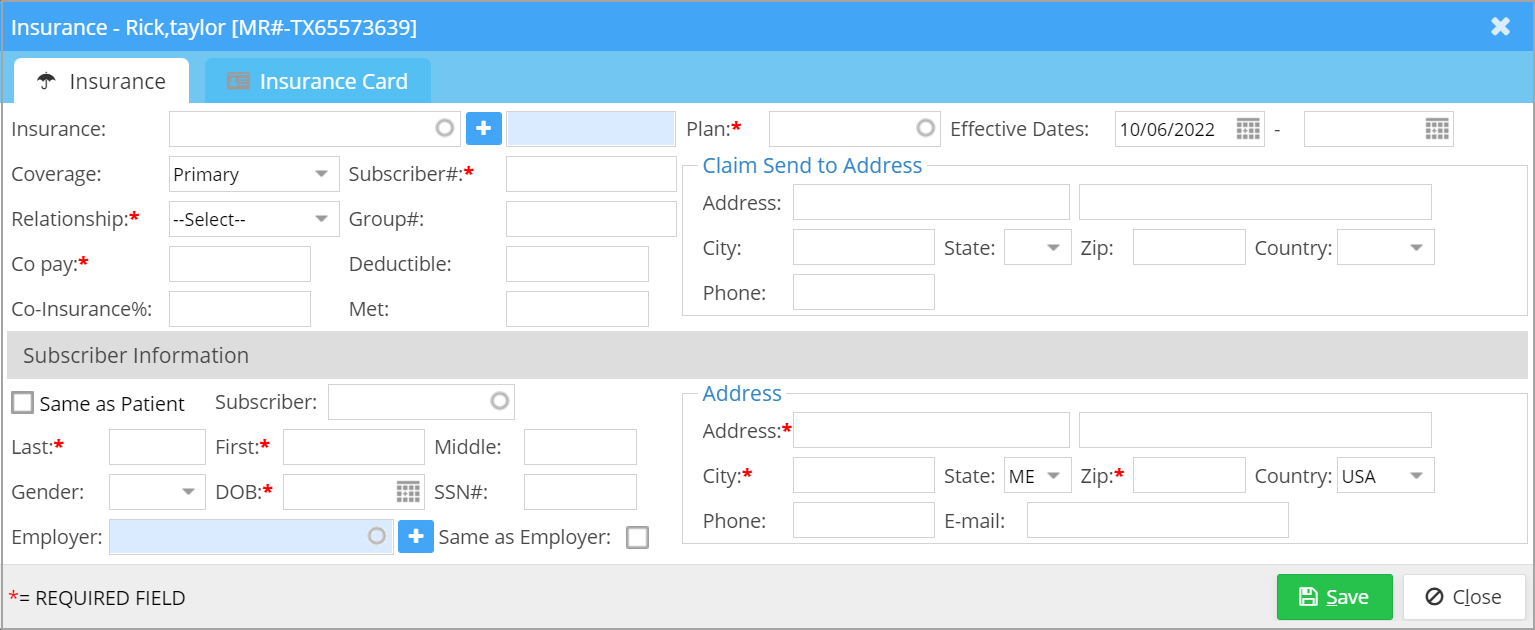
3. Collect their insurance information so that their eligibility can be checked before the appointment (usually by phone). Enter the insurance details in the Insurance section of the Patient Demographic screen.
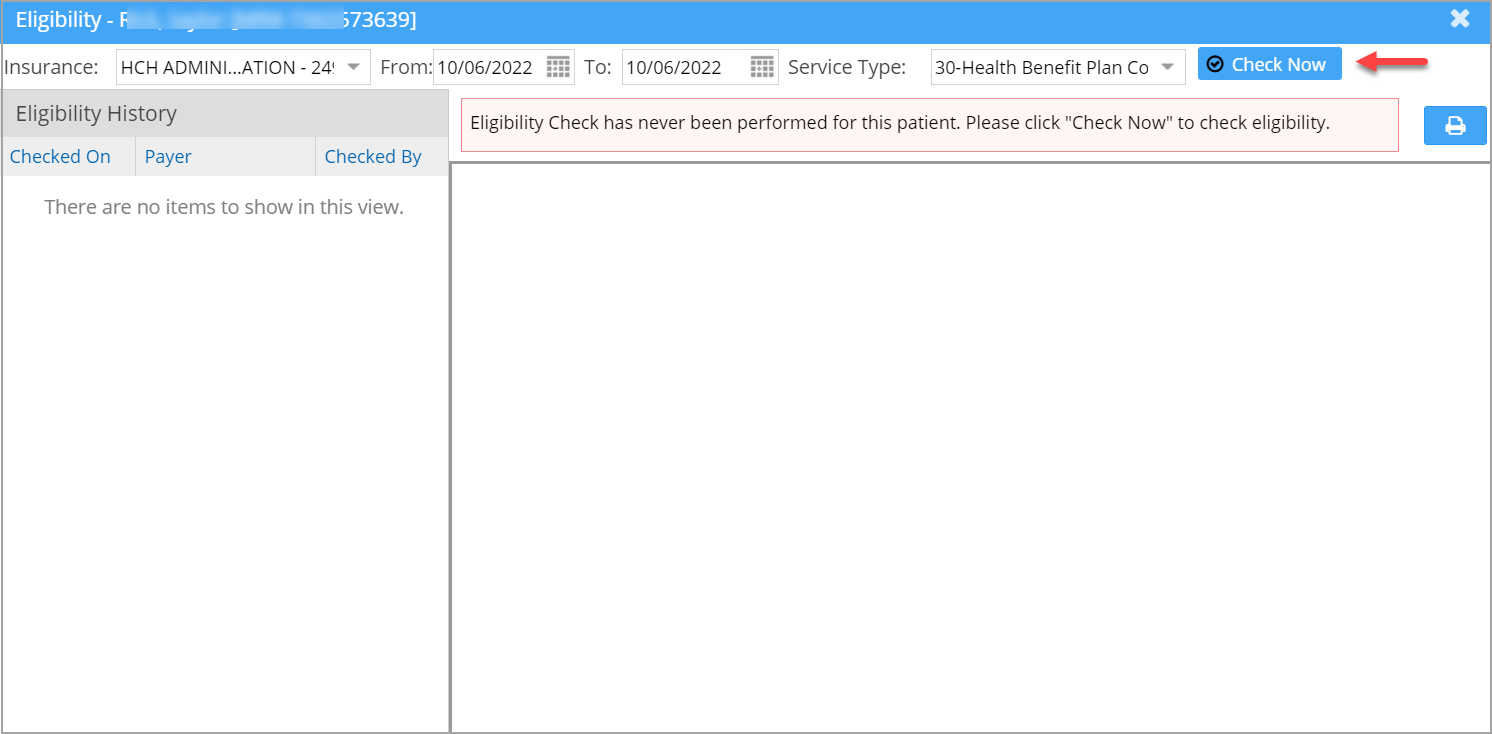
4. Check eligibility to make sure the patient can be seen in this clinic. Click the ‘Eligibility’ option on the left side of the patient demographics. The default date range will be the current day. Change the date if needed and hit ‘Check Now’ to verify eligibility. If found not eligible, staff will have to contact the patient and let them know so that they can contact their insurance company.
5. Once the patient is found eligible, put the patient on schedule. (Usually done by phone unless a walk-in appt). Open Scheduler, click on the needed slot, and enter the patient details.
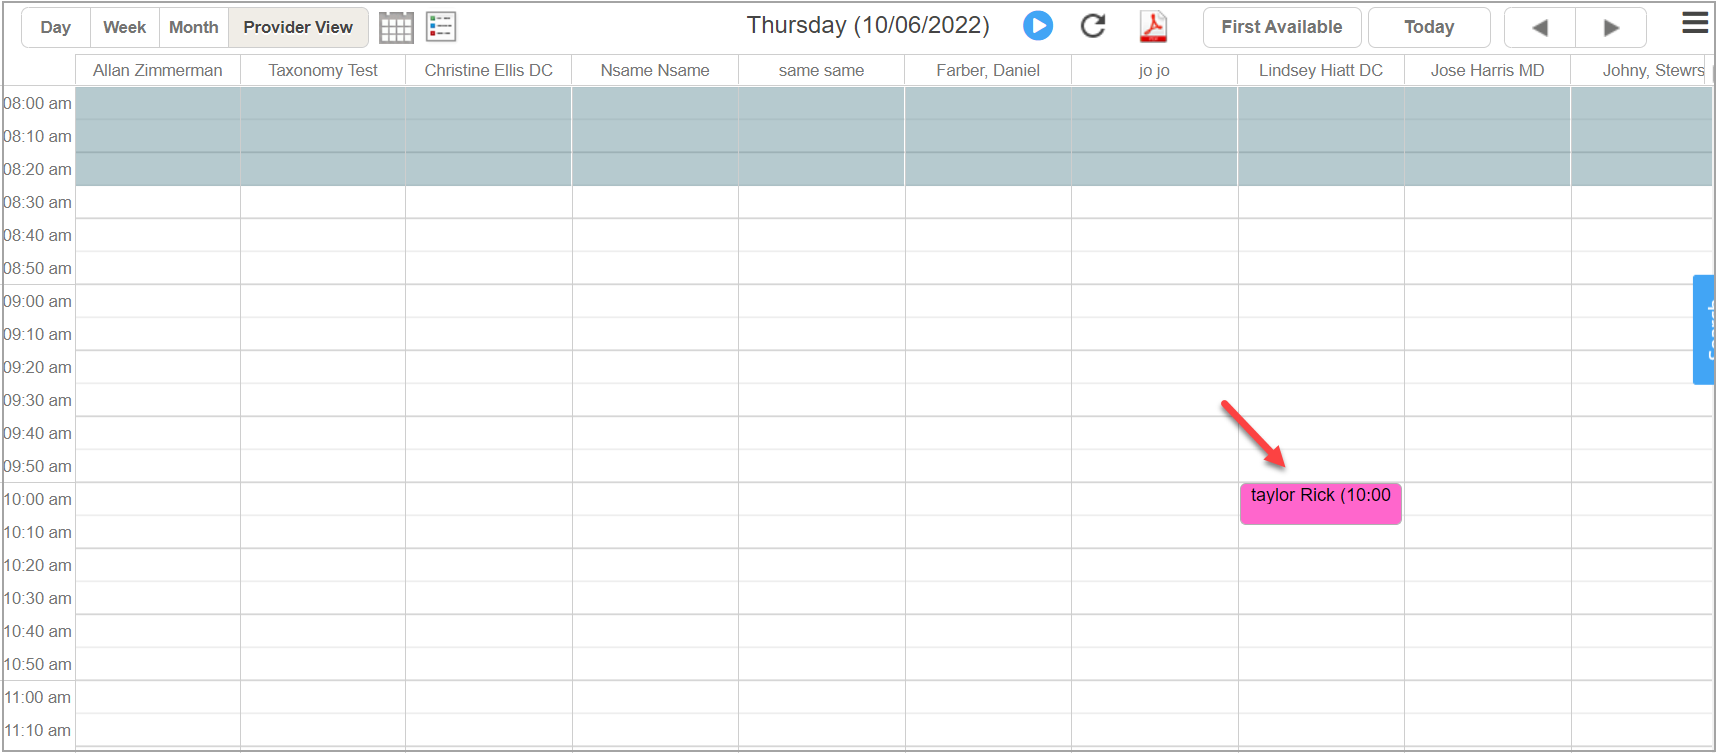
6. When the patient arrives at the office, the patient should be marked Arrived to indicate that the patient is in fact in the office. For this, go to Scheduler, click on the patient from the allotted time slot, and change the schedule status to ‘Checked In’.

7. Front desk staff will gather information and complete the registration Process
A. Sign all legal documents and give a copy of HIPAA
B. Have the patient sign up for the Patient Portal.
C. Patients can do Patient forms from their own Patient Portal
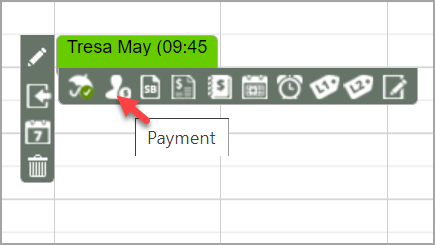
D. Gather COPAY; if required, this can be done at the beginning of the visit or at the end.
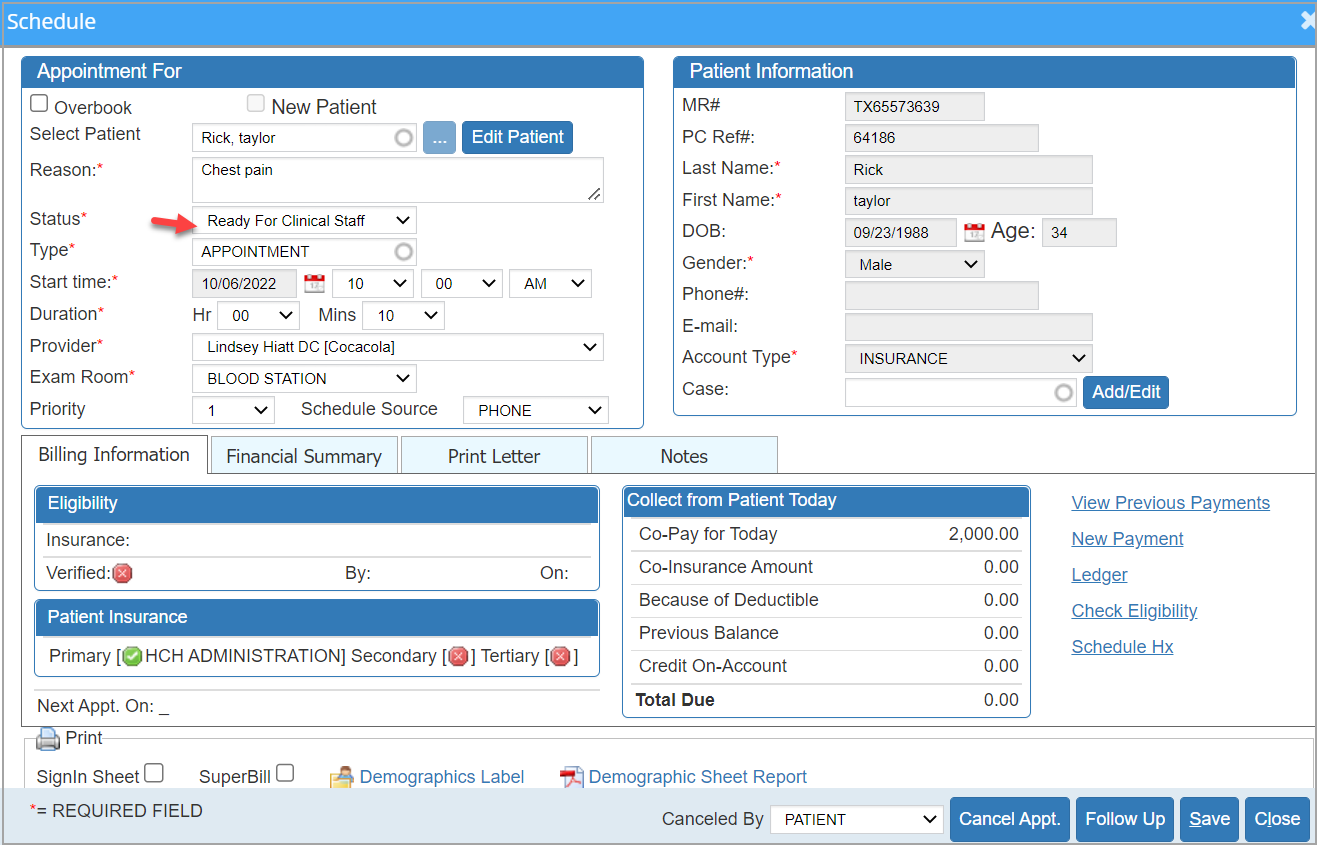
8. Mark the patient as Ready for the Clinical staff (NURSE MA) depending on the workflow of the office. For this, go to Scheduler and change the schedule status to ‘Ready for Clinical Staff’.
Front Office Staff Workflow for Established Patients
1. Put the patient on schedule. Open Scheduler and allot a convenient slot.
2. The eligibility check is to be completed, ideally before the day of the appointment. Inform the patient if they are not eligible for the visit.
3. When the patient comes into the office, immediately mark the patient as ‘Arrived’. To do this, go to Scheduler, click on the patient from the allotted time slot, and change the schedule status to ‘Checked In’.
4. Review and update any new information on registration and insurance.
5. The patient is marked Ready for Clinical Staff. To do this, go to Scheduler and change the schedule status to ‘Ready for Clinical Staff’.
Checkout Workflow
1. Either the provider, front office staff, or clinical staff marks the patient Ready for Check-out using the scheduler appointment status.

2. When the patient reaches the front desk for check-out, hand over appropriate educational material and a visit summary to the patient.
3. Collect co-pay if not collected at the beginning of the visit.

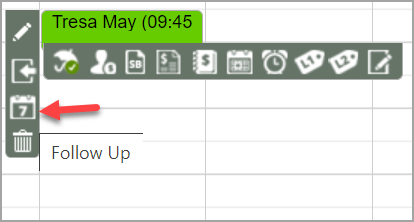
4. Create a Follow-up appointment for the patient if required.