

Creating or Assigning a Case from the Scheduler
Each appointment must be linked to a case. A case can be created or assigned from multiple locations in the system, including the Scheduler, Charge Entry screen, or Patient Demographics. This section explains how to create or assign a case directly from the Scheduler.
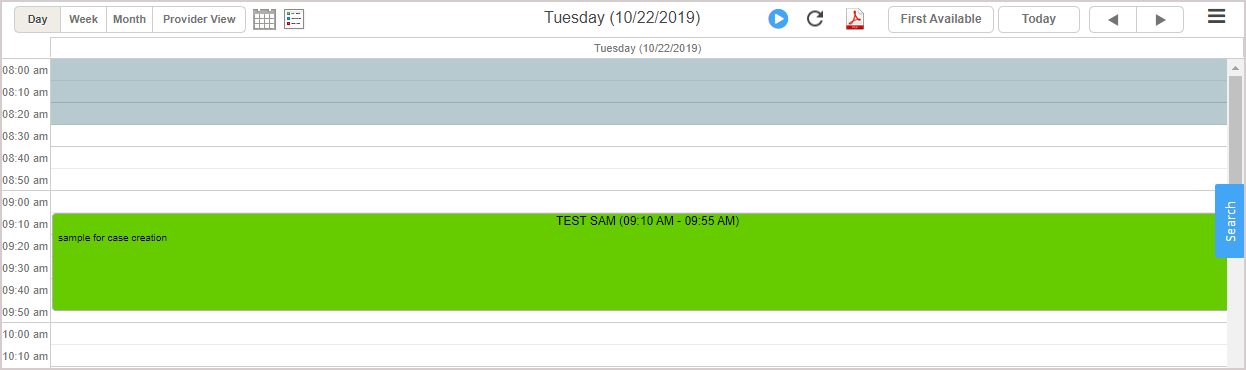
1. To view the Appointment Scheduler window, click the Scheduler module. The Appointment Scheduler window will be displayed as in Image 1.
2. Click on the patient’s name to open the Schedule page.
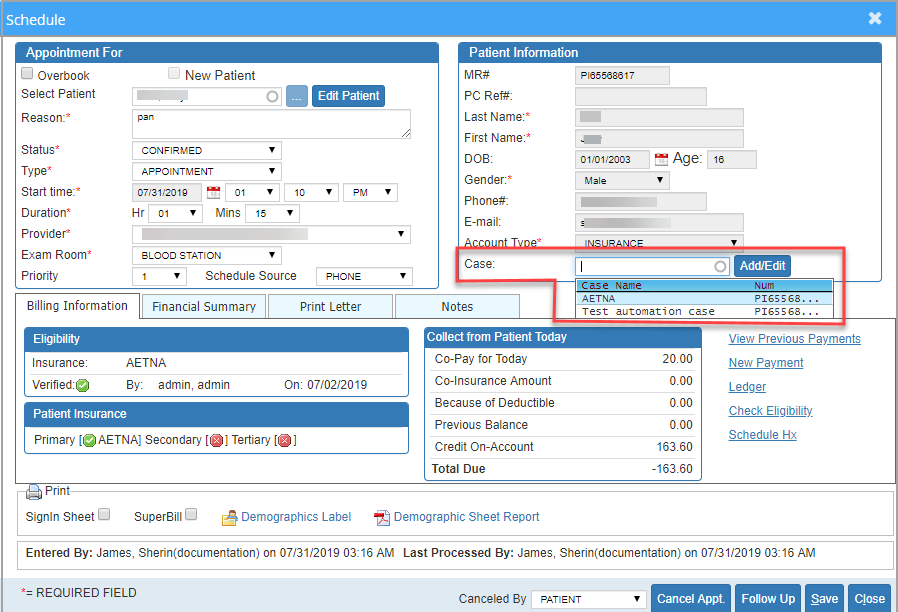
3. Click on the Case box to view the list of present cases for the patient. Select a case from the list as appropriate. The case gets assigned to the appointment.
3a. The screen will display insurance information tied to the selected case in the Patient Insurance section. If no case is chosen, the screen will instead show the most recent active primary, secondary, and tertiary insurances on file for the patient.
4. If none of the cases are suitable for the current visit, add a new case by clicking the ![]() button to open the Case window.
button to open the Case window.
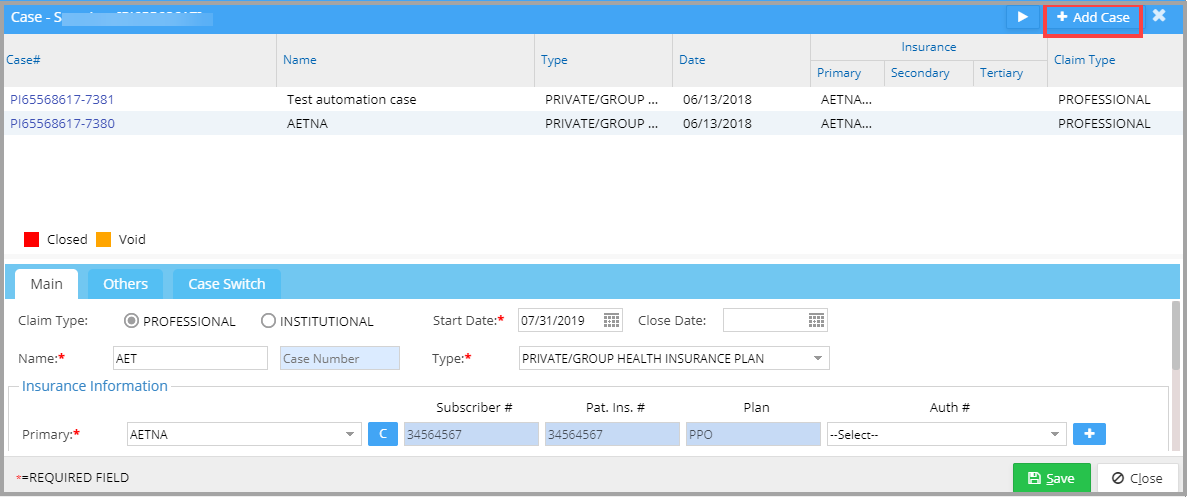
5. Click on ![]() button. Enter all the necessary details and click on Save.
button. Enter all the necessary details and click on Save.
6. For detailed information on how to add a new case, click here.