

Run Claims Validation
PracticeSuite claims validation will validate all the data elements on the claim form before claims are generated. PracticeSuite system internally validates the claims against predefined rules built on Clearinghouse specifications and plan-specific requirements. Claims not meeting the requirements are reported with validation messages for corrections before batches are generated. This reduces the chance of errors that may occur. The validation rules are categorized into errors, warnings, alerts & validation messages. To run the validations, follow the steps below.
1. Navigate to the Charges module and click on Submit Claims. Claims Dashboard will open up. Click on Ready To Submit bucket on the left. The screen, as in Image 1, opens up.
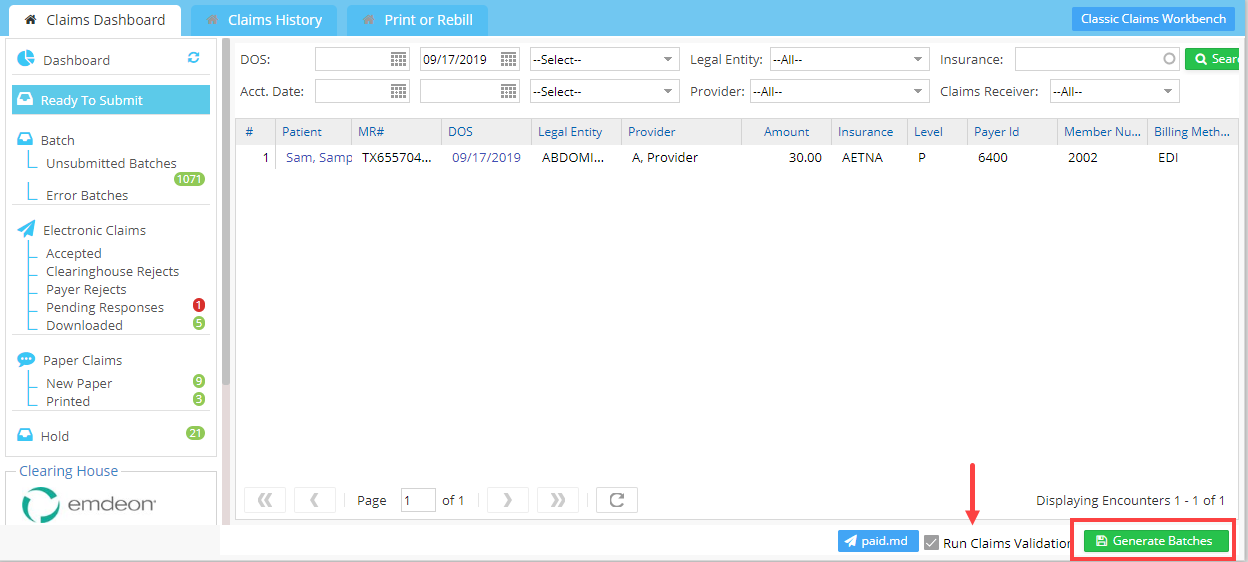
2. The Run Claims Validation checkbox is checked by default. Click on Generate Batches, and the validation screen will open up after validating all the claim-specific requirements and will acknowledge with errors, warnings, alerts & validation messages if any. After validation, if there is no error, the validation screen will appear, as in Image 3.

3. To do the required corrections on the charges, the Charge Master can be accessed by clicking on the shortcut button (highlighted in Image 2) on the right side of each message.
4. Once all corrections are done, click on the Re-Validate button. The screen will be as shown in Image 3 when there are no more errors.

5. Click on Proceed with Claim Generation button to generate claims for processing.