

PracticeSuite Scanner Application
PracticeSuite has a proprietary scanner SDK replacing the current third-party solution and comes with an improved UI and features. The updated doc scanner software delivers enterprise-grade document digitization while maintaining HIPAA compliance.
Key Features
Scanner Support & Detection
• Automatic discovery of locally connected scanners via TWAIN/WIA/ICA protocols
• Real-time device status monitoring with dynamic scanner list updates
• Support for single-page and multi-page ADF scanning
Integrated Scanning Workflow
• Scan documents directly from the PracticeSuite application with one click
• Preview scanned pages immediately and make simple edits (rotate, reorder, or remove pages)
• Add document details such as type, source, date, description, and associated provider
• Scanned documents automatically upload and appear in patient records
Security & Compliance
• Secure encrypted communication between the scanning service and the application.
• Password-protected access with secure authentication
• HIPAA-compliant – scanned documents are not stored on local computers after upload
Setup
To learn how to set up the document scanner, click here.
Usage Guidance
1. Once the scanner is launched, you will be directed to the user interface screen (Image 1), where you can find the scanning-related options on the right side and page edit shortcuts on the left.
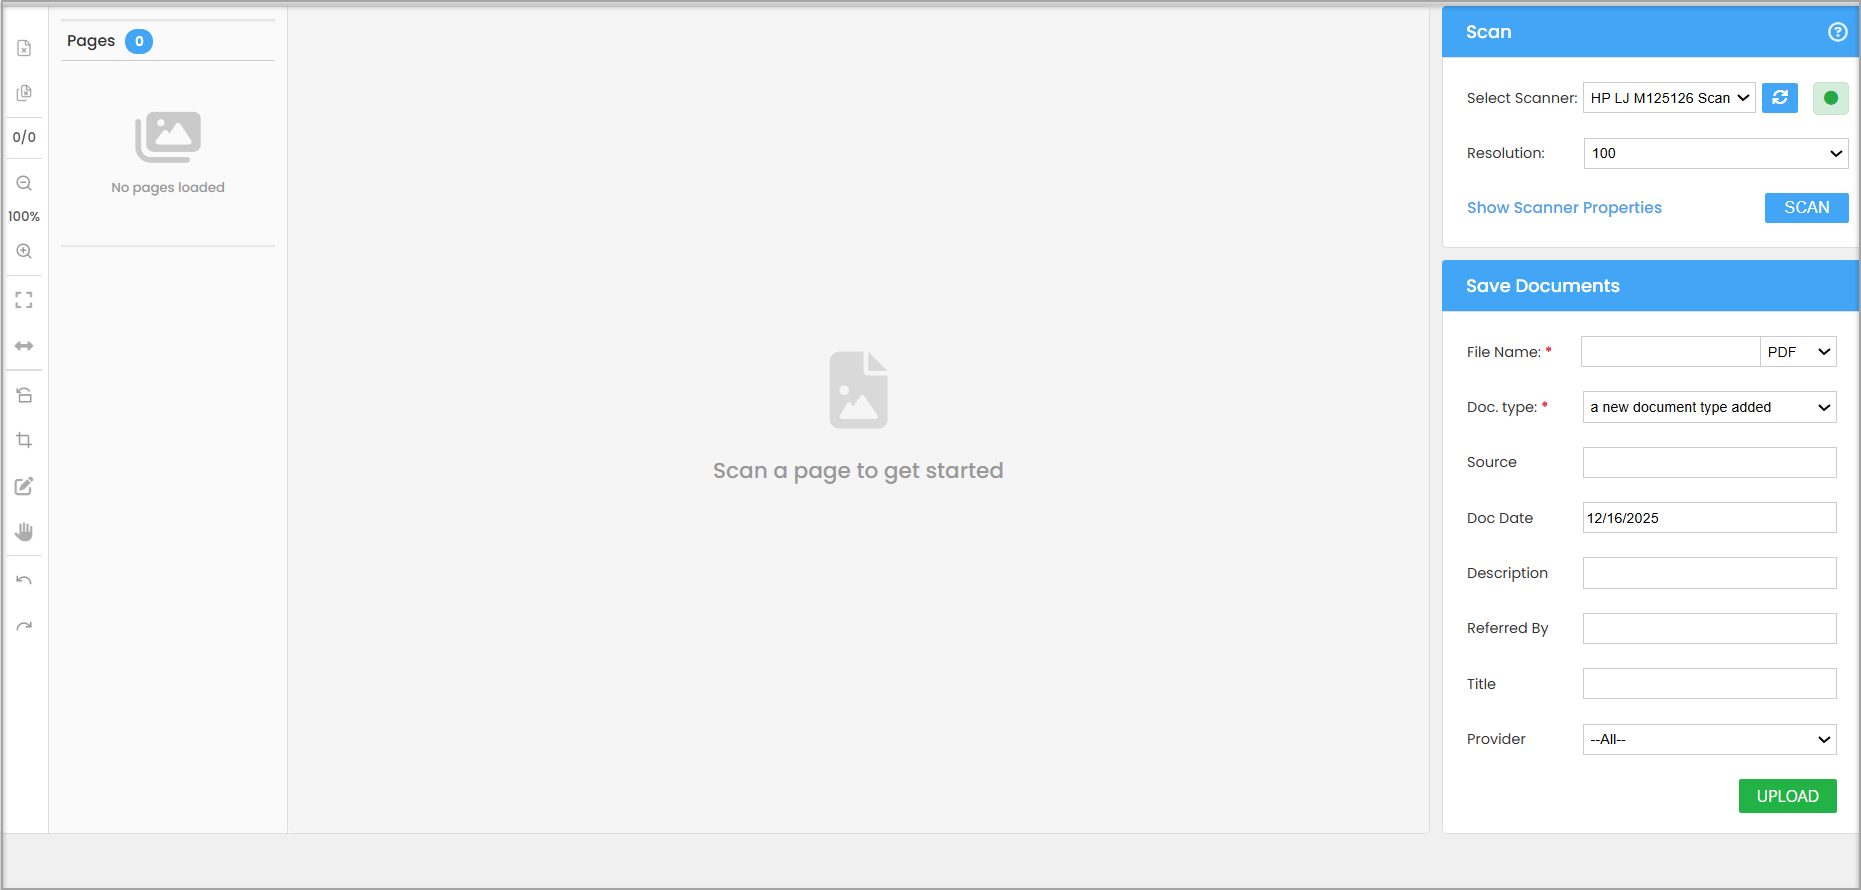
2. From the Select Scanner drop-down at the top right corner, select a scanner. The drop-down will automatically default to the most recently used scanner. If the user is opening for the first time, the system will auto-detect any available scanner.
3. Resolution indicates the quality of the scanned page. The default value is 100; you may change it if needed.
4. Click on Scan to scan the document. Each document scanned is added to the left pane.
5. If you need additional scanning options, click on Show Scanner Properties.
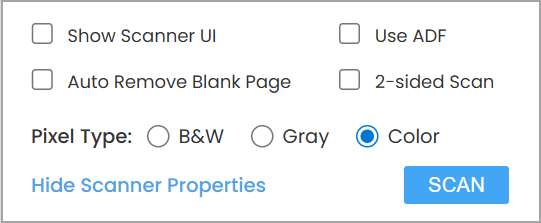
Scanner Properties Menu
Detailed Information on Scanner Properties
| Show Scanner UI | Opens the traditional scanner settings installed on the system, where you can choose some additional options like document size, source, etc. (See Image 6.) |
| Use ADF | The Automatic Document Feeder (ADF) can scan multiple pages, including duplex pages, in one go. If your scanner supports the ADF feature, you may enable this service. |
| Auto Remove Blank Page | If this option is checked, scanned pages are evaluated for content. Pages detected as blank show up in the viewer with a delete notation on them. These detected blank pages are deleted during the final operation and are not sent to the destination. Note: This setting is only available as a scan setting. |
| 2-sided scan | It enables users to scan both sides of a document simultaneously without having to manually reinsert the document the other way up. |
| Pixel Type | Black & White, Gray, and Color |
Page Editing
Scanned documents can be edited using the page edit menu on the left.
Page Editing Options in the Scanner Screen
| Remove the current scanned image. | |
| Remove all scanned images. | |
| Zoom out | |
| Zoom in | |
| Fit window | |
| Fit Width | |
| Rotate Image | |
| Crop | |
| Edit | |
| Drag | |
| Undo and Redo |
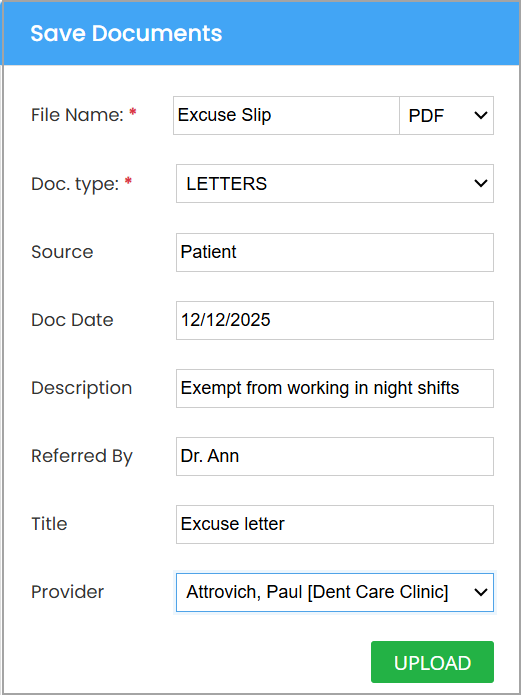
Save Documents
1. Once the scanned documents are ready, you need to save each one of them using the Save Documents section on the right pane.
2. Click the document in the left pane and provide the required data in the Save Documents pane. The table below explains the document-saving fields in detail.
Fields for Document Save
| File Name | Mandatory field: Provide the name of the file here. |
| Doc. Type | Mandatory: Indicates the file type or directory to which the document should be uploaded. If the required type is not present in the list, you can add a new document type of your own. To learn more, click here. |
| Source | Source of the file: internal or external |
| Doc. Date | Scanned Date |
| Description | A description of file contents |
| Referred By | Referring provider name |
| Title | A title can be given to the file. |
| Provider | The rendering provider of the patient is selected by default. |
3. Once all the required fields are filled in, click on Upload at the bottom to upload the file.
4. Repeat steps 2 and 3 for all the files scanned.
5. The files will be saved to the patient’s document manager.