

Claim generation involves the creation of claim numbers for all charges that are ready to be submitted and grouping them into batches according to the batch grouping rule specified in the Billing Options. Submission involves sending the batches to the appropriate clearinghouses.
I Claim Generation
1. Click on the Charges from the main menu and click on Submit Claims to open the Claims Dashboard.
2. Click on Ready To Submit on the left pane. All the charges yet to be batched are displayed. Choose appropriate filtering parameters, such as DOS, for generating the claims. Other filtering options are explained below.
a. To generate claims between two Accounting dates, use the Acct. Date From and To.
b. Enter the Insurance/Payer ID to generate claims for a particular Insurance.
c. To send the claim to a particular clearinghouse select a Claim Receiver from the drop-down list.
d. Select a legal entity from the list to generate claims for a particular legal entity.
e. Select a Provider to generate claims for a particular Provider. Refer to Image 1.

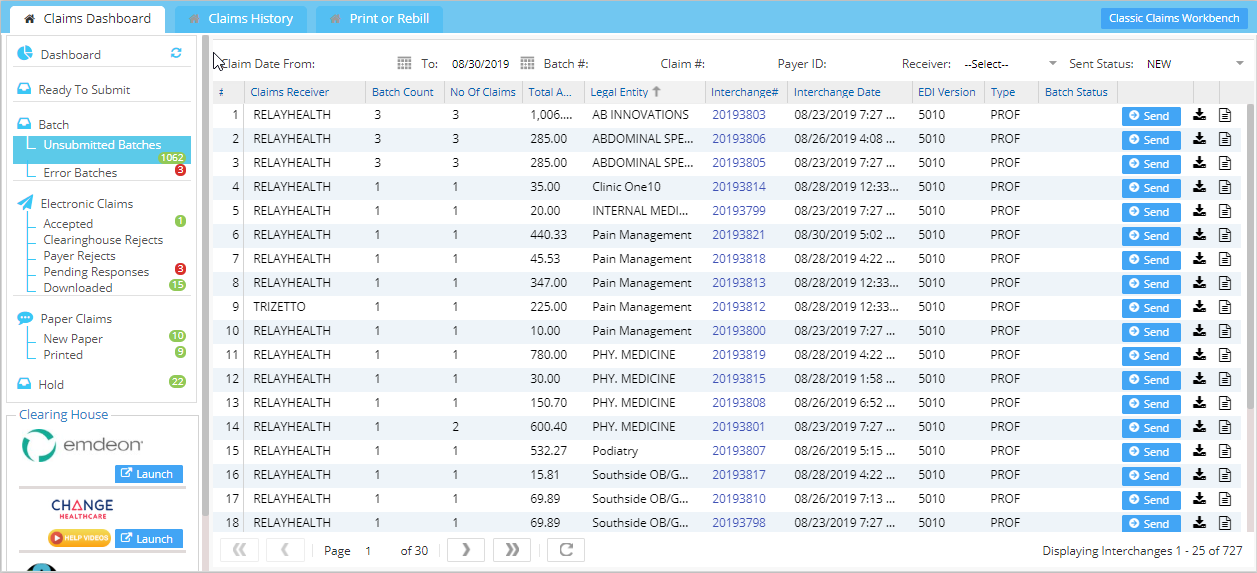
3. Click on ![]() button to generate all the available claims between the given dates. Once the claim generation is done, the available claim batch information will be as shown in Image 2.
button to generate all the available claims between the given dates. Once the claim generation is done, the available claim batch information will be as shown in Image 2.
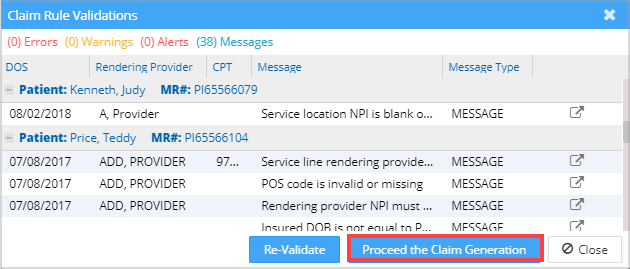
Image 2
4. Click on Proceed the Claim Generation button to complete the claim generation process.
When claim batching is completed, a confirmation message is displayed. Image 3 is a sample confirmation message.

II Claim Submission
All the electronic claims thus generated will fall in the Unsubmitted Batches bucket, and the paper claims will fall in the New Paper bucket.
Click on ![]() button (refer to Image 4) to send the corresponding unbilled EDI claims to the clearinghouse.
button (refer to Image 4) to send the corresponding unbilled EDI claims to the clearinghouse.
Sometimes EDI claims can be downloaded and uploaded to the clearinghouse by selecting the ![]() option if the clearinghouse permits.
option if the clearinghouse permits.
In the case of paper claims, you can print the same by selecting the appropriate print claim format at the bottom of the screen.