Advanced ERA Exception Management & Automated Posting
PracticeSuite ERA automation process is now enhanced to bring in more transparency to the automation process, providing detailed, real-time visibility into claims that failed during the automated ERA posting process, allowing users to view, fix, and repost claims before triggering the auto-post.
Key Features
Dedicated Exception Screen: A new, centralized interface that automatically populates with all claims with errors. Users can review and resolve exceptions before posting.
Manual Mapping & Correction: Users can manually map unmatched claims, fix discrepancies, and correct errors directly within the exception screen.
Retry Functionality: The system allows users to retry posting for a single claim or multiple selected claims simultaneously.
ERA Status Update: Upon successful retry, the system automatically updates the overall ERA status to “Posted” and updates the corresponding claim details in the charge master and reports.
Error Handling on Failure: If a retry fails, the system displays the specific error message, allowing for further troubleshooting.
Detailed Exception Report: All claims that did not auto-post will show up in this report. Each exception record includes: Check #, ERA Payment #, Claim Number, Patient Name, DOS (Date of Service), Payment Amount, Payer Claim Control Number, Exception Code, Exception Message, ERA Claim Status Code, LE (Legal Entity), and Provider.
Export Functionality: The Exception Report and Posting Detail Report can be exported to an Excel format for reporting and analysis.
Audit Trail: All user actions, including manual mapping and retries, are recorded in the Posting Detail Report.
Duplicate Payment Prevention: The system includes a guarantee mechanism (e.g., idempotency keys) to prevent duplicate payments during retry attempts.
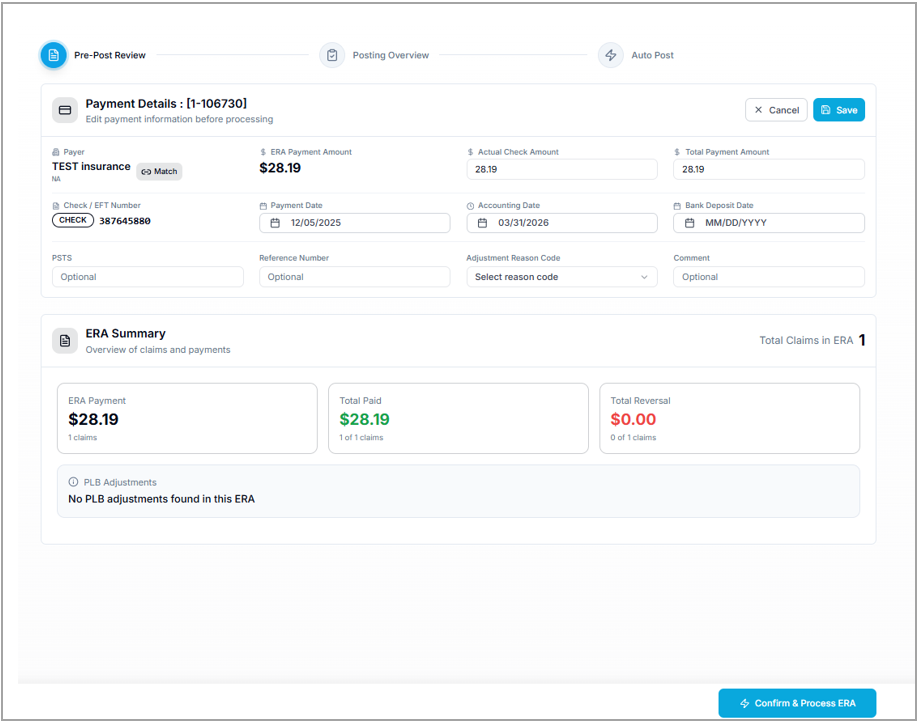
Pre-Post Review Screen
This screen contains payment information with the ERA Summary at the bottom. Users can edit the payment information if needed. ERA Summary:
ERA Payment (Number of claims and Amount)
Total paid (Number of claims and the amount)
Total Reversals (Number of claims and the amount)
PLB recoupments (Number of claims and the amount)
Click Confirm and Process ERA button to save the payment in the system. The Posting Overview screen opens.
Posting Overview Screen
The dashboard has a summary of matched claims, posted claims, and exception claims, along with the amounts. Exceptions are listed with category-based filters for quick sorting of the list.
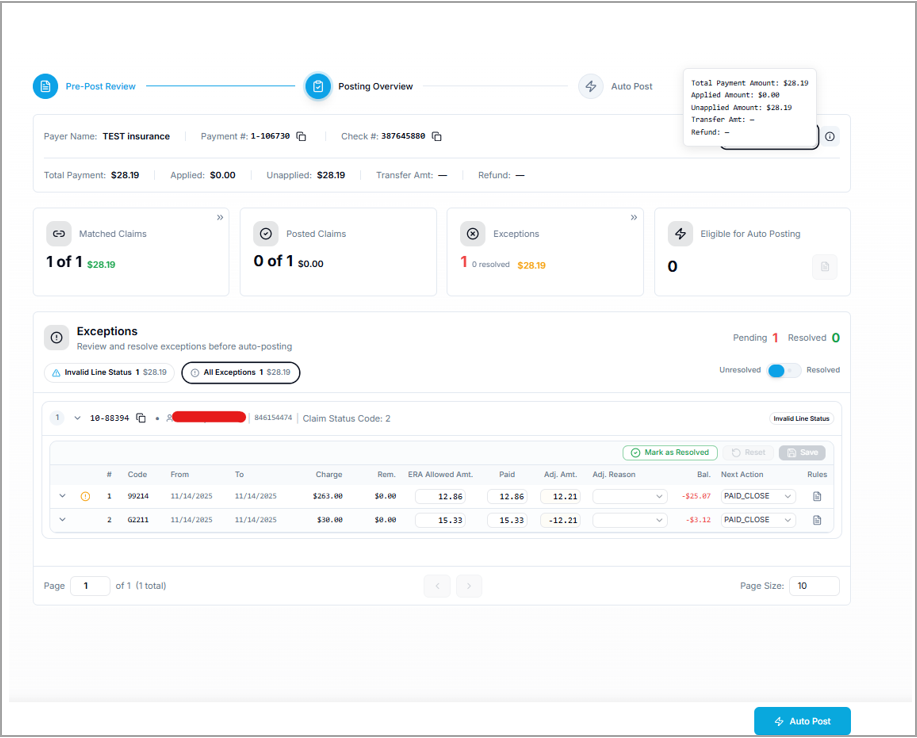
Users can edit the exceptions to remove them from the exception list.
Find guidance on managing ERA exceptions by clicking here.
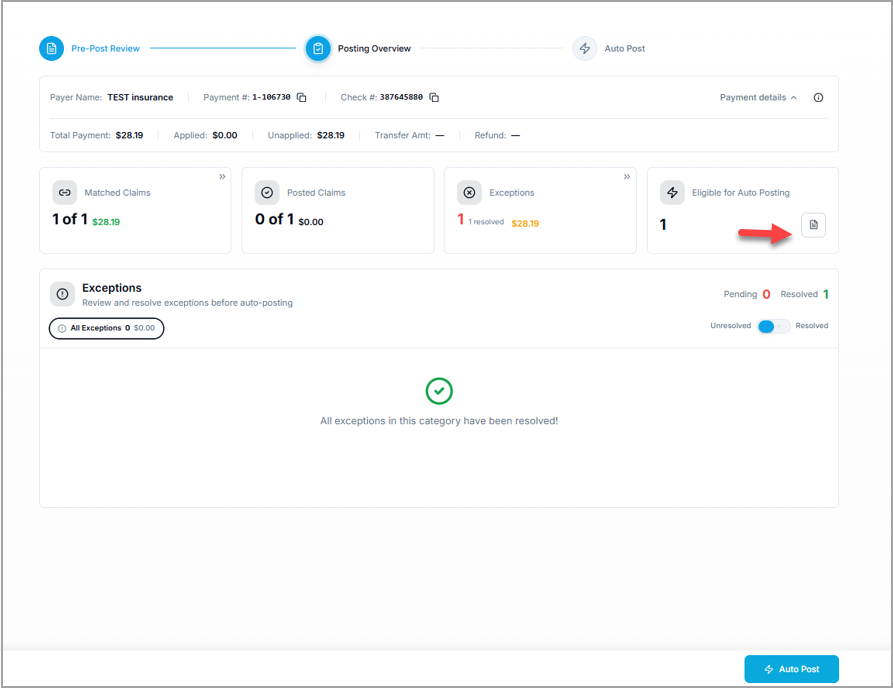
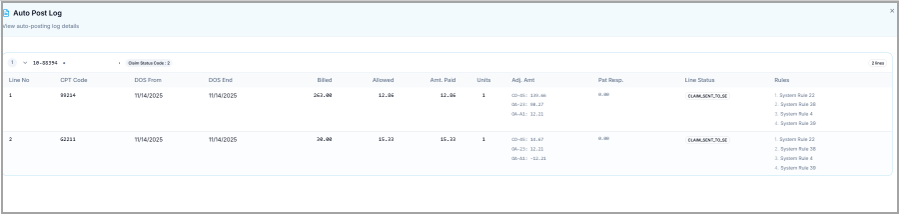
Click the Log icon (highlighted in Image 3) to view all claims eligible for posting. Image 4 shows the auto-posting log.
After reviewing, click Auto Post to complete the automation.
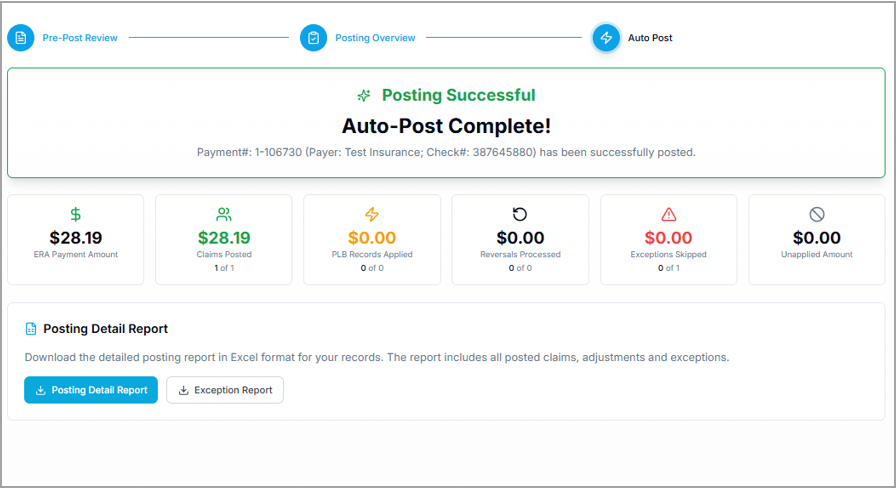
Auto Post Log
Auto Post Confirmation Screen
On clicking Auto Post, the ERA auto-post completion confirmation screen appears. The actions that can be performed on this screen are
Review Results: View the total count of processed claims on this screen.
Analyze Details: Use the Posting Detail and Exception Reports to review successes and failures.
Save/Print: Click Print Remit to generate a hard copy of the remittance advice.