Pre-authorization or precertification refers to the process by which a patient is pre-approved for coverage of a specific medical procedure or prescription drug. Health insurance companies may require that patients meet specific criteria before they extend coverage for some surgeries or certain medications. To pre-approve such a drug or service, the insurance company will generally require notes and lab results documenting the patient’s condition and treatment history.
PracticeSuite has an Authorization Desk that helps users manage prior authorizations. Select Charges from the main menu and go to the Authorization Desk. Authorizations added to the system can be viewed and controlled from this screen.
Search Filters of the Authorization Desk
| Field | Description |
| Authorized Date | Date when authorized |
| Valid Auth. From/To | To filter out valid authorizations on a date range. |
| Insurance | To filter authorizations provided by a specific payer |
| Patient | To view details pertaining to a specific patient |
| Assigned To | To filter out authorizations handled by a specific user |
| Expiring In | To filter out authorizations that expire in the specified number of days. |
| DOS | To filter out authorizations related to charges in a specific DOS range |
| Auth Status | Authorization status: New/Pending.Hold/Authorized |
| Auth # | Unique ID of the authorization |
| Include Inactive Authorizations | To include inactive authorizations along with the search result. |
| Refreshes the result |
Note: Authorizations of inactive patients are displayed in Red.
Color coding of Authorization Status
| Authorization Status | Color |
| New | |
| Hold | |
| Authorized | |
| Pending | Pending status doesn’t have a color code. |
Authorization Desk

Authorization Creation from Desk
Users can add new authorizations for patients from the Authorization Desk through the New Authorization button. To create a new authorization from the desk, type in and search for a patient using the Patient Smart Search field provided. This enables the New Authorization button. Click on the button to open the authorization screen for the patient, where new authorization information can be added and saved.
A Few Notes on the Report Columns
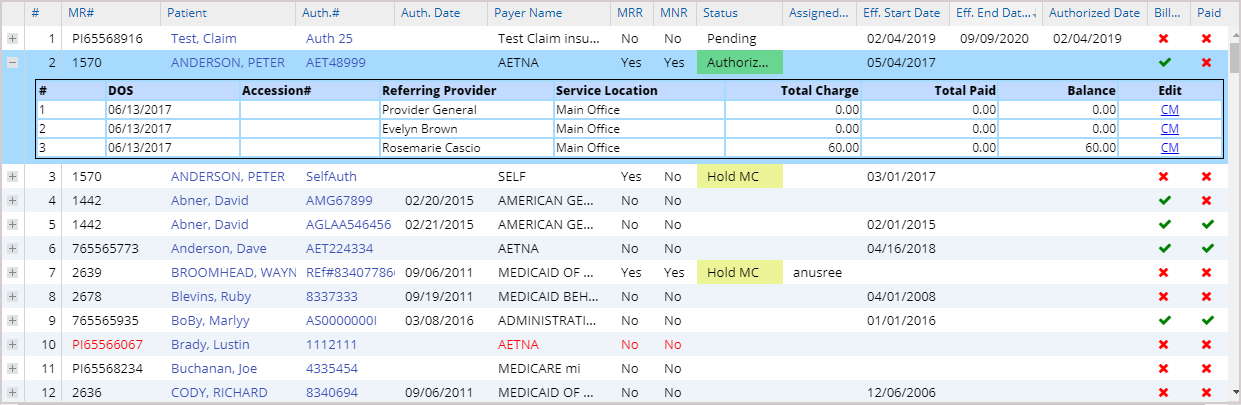
1. Patient name is a hyperlink that takes us to the patient demographics of the specific patient.
2. Auth.# takes us to the authorization screen for the patient.
3. The ![]() sign at the leftmost part of each line in the output can be clicked to view the charges under that authorization, as shown in Image 2. The encounter details can be viewed at the Charge Master screen by clicking on
sign at the leftmost part of each line in the output can be clicked to view the charges under that authorization, as shown in Image 2. The encounter details can be viewed at the Charge Master screen by clicking on ![]() link against the encounter.
link against the encounter.