Bulk Charge Upload
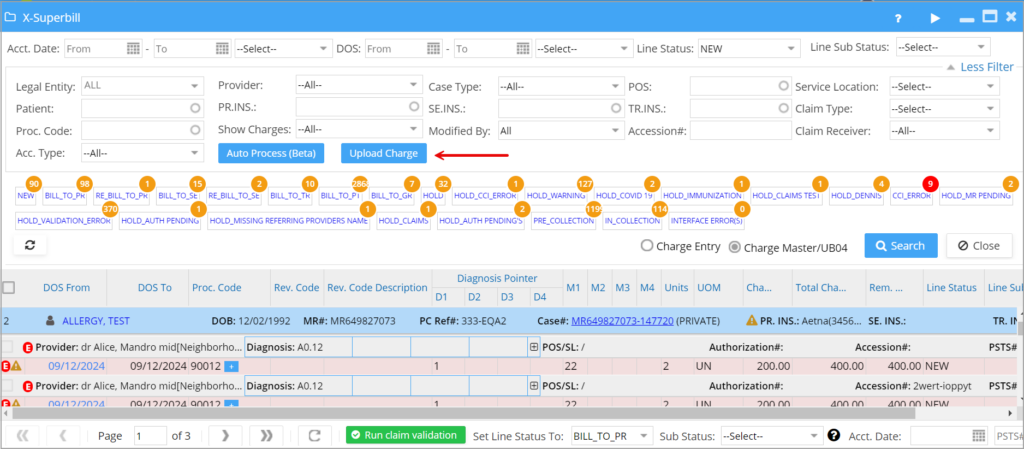
Bulk charges in CSV or Excel format can be uploaded into PracticeSuite through the X-Superbill screen.
Enabling Charge Upload Option
Practices interested in using the ‘Charge CSV/Excel Upload’ option should contact our implementation team for setup assistance.
The “Upload Charge” button on the X-Superbill screen will be enabled only for practices with the CSV/Excel upload option activated.
Requirement
The import file should adhere to the specified structure and format. All successfully imported charges show up on the X-Superbill screen in the NEW status. If there are any formatting errors in the file, the system throws a front-end error.
If any required data is unavailable in the file (such as the rendering provider in the file not being added to the provider list), it would not import that row from the charge file, and such post-processing errors can be seen in the E9. Interface Log Report.
How to Upload
1. Go to the X-Superbill screen and click on the ‘More Filters’ button. Click on the ‘Upload Charge’ button now visible on the screen.
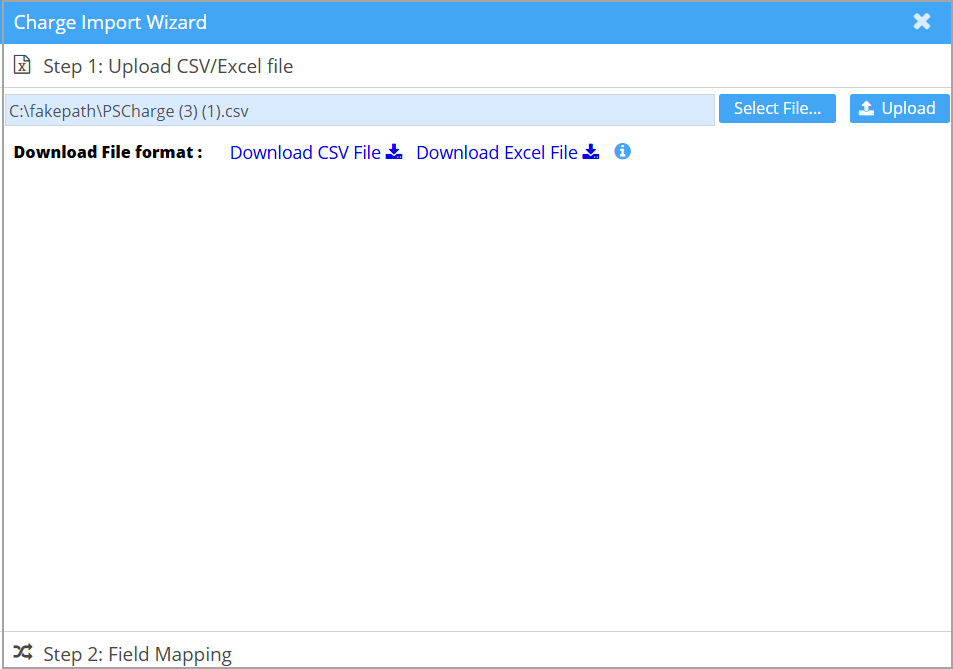
2. The charge import wizard opens up. To get the sample file, click on the ‘Download CSV’ or the ‘Download Excel’ button. The PracticeSuite CSV/Excel template file is downloaded. Import data from the file into the PracticeSuite Template file.
3. If the file is in the required format, select the file using the ‘Select’ button.
4. Upload the file into the system using the ‘Upload’ button.
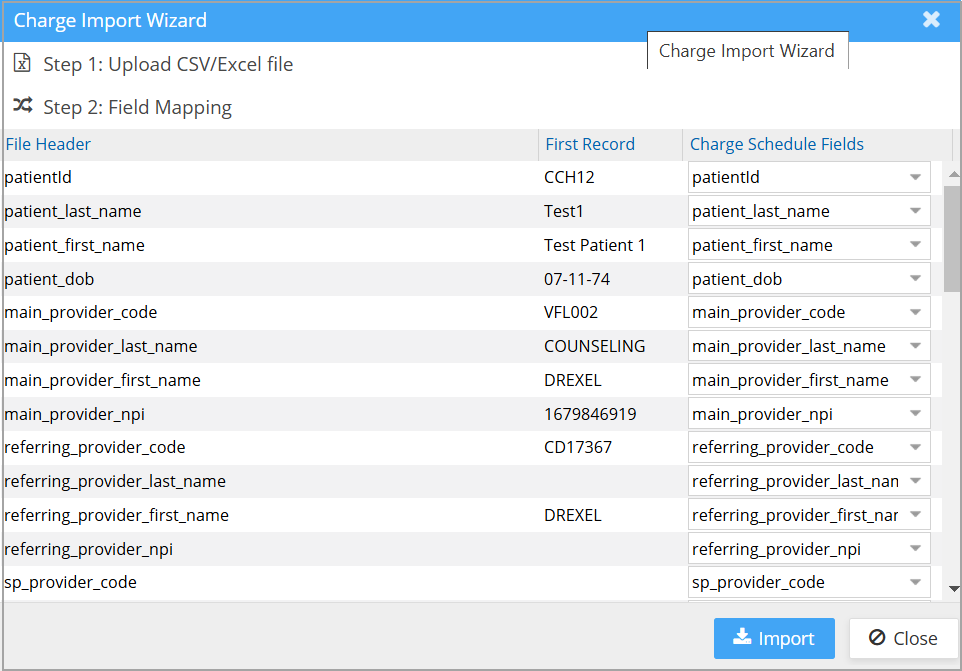
5. The next step in the process is field mapping, where fields in the file are to be mapped to the corresponding fields in the template file.
6. Finally, click on Import to complete the process.
7. On successful upload, the charge will be reflected in the X-Superbill screen.
Key points to be noted for Charge Upload
1. If an encounter ID and line unique ID are not provided, the system will use a combination of patient ID, provider code, and Date of Service.
For example:
Patient ID: 2234
Provider Code: V003
Date of Service: 04/22/2024
The encounter ID will be formatted as 2234V00304222024, and the line ID will be 2234V00304222024.0.
2. Line-level provider info can be included in the charge upload file (Excel and CSV formats) using a provider code.
Newly Added Fields to the Template File
- DOS from and DOS to fields


