

Claim Scrubbing in PracticeSuite
PracticeSuite, in association with CMS Pricer, has the real-time CCI edits claims scrubbing feature implemented.
Screens Where CCI Validation is Currently Available
A. Charge Entry
B. Charge Master (Edit Charges)
C. Claims Workbench.
D. XSuperbill
How to Set Up CCI Validation with CMS Pricer
Setup is done from Setup -> Practice -> Practice Options. Contact our team to enable the real-time CCI edits scrubbing feature for the claims.

CCI Validation from Charge Master and Charge Entry
The workflow to run the claims validation rule from both the Charge Entry and Charge Master screens will remain the same. If claim validation with CMS Pricer is enabled for the practice, the system will validate claims using both the internal rules and CMS Pricer. CE and CM screens will show the errors from CMS Pricer, followed by internal validation errors. The same applies to the XSuperbill screen.
CCI Error Bucket in Claim Workbench
Claims Workbench has a new bucket to include all the encounters that have validation errors at the time of claim generation.
This bucket is only available to accounts that have CMS Pricer enabled.
Workflow
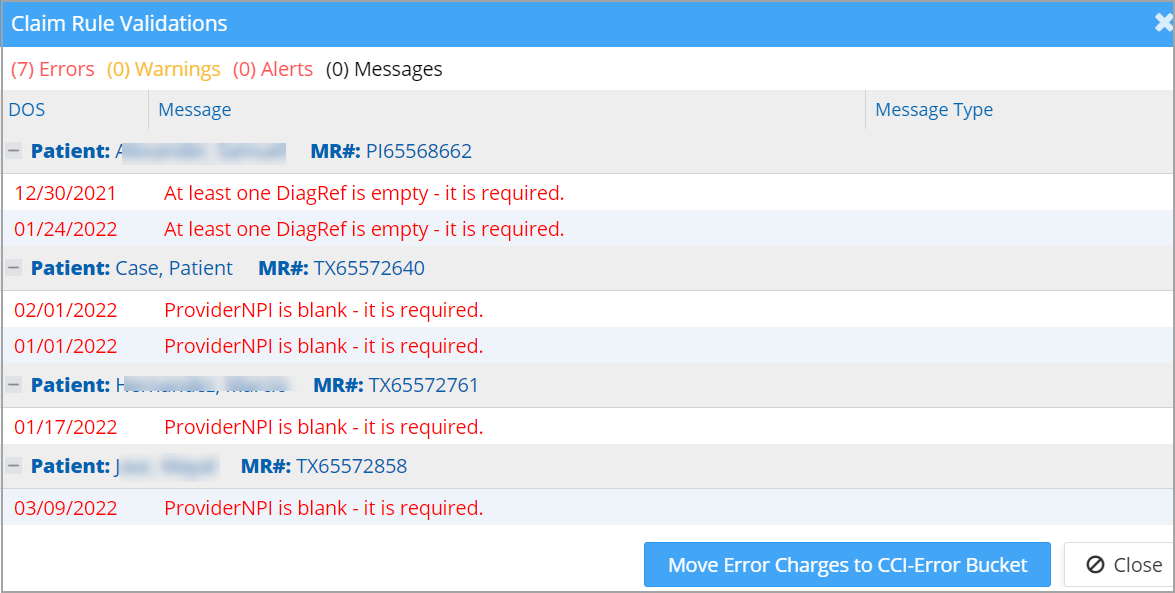
While generating the claims from the Ready to Submit Bucket, when the user checks the Run Claim Validation check box, a Claim Rule validation pop-up appears with errors, warnings, and messages of the encounters submitted; see Image 2.

| Action | Checkbox Status | Result (Encounters with Errors) | Result (Other Encounters) | System Update |
| Click Proceed the Claim Generation | Moved to CCI Error Bucket | Generated as claims | Line Status → HOLD. Line Sub Status → CCI Error | |
| Click Proceed the Claim Generation | Generated as claims (not moved to CCI Error Bucket) | Generated as claims | All claims will have the Claim_SENT_TO status |
CCI Validation in XSuperbill
Users can select the claims and hit the Run claim validation option, and any claims that have errors are moved to the CCI_ERROR list. Note that the error count is displayed in red to quickly identify the errored claims. Please see Image 3.
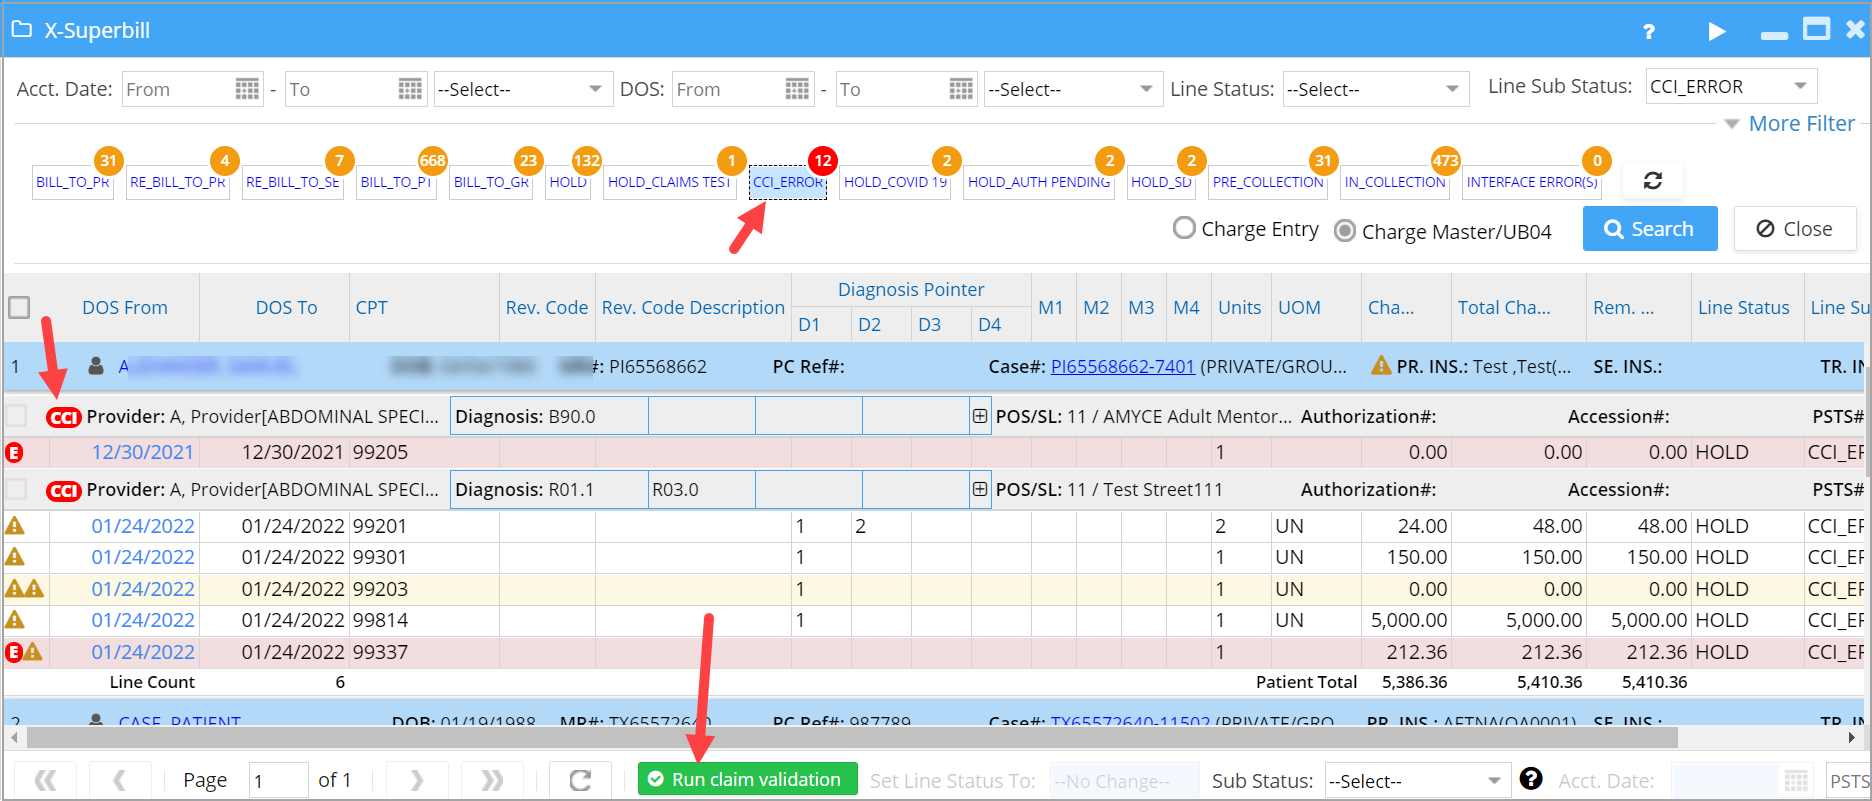
A. On the validation popup screen, click on the “Move Error Charges to CCI-Error Bucket” to move all charges with errors to the CCI_ERROR list in the Claims Workbench (Submit Claims); see Image 4.
B. Click on the CCI_ERROR bucket to list the validated claims with errors. The ![]() icon beside the provider name in the charge listing will show the errors on mouseover (refer to Image 5).
icon beside the provider name in the charge listing will show the errors on mouseover (refer to Image 5).
