

Configuring User Access
In PracticeSuite, once a user is created with appropriate admin, legal, and accounting rights, access configurations for the user need to be set up. The configuration has mainly two components. They are
1. Remote Access configuration
2. Menu access configuration.
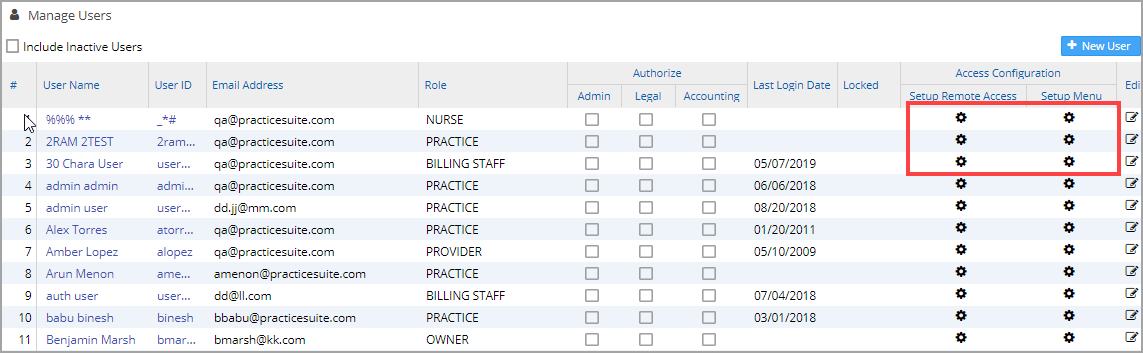
They are represented by gear icons, as highlighted in Image 1.
1. Remote Access Configuration
Remote access for a user needs to be configured to restrict the time and days on which a user can access the system remotely. Moreover, IP addresses can be given to restrict a user to those machines while accessing the system remotely. On clicking the Setup Remote Access gear icon ![]() , the screen, as in Image 2, shows up.
, the screen, as in Image 2, shows up.
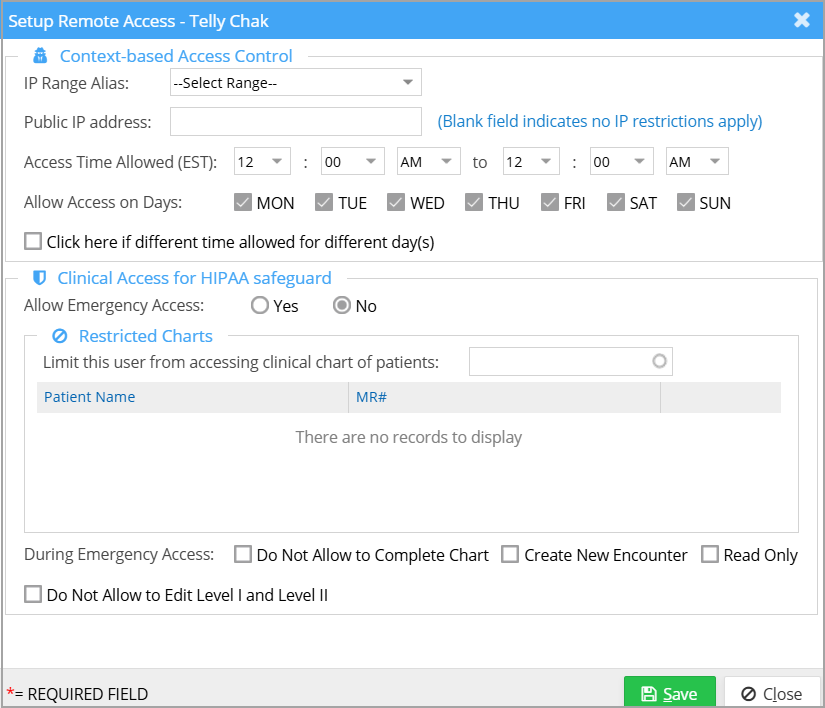
a) Context-based access control
i) From the IP Range Alias drop-down menu, select PRACTICE_ALLOWED_IP_RANGE to apply practice-level IP permissions to the user (practice-level IP permissions can be viewed at Security → Preferences screen). If the option is left at Select Range, it allows the administrators to enter the specific IP addresses in the Public IP Address field.
If ‘Public IP Address’ field is empty, the user can access the system from any IP address without any restrictions.
ii) To enable time- or day-based access for the user
Set the Access Time Allowed for the user using the Time Allowed From and Time Allowed To boxes.
From the Allow Access on Days menu, select the days on which remote access is allowed. To prevent access on any particular day, leave the checkbox corresponding to the day unchecked.
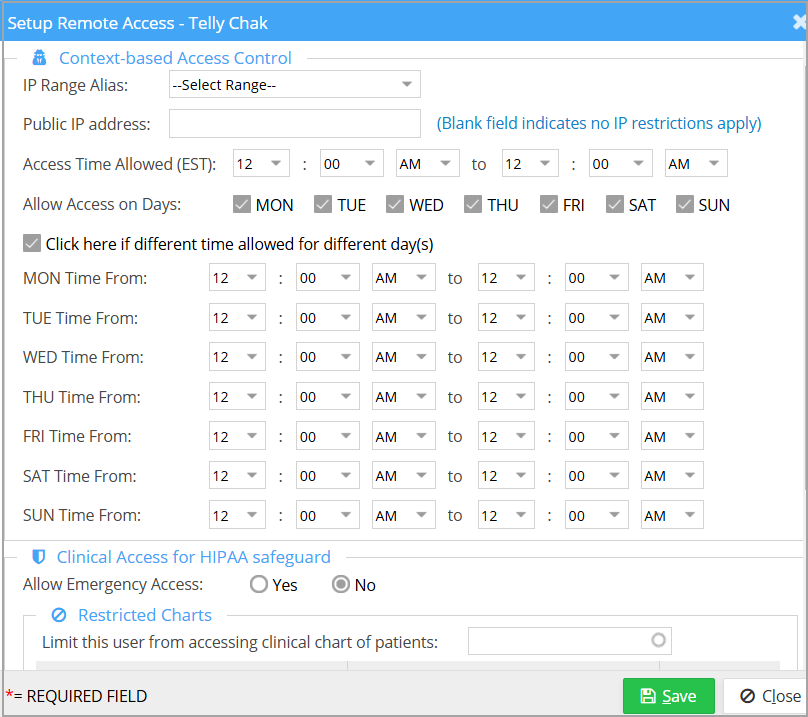
If remote access timing varies for different days, then select the checkbox Click here if different time allowed for different day(s). A list of days will be displayed below, with the option to set individual timings for each day as shown in the image below. Set different access times for the user using the options provided.
b) Clinical Access for HIPAA safeguard
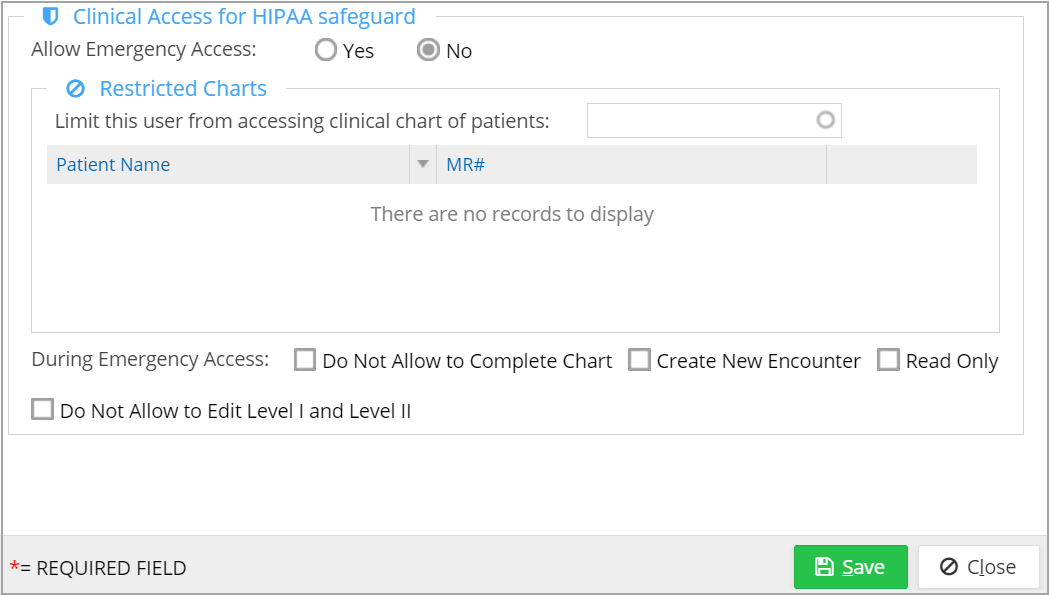
PracticeSuite provides the option to restrict user access to certain patient charts.
Restricted Charts: Here we can limit the user to clinical charts of certain patients. The patients can be selected by typing the first three letters of their last name in the field provided in Image 4. A drop-down appears from which the patient can be selected. Any number of patients can be added to the list. To remove a patient from the list, click on ![]() button corresponding to the patient.
button corresponding to the patient.
Allow Emergency Access If this option is set to Yes, then the restricted user can be given access to a restricted patient chart in case of an emergency after validation.
Do Not Allow to Edit Level I and Level II: This can be used to restrict users from editing the EHR Level-1 and Level-2 components. The system throws a warning when the user tries to edit any of the L1 or L2.
After entering all the necessary information, click on the Save button. The remote access for the user gets configured.
2. Menu Access Configuration
Menu access permissions for a user are set according to the role of the user in the system. The role is specified at the time of creating the user. Further permissions/restrictions can be given by Setup Menu Access gear icon ![]() in the Manage Users page. On clicking
in the Manage Users page. On clicking ![]() corresponding to a user, the screen as in Image 5 opens up.
corresponding to a user, the screen as in Image 5 opens up.
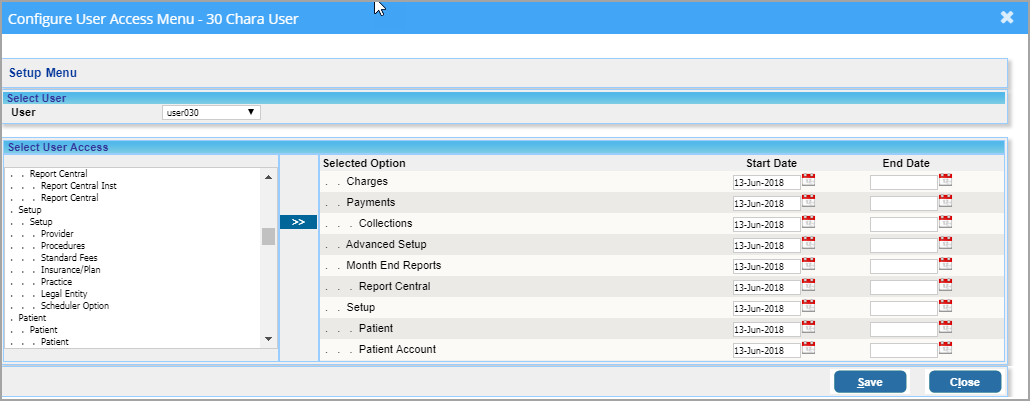
The left pane displays the main menu and the sub-menus. The permitted menu options for the selected user are given on the right. Start Date displays the date on which the menu access was given. End Date can be given (optional) to specify the date to which access is given. Select the menu displayed on the left side and click the assign button ![]() to assign the menu to the user. When assigning the Start date, it defaults to the current date. Provide an end date if menu access is to be given for only a certain period, and click on Save.
to assign the menu to the user. When assigning the Start date, it defaults to the current date. Provide an end date if menu access is to be given for only a certain period, and click on Save.