![]()
Creating Your Patient Portal Login ID
There are two ways you can get your login ID created for Patient Portal.
Method 1: From the Portal Login screen by clicking the ‘New Appointment request‘ button- This way you could schedule an appointment and get your login credentials created in one go.
Method 2: By Contacting Your Clinic and requesting for portal access- The clinic would enable the portal access for you. You would thereafter receive an email from the practice containing your temporary login ID and password. Follow Step 7 onwards mentioned below to complete the login ID creation.
Method 1: From the Portal login Screen
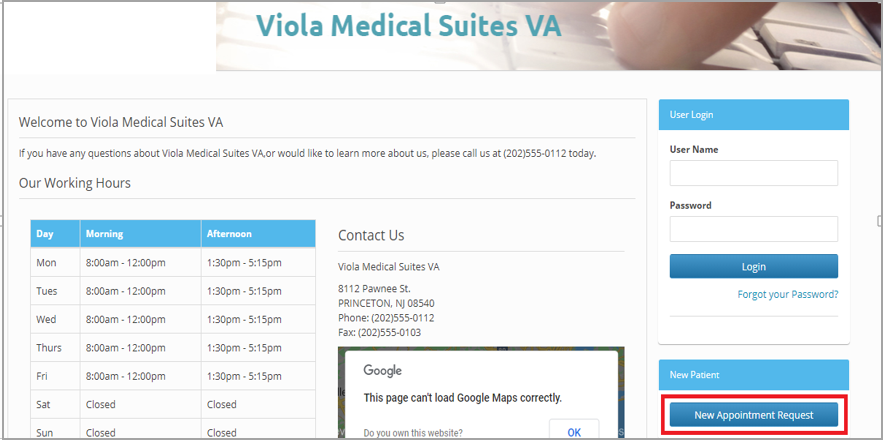
1.On the Login URL, click the “New Appointment Request” button highlighted in the Image below.
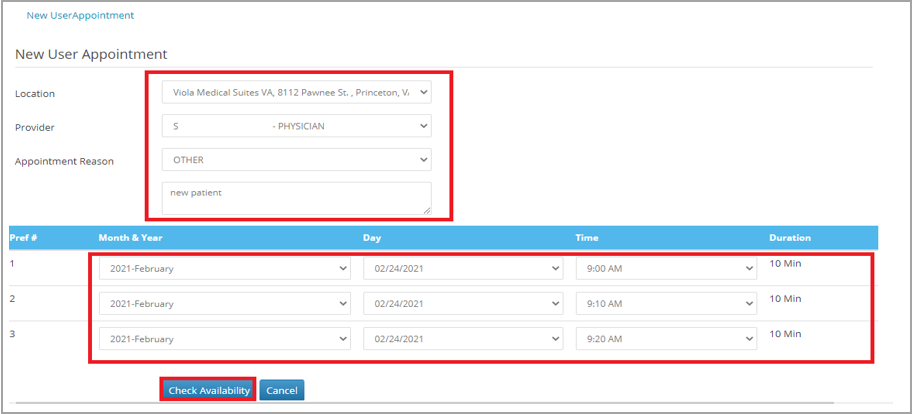
2. The below page loads. Select Location, Provider and Appointment Reason from the dropdowns provided. Also, give three dates preferred for appointment with different timings. Click “Check Availability” on the bottom of the page.
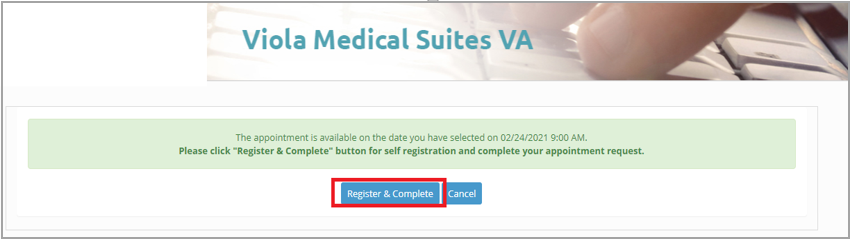
3. The following message pops up, click “Register & Complete”.
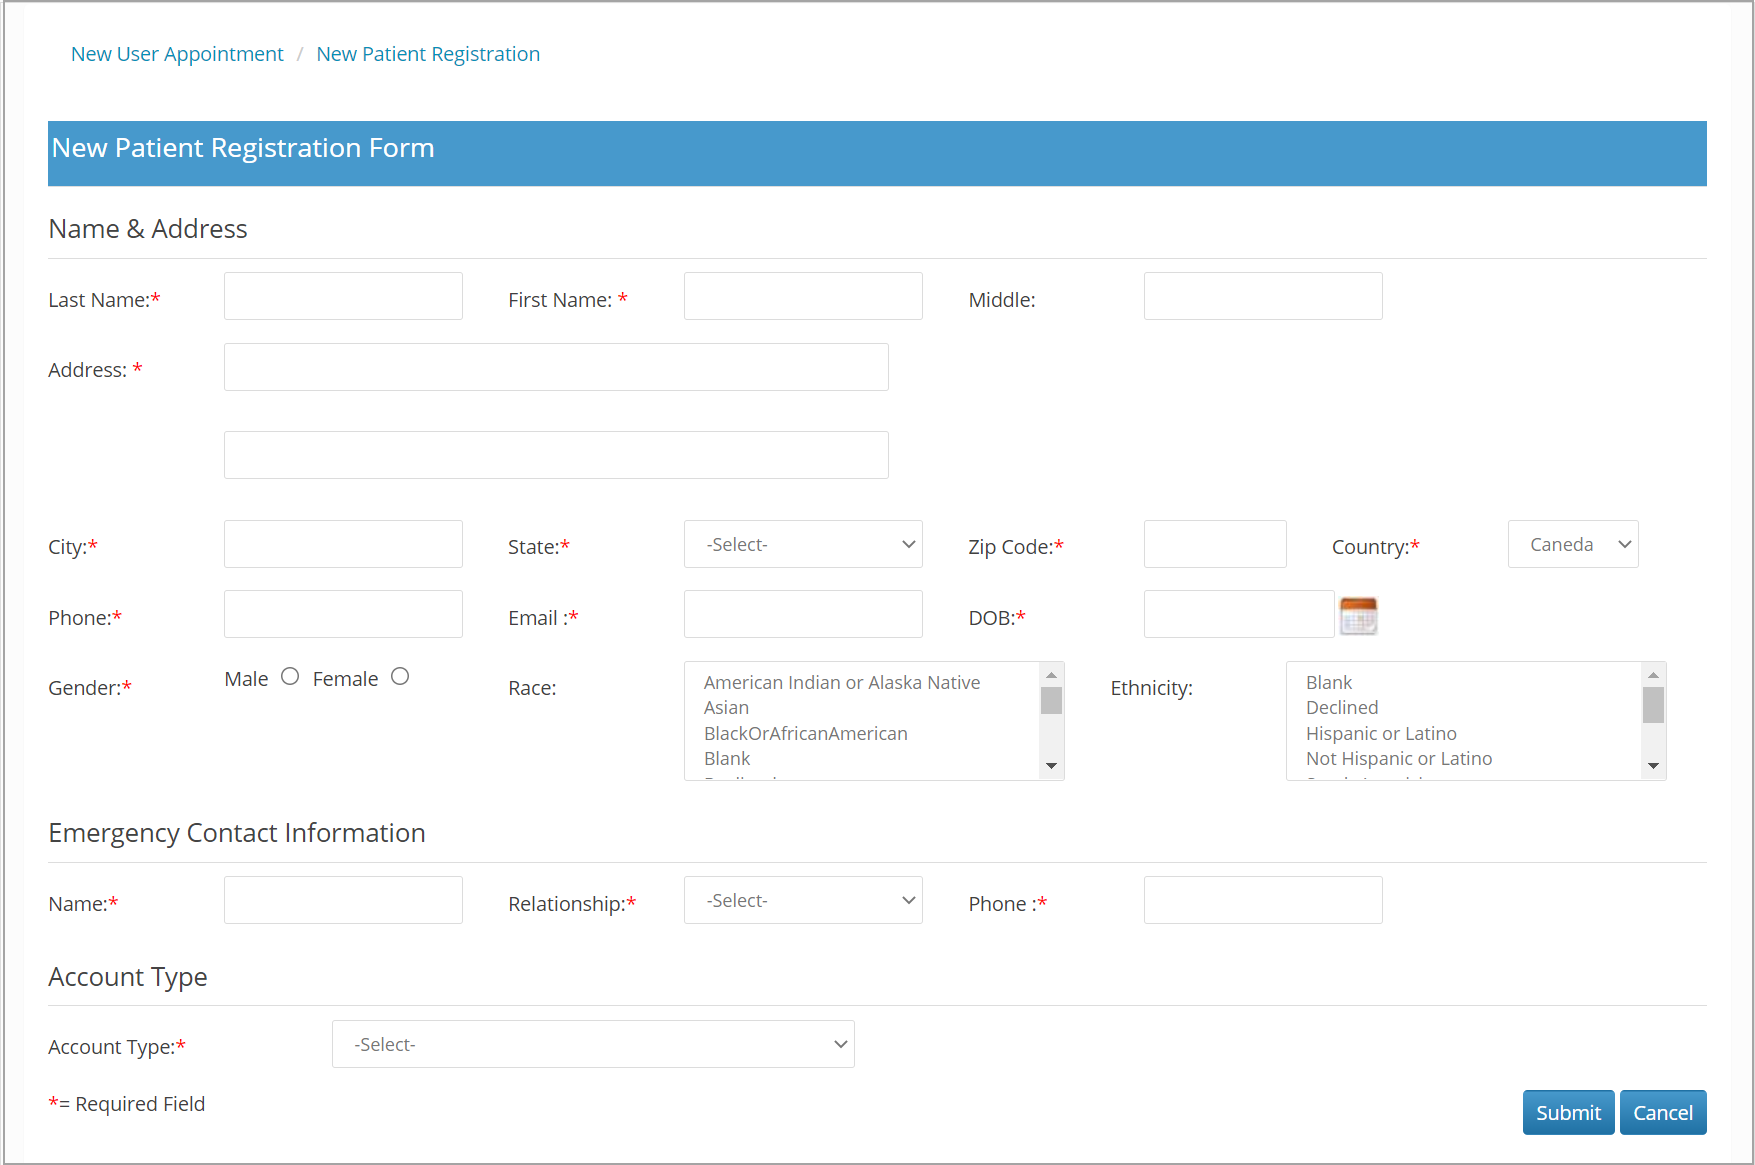
4. Fill all the mandatory fields of “New Patient Registration Form” and click on Submit.
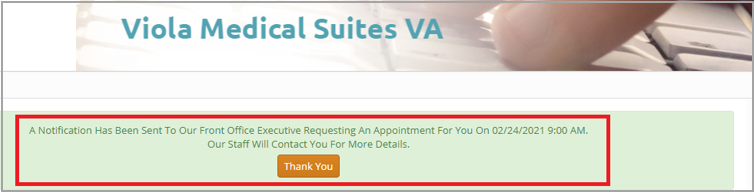
5. A “Thank You” message will appear as shown below. After this you will have to wait to receive an e-mail from Practice which will provide you the information to Login in to Portal.
6. The e-mail you receive will have the Portal URL, User name and Password to login to Patient Portal. Please check the spam/Junk folder of your mail as well in case you do not receive the mail in your Inbox.

7. You can now login to the patient portal website by using the credentials received through email.

8. Patient logging in for the first time will find the below Consent form that they need to acknowledge.
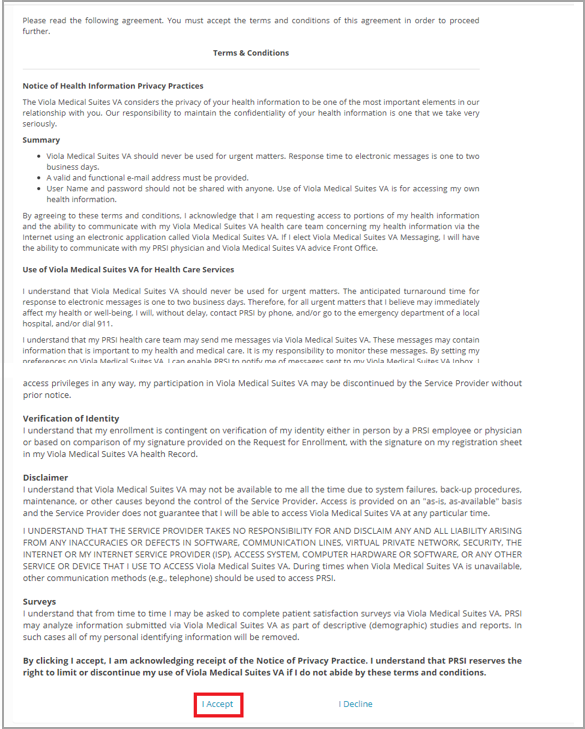
9. Click on I Accept option and click Continue on the following page.

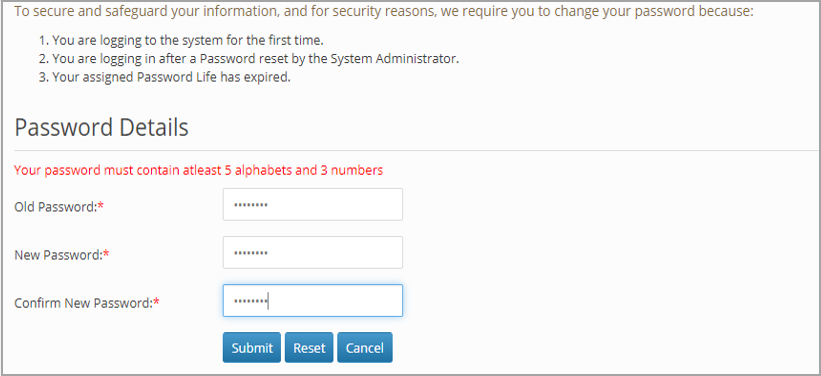
10. For users logging in for the first time, the system will request for password change if the password was set from the Practice end. Provide the new password and click Submit.
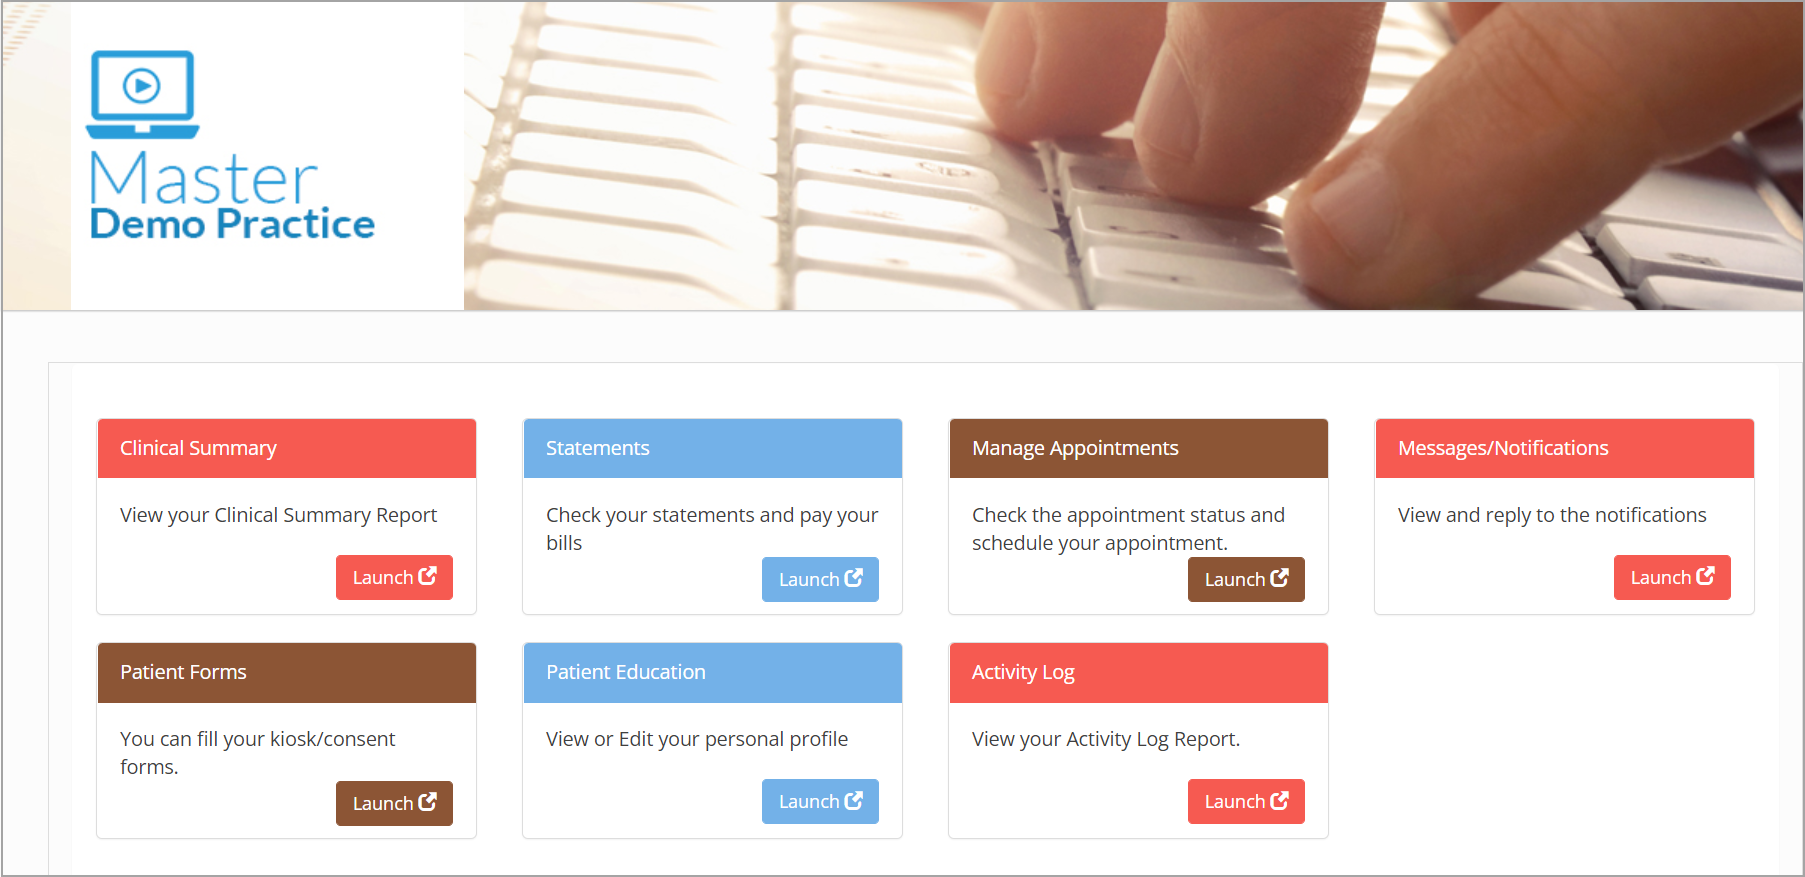
9. The following page shows that the Patient is now logged in.