

Lookups
Lookups are used to populate the different drop-down options in the software. There are two types of Lookups- Common Lookups and Billing Lookups. Although lookup values are added and updated in the same way, some lookup values have special features added to support the related modules.
Adding a Lookup Value
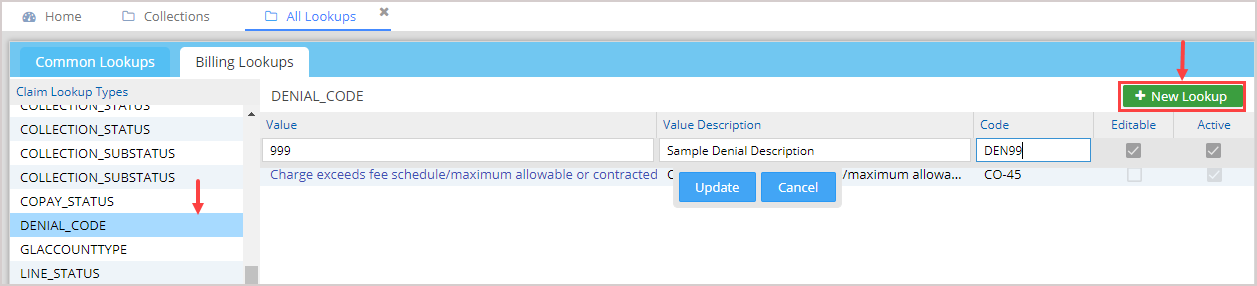
Select the item on the left and click on New Lookup. After entering the required information, click Update to add the new item. The screenshot below shows adding custom denial codes apart from those available in the repository.
Removing a Lookup Value
Uncheck the checkbox Active to remove the item from the Lookup.
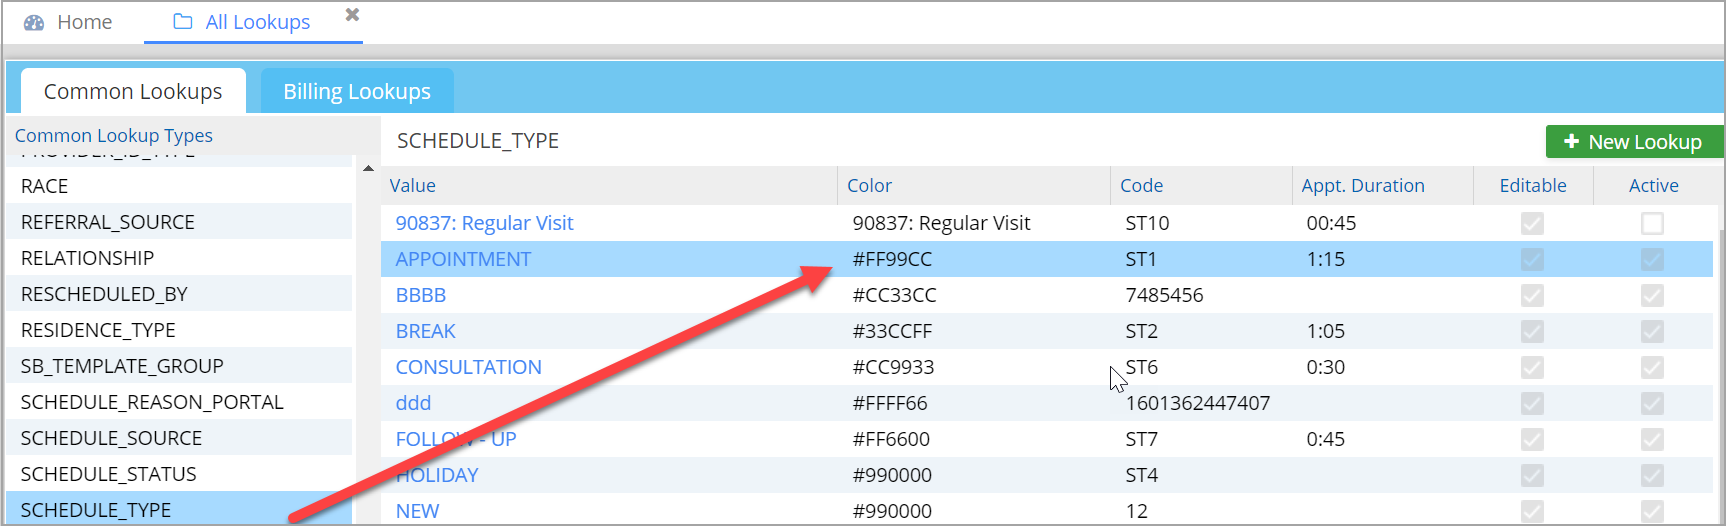
1. Color Picker for Schedule Status and Schedule Type
The Schedule Status and Schedule Type lookups include a color picker, allowing users to assign specific colors to each value. This feature is accessible both from the All Lookups screen and the Scheduler screen, enabling consistent color coding across the system.
2. Character Restrictions for Line Substatus
When creating a new Line Substatus, special characters are not allowed in the Value, Value Description, and Code fields. Only underscores (_) are permitted to ensure standardization and data integrity.
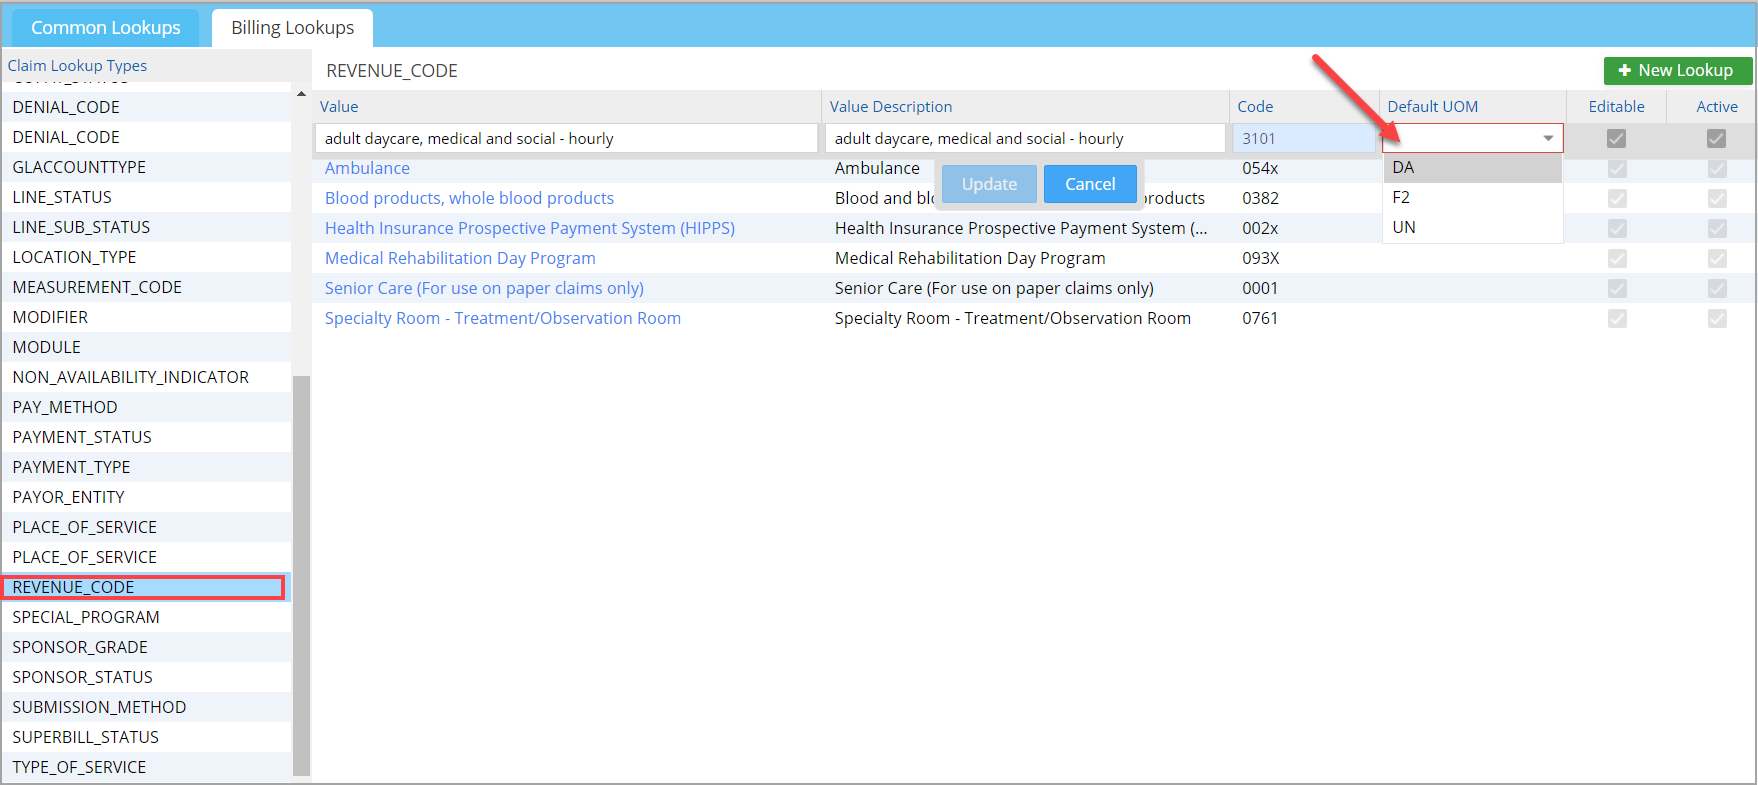
3. Add/Edit Revenue Codes
New Revenue Codes can be added or edited from the Billing Lookups screen. This allows users to manage billing-related codes without leaving the lookup section. The default unit of measurement (UoM) for a revenue code can also be saved in the Rev. Code lookup.
4. Adding HOLD-Type Substatuses
Users can add HOLD-type substatuses directly from the Billing Lookups screen. This enables better control over billing status management through centralized configuration.

5. Mapping Collection Statuses and Substatuses
Collection substatuses can be linked to specific collection statuses to control which substatuses appear in the Collection Manager screen.
From Billing Lookups, select a Collection Substatus from the left panel.
Use the Collection Status multi-select combo to assign one or more collection statuses to the substatus.
Only the linked substatuses will be shown when a collection status is selected.

6. Adding Work Queue Statuses
New Work Queue statuses can be added from the Billing Lookups screen. Select WORKQUEUE_STATUS, add the new entry, and save it to include it in the available status list.
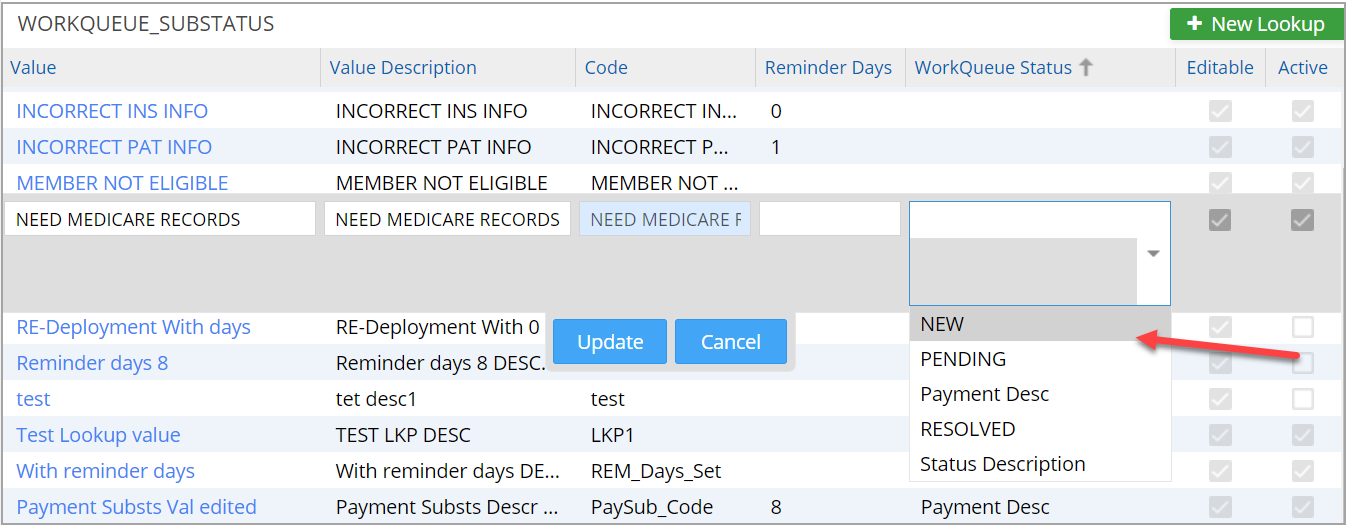
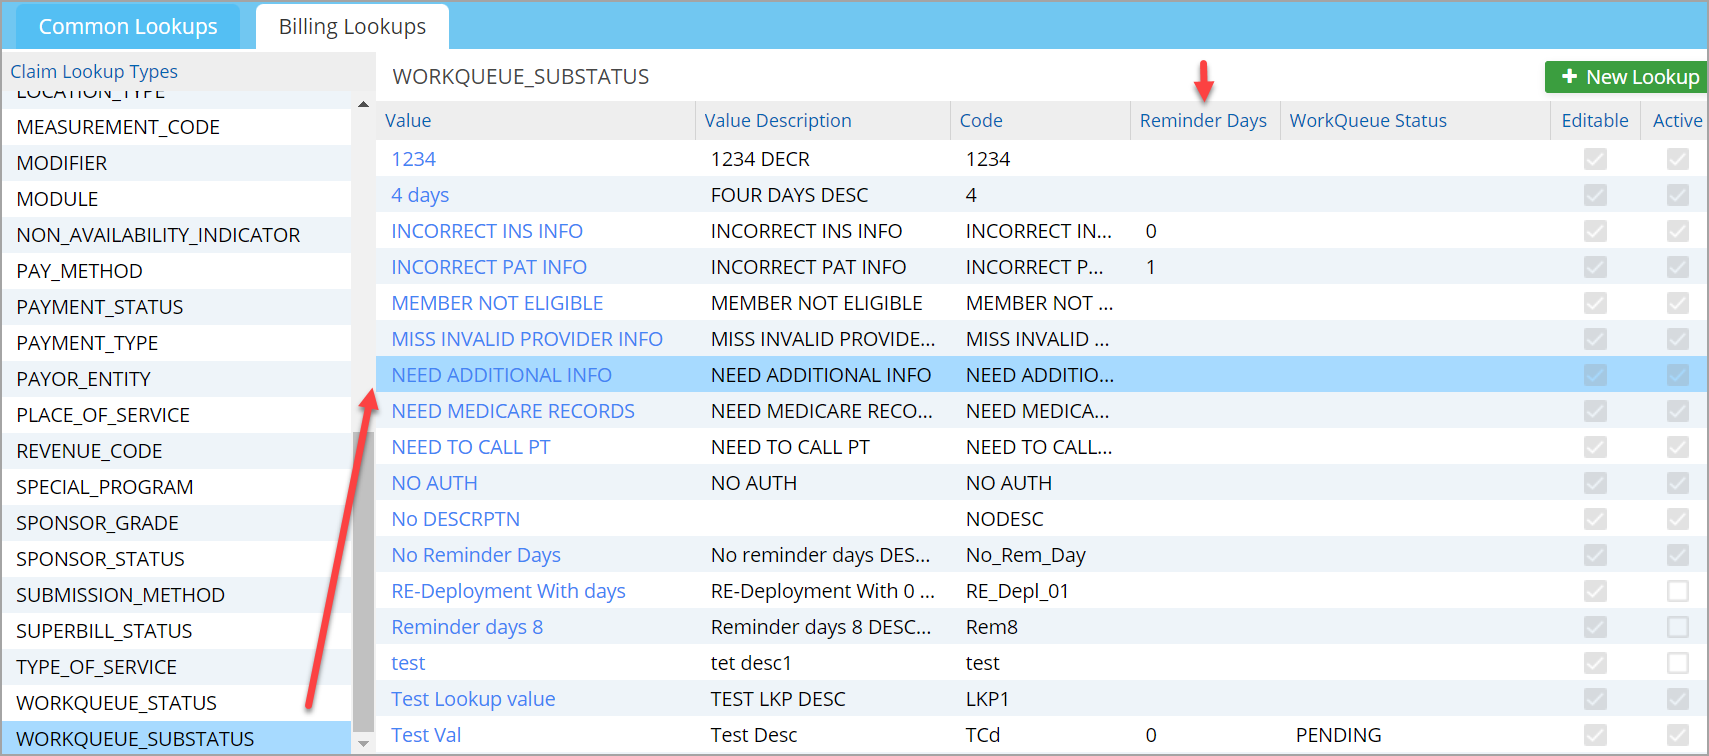
7. Linking Work Queue Statuses with Substatuses
Work Queue substatuses can be associated with one or more statuses using a multi-select combo.
From Billing Lookups, select a WORKQUEUE_SUBSTATUS from the left panel.
Use the WorkQueue Status multi-select combo to assign one or more collection statuses to the selected substatus.
This mapping ensures that only relevant substatus options are shown for each substatus.
8. Setting Reminder Days for Work Queue Substatuses
Reminder days can be configured for each Work Queue substatus:
From Billing Lookups, select a WORKQUEUE_SUBSTATUS from the left panel.
Use the Reminder Days field to assign the reminder days.
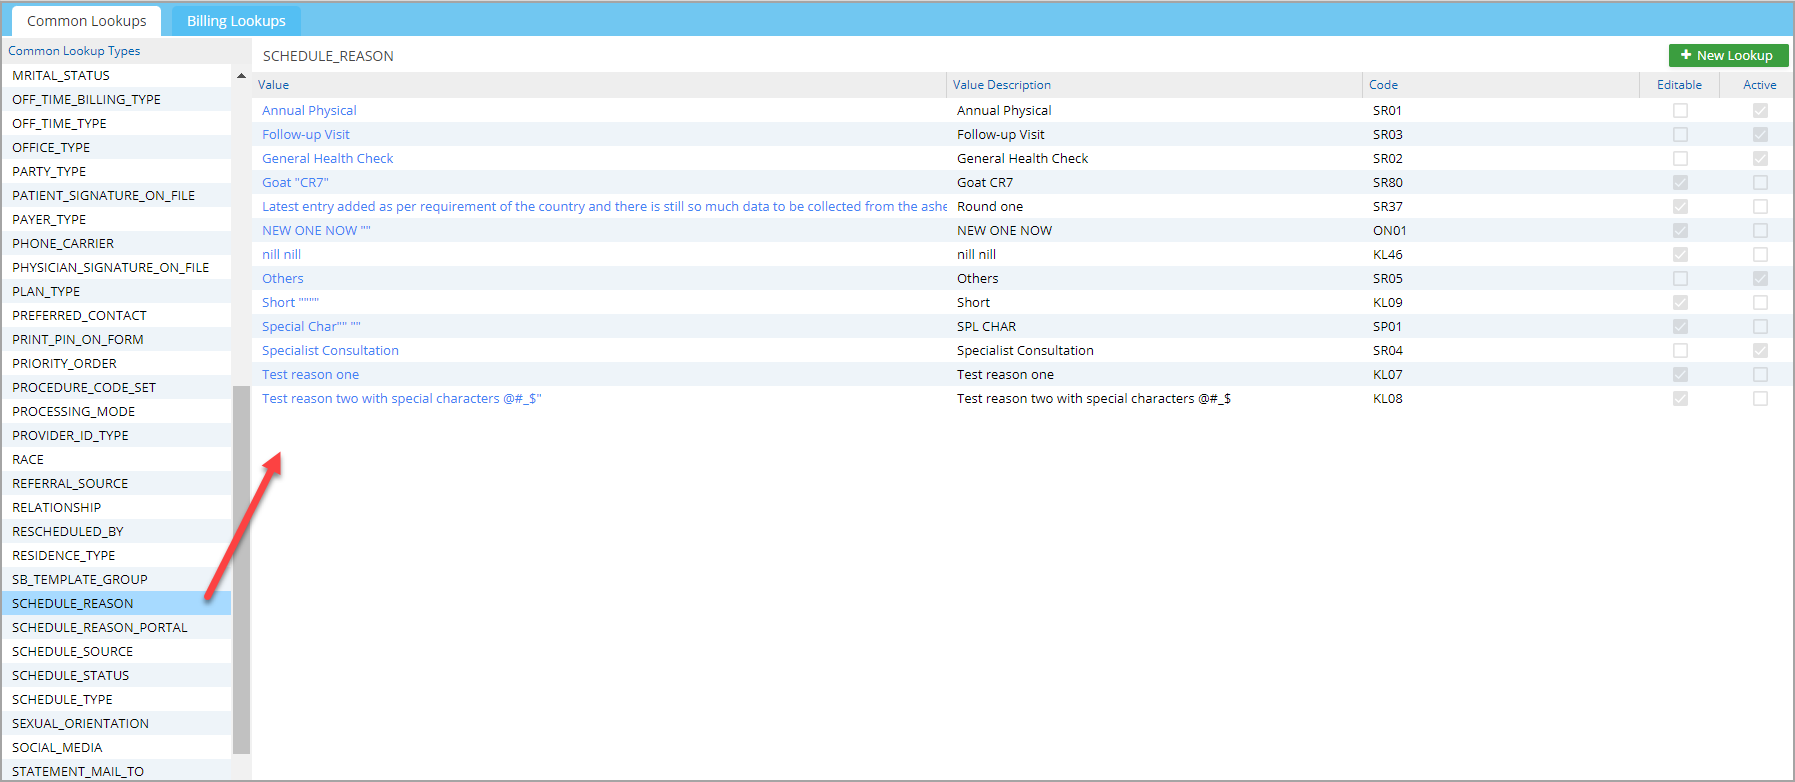
9. Appointment Reasons via Lookup
A new lookup type called Schedule Reason allows users to configure appointment reasons through the lookup list. To enable:
-
Go to Scheduler Options
-
Enable the checkbox labeled “Show Schedule Reason From Lookups”
Once enabled, the appointment reason field will list values defined in the Schedule Reason lookup.
10. Custom Payer Types
Users can define custom payer types and map them to standard types through the Payer Type lookup:
-
Go to All Lookups → Payer Type
-
Use the Type field to map each custom payer type to a standard type