

Physicians must verify each patient’s eligibility and benefits to ensure they receive payment for the services provided. The primary goal of eligibility verification is to prevent claim denials, minimize payment delays, streamline back-end processes, and improve patient satisfaction.
Below are the steps involved in configuring eligibility verification.
1. Select Setup from the main menu and then choose Practice. Select the required practice from the list shown on the left for which eligibility verification functionality needs to be configured. Now click ![]() button on the top right part of the screen.
button on the top right part of the screen.
2. Click on the Eligibility tab of Practice Options, and the following screen opens up.
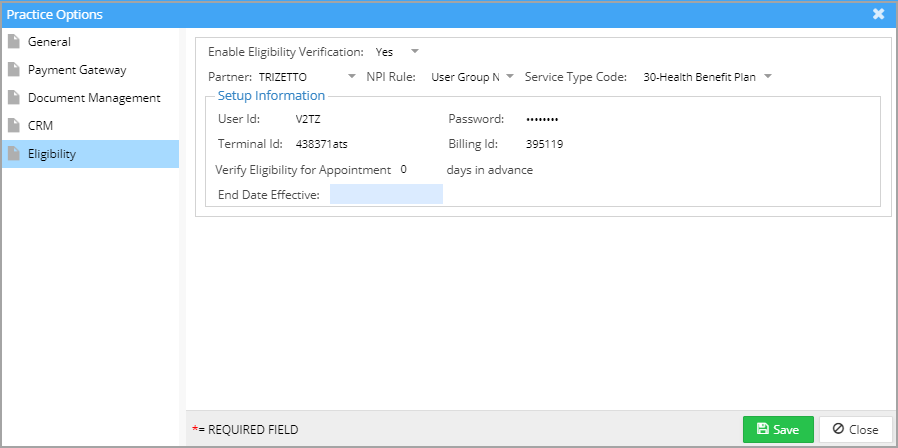
The following are the fields in the Eligibility tab.
Enable Eligibility Verification: If the practice requires eligibility verification by a clearinghouse, set this option to YES, and a drop-down appears for selecting the clearinghouse. If set to NO, the practice will not be able to do eligibility verification.
NPI Rule: Select the rule to be applied in verification.
Service Type Code: Select the service for which the eligibility is to be verified.
Setup Information
The fields in the Setup Information box, such as User Name, Password, Terminal ID, Billing ID, etc., are credentials provided to the practice for accessing the clearinghouse server for eligibility verification.
Verify Eligibility for Appointment: If automatic verification of eligibility is required, set the number of days before the appointment when the verification is to be done.
End Date effective: The date on which automatic verification of eligibility is to be stopped.