

Workflow for Providers is described below. The following steps indicate just one of the many ways in which PracticeSuite can be tailored to suite your practice requirements.
Step 1: Provider checks the ‘Ready for Exam‘ tab to view patients reviewed by clinical staff and ready for examination; Picks up the patient with the earliest appointment time. Patient’s chart opens up. Provider while in their private office, can review
A. Previous Progress Note (if applicable)
B. Face Sheet
C. Vital Signs
D. Testing performed by clinical staff today- Example (Sore throat- Staff ran Rapid strep screen as this is their protocol)
E. Past Testing that had been performed
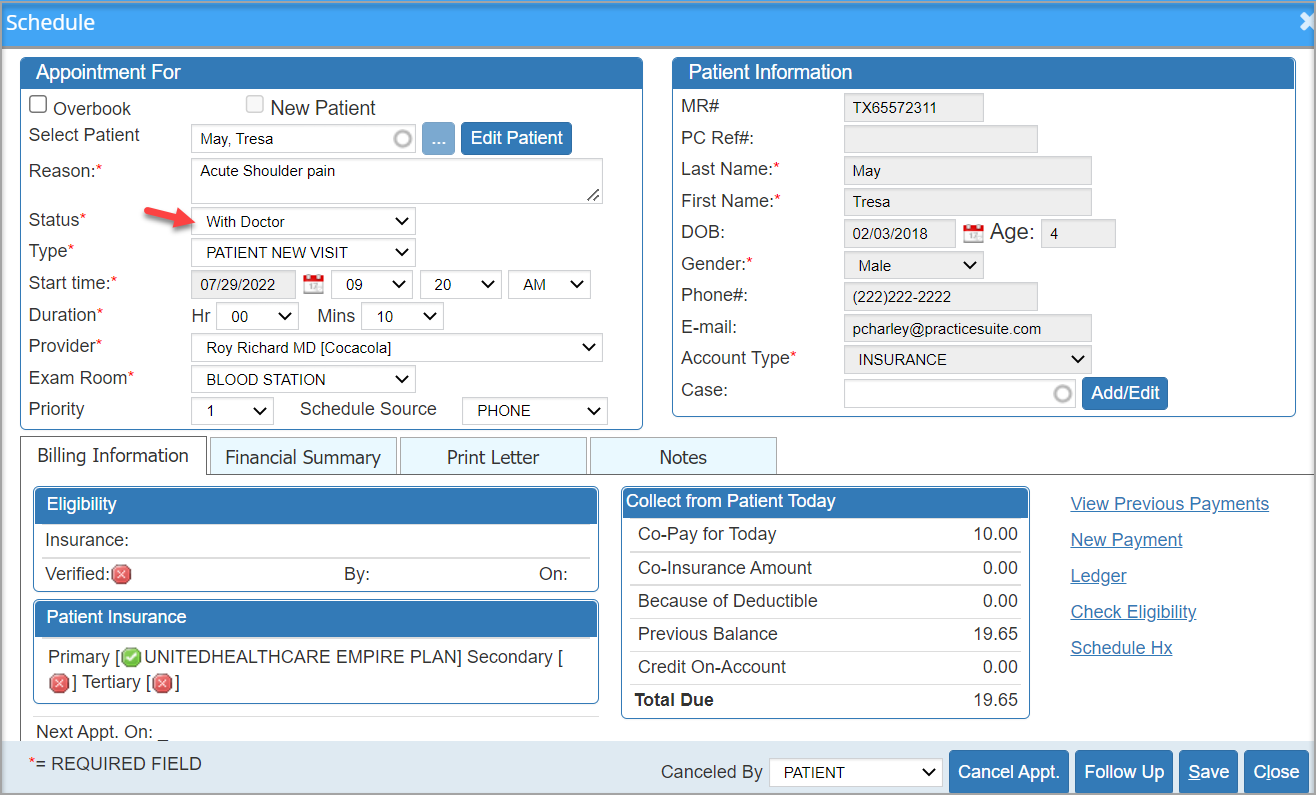
Step 2: When Provider enters room for patient consultation, change status to ‘With Doctor’. To do this, Go to Scheduler, click on the patient and change the status. This can be done by front staff, clinical staff or the providers themselves.
Step 3: Provider discusses with patient the reason they are there with patient, to gather information from them.
Step 4: Provider updates HPI, Vitals, and ROS accordingly.
Step 5: Provider proceeds to do the Physical for the visit.
**Physical aspect may be a full physical if required or maybe just the body system that may be affected by the present illness. For example if the patient has a sore throat, Doctor would do Ears, Eyes, Nose, Throat, and usually Respiratory system. They may also do Skin(Dermatology) to look for rash that can be present with Strep throat.
Step 6: Provider will document physical findings.
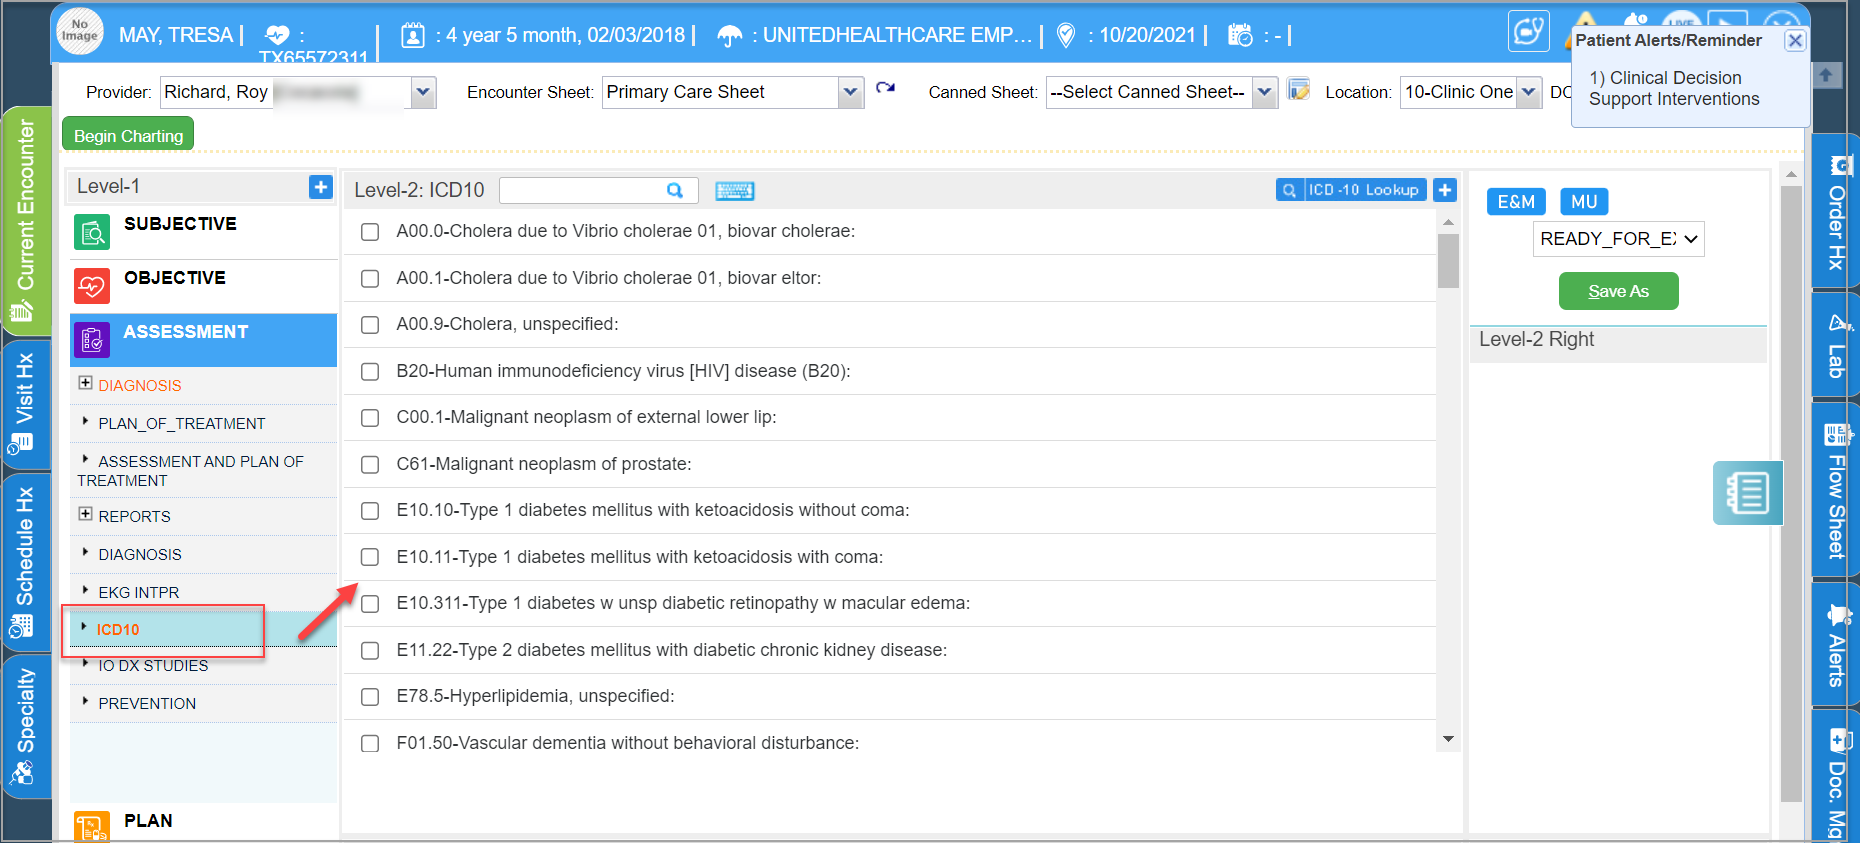
Step 7: Provider will complete Assessment documentation; under ASSESSMENT, select the appropriate diagnoses codes.
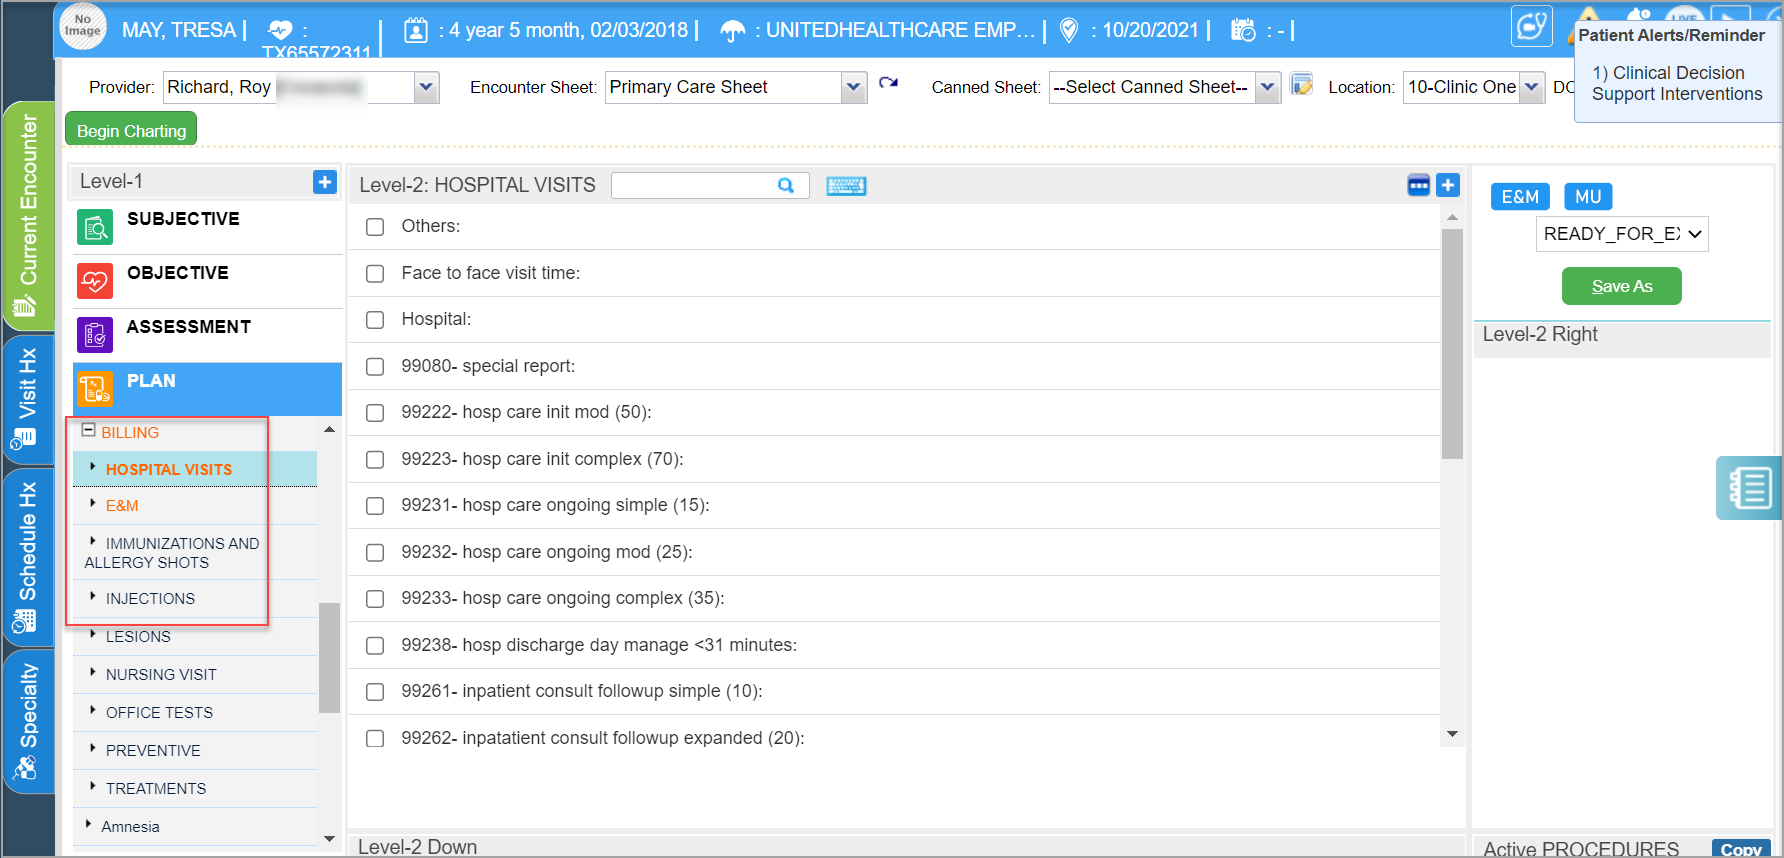
Step 8: Under PLAN, Pull all codes for visit including E and M codes (evaluation and management- office visit codes) including any Procedure codes that may be needed for billing purposes.
Step 9: Provider decides on Plan of care- and completes documentation required for,
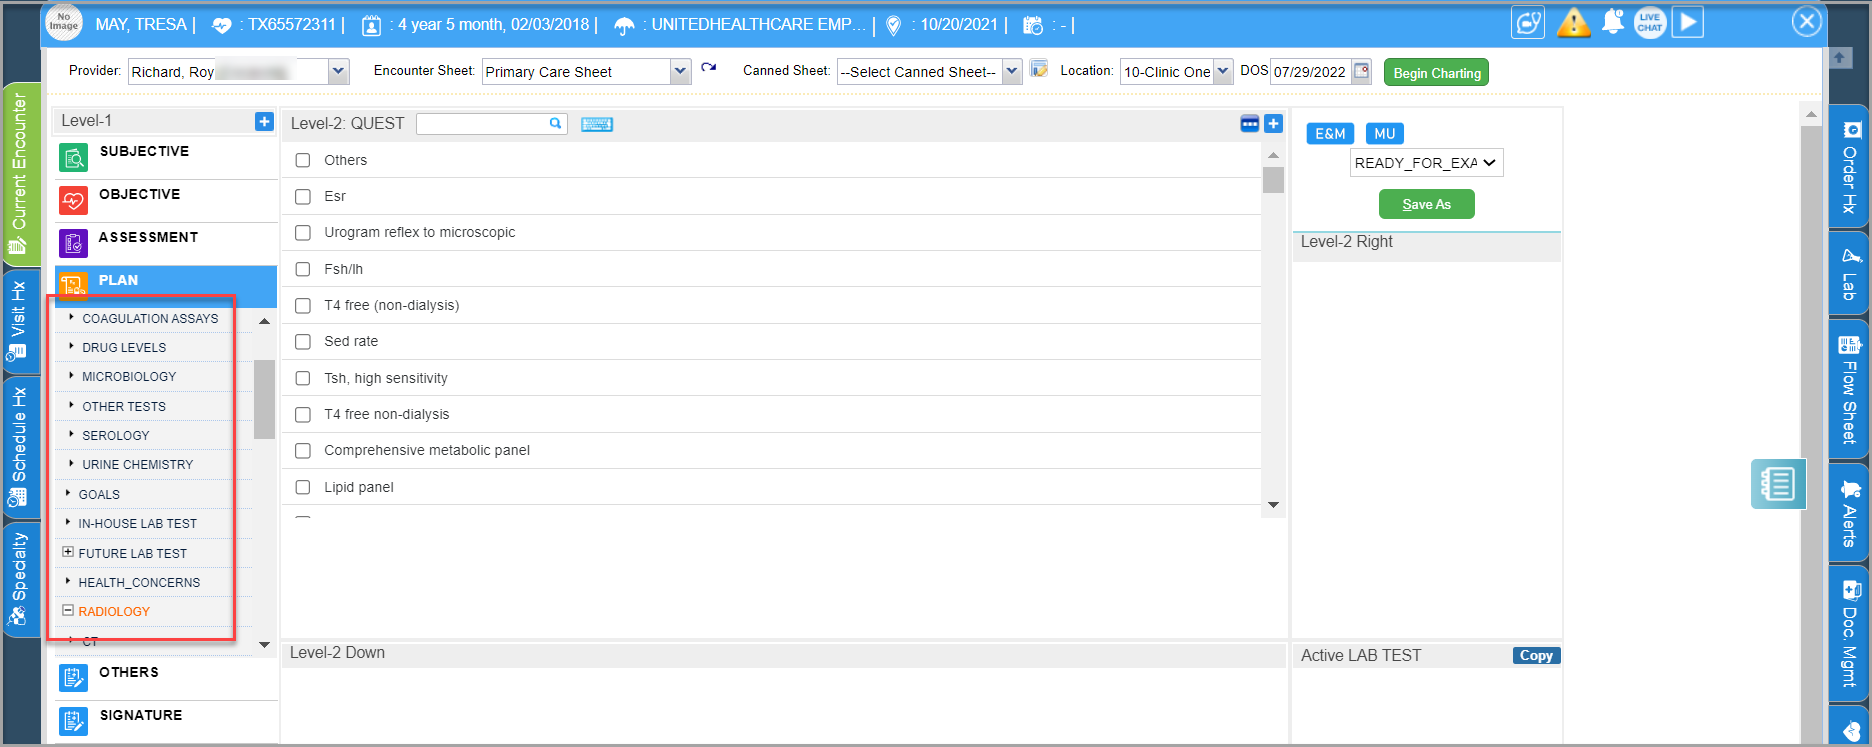
9A. Provider will order any further testing.
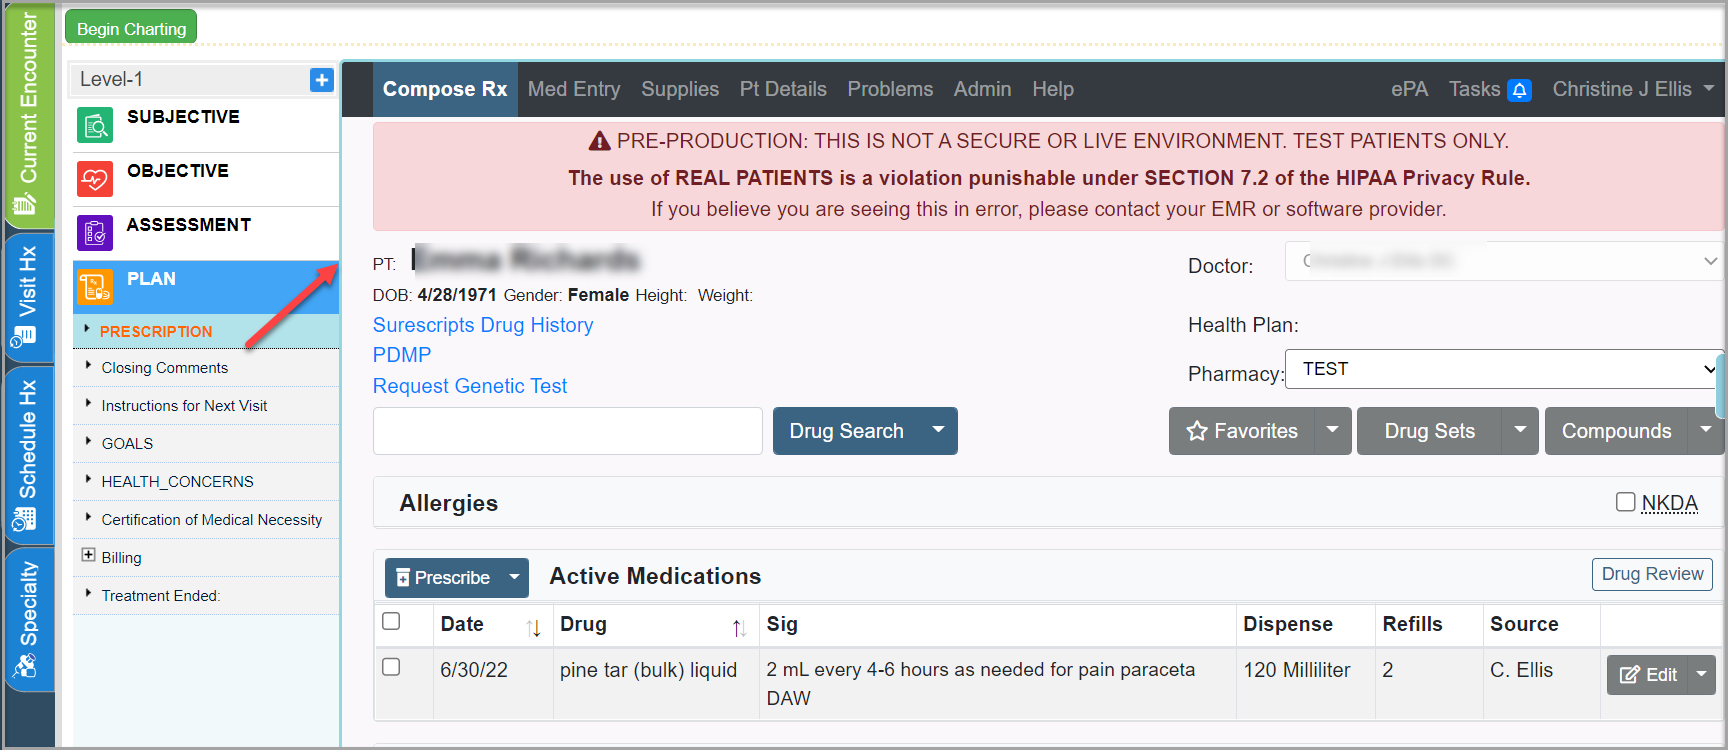
9B. Provider will order any medications. Provider logs into New Crop Portal to prescribe medicines.
9C. Provider will give patient any educational documentation. (Or this may be given by other staff-depending on the clinic workflow)
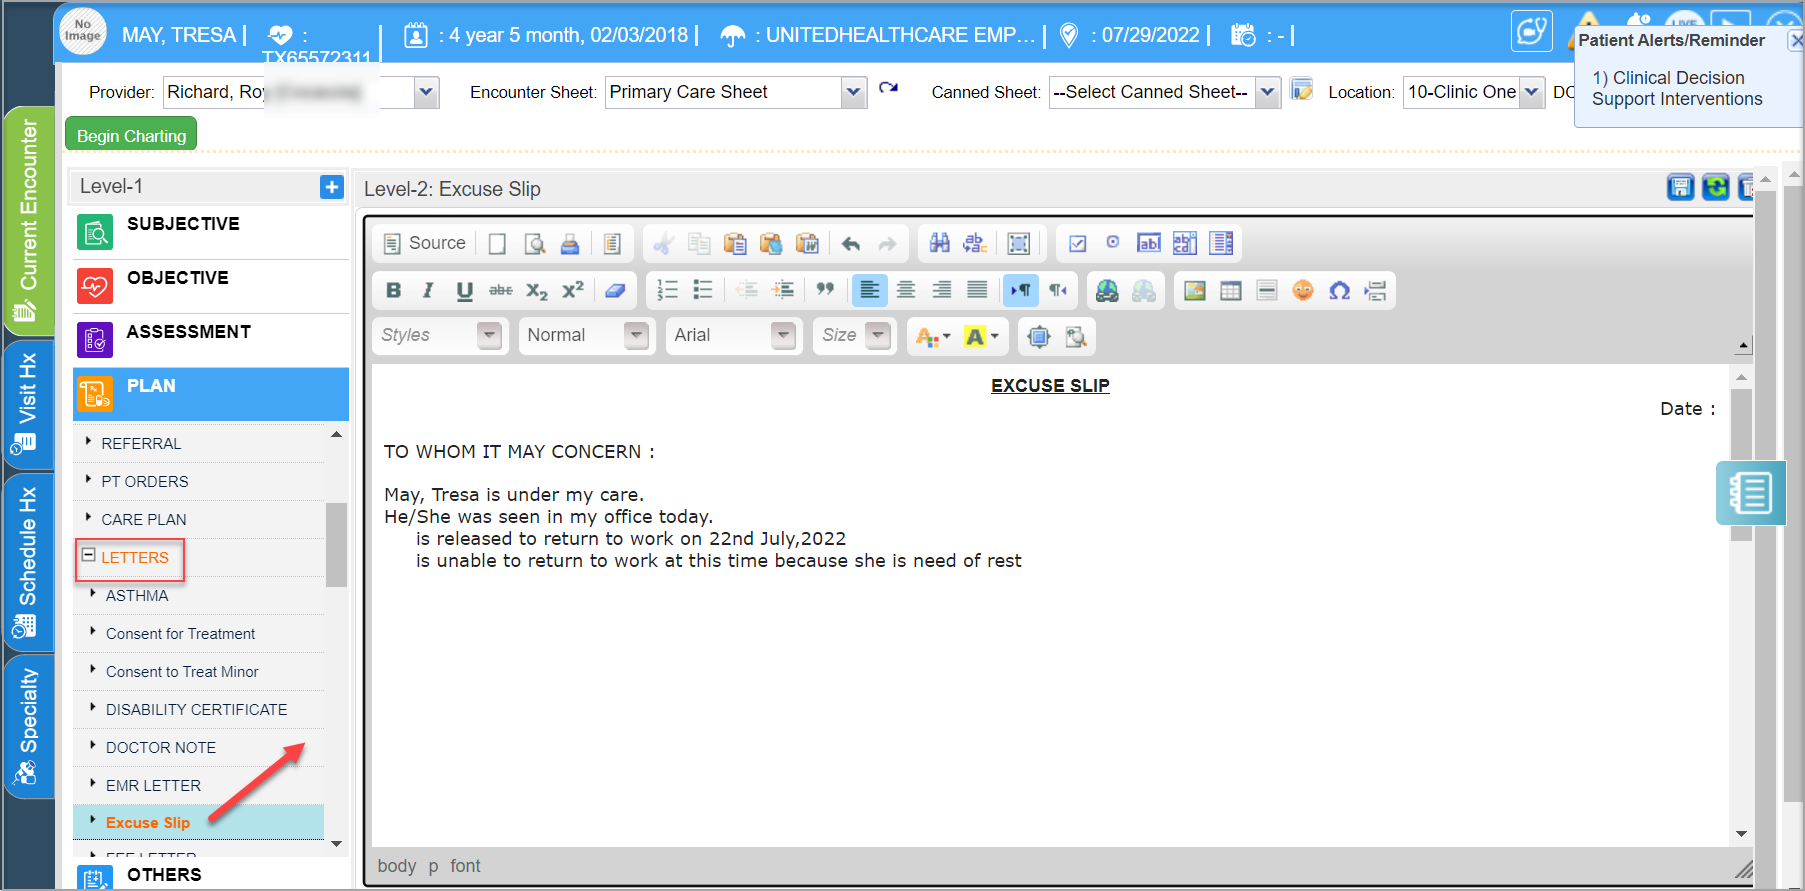
9D. Print excuses for work/school (Depending on the clinic Protocol- nurse or front staff may do this)
9E. Decides if follow up is needed, and will inform front staff.
Step 10: Provider saves the chart.
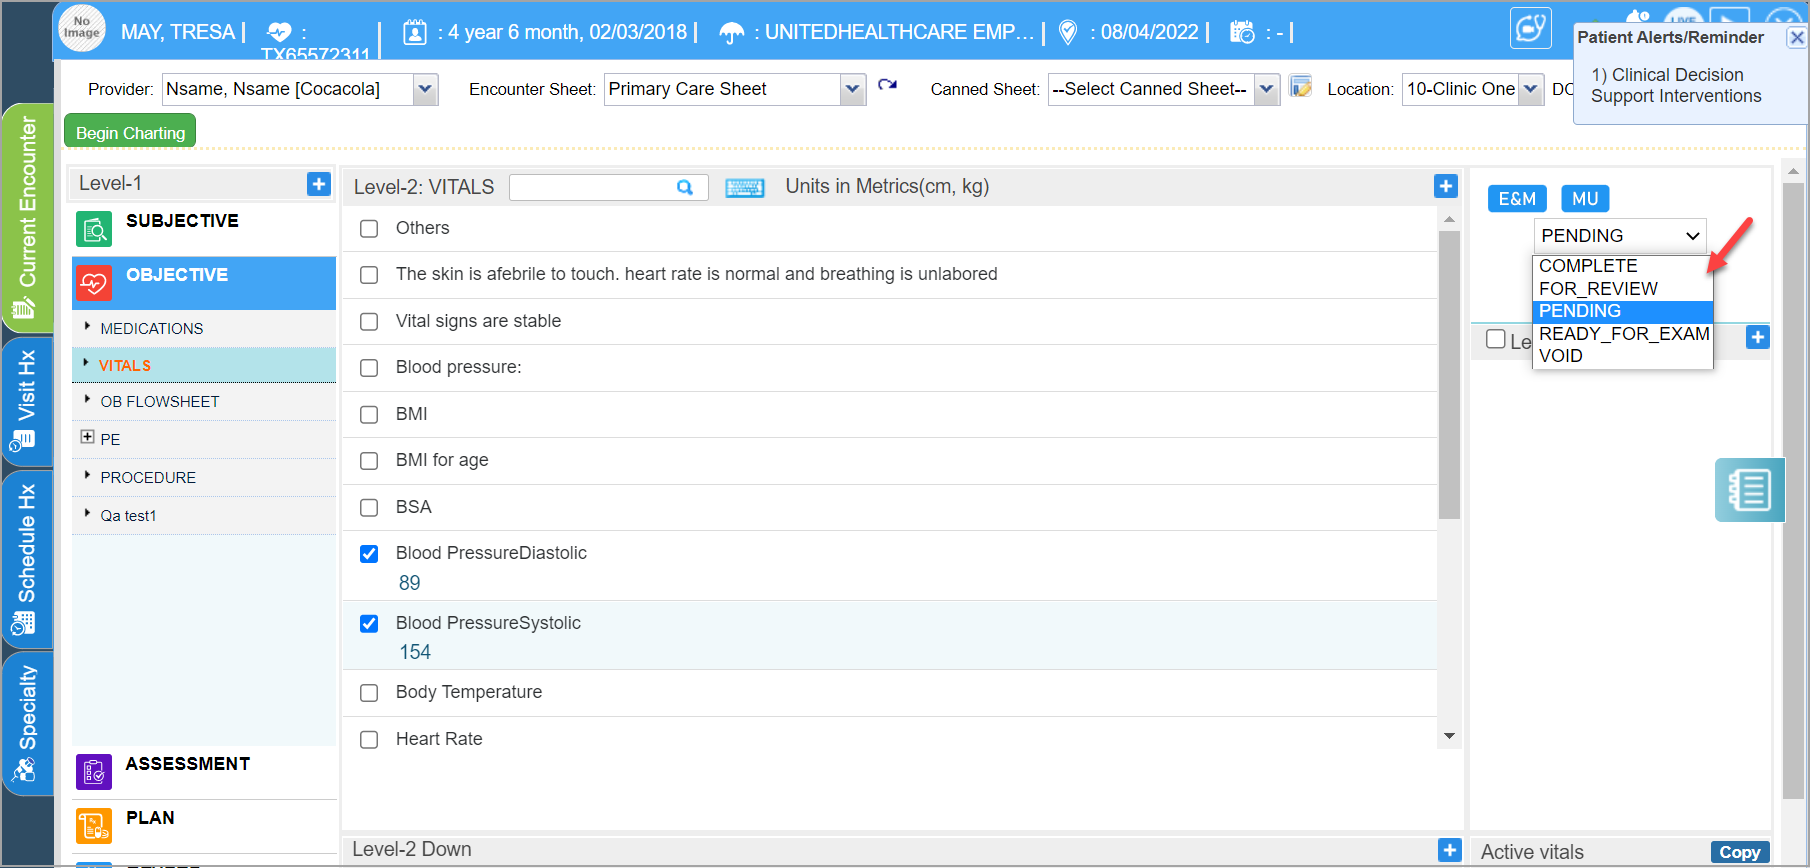
A. Saves the chart as COMPLETE if charting is complete.
B. Saves it as PENDING if more items are to be added but at a later date; either the provider or his assistant can complete the chart later on.
C. Saves the chart as FOR REVIEW if the chart is to be sent to another user in the system for reviewing. Charts can be sent for review only to clinical users in the system.
D. Saving as VOID logically deletes the chart.
Step 11: Marks patient ready for checkout. For this, go to Scheduler module, click on the patient name and change the status. Again, this can be done by either front staff, clinical staff or the providers themselves.

Note: For Completed charts, users can add ADDENDUM as well.
