

Recurring Payments through Credit Card
PracticeSuite facilitates recurring installments by auto-charging credit cards.
Key Features
1. Installment with a credit card can be activated in 2 minutes.
2. Multiple USIO IDs are configurable for installment payments.
3. Email notifications will be sent to patients with the details of the installment plan.
4. PracticeSuite auto-posts the payments to the lines once the installment payments are created. No manual intervention needed.
5. Patients can pre-close their installments at any time.
6. Credit cards that have an expiry date within the installment period can also be added to the installment plan.
Prerequisites
1. The account should be enabled with the payment gateway.
2. The patient should have a valid credit card.
How to Create a Recurring Installment
1. Go to Patient Demographics and select Installment Plan from the left pane, or go to Charge Master and select Installment Plan under the Patient Tab.
2. Select and enter the required fields, the same as manual installment, such as encounter lines, the start date, and the period.
3. Select the checkbox Setup Credit Card highlighted in Image 1.
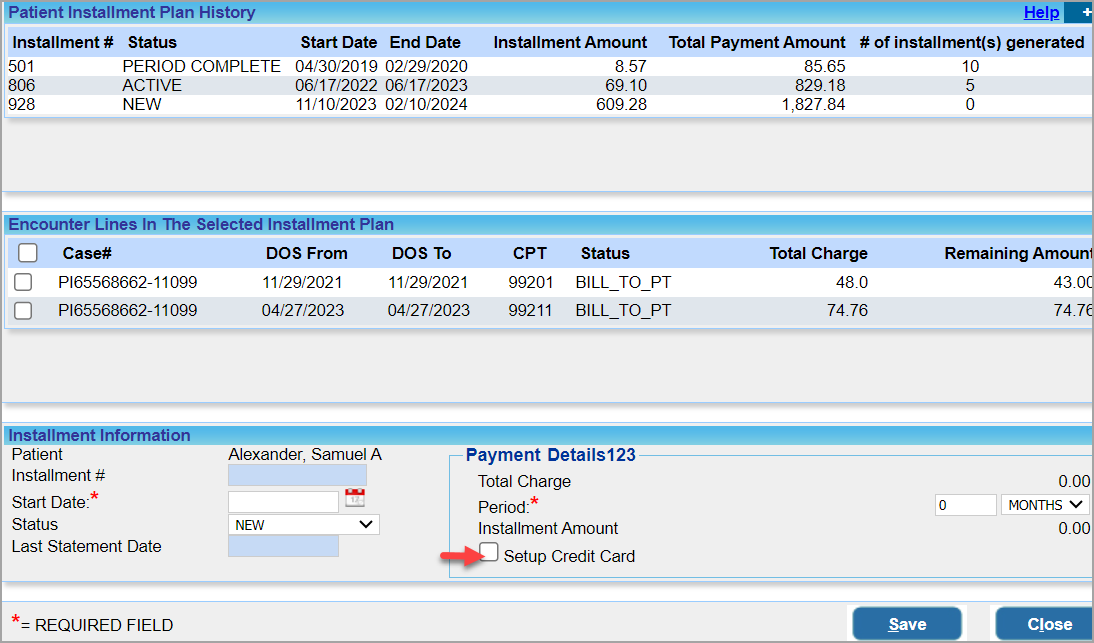 Image 1
4. Enter the card parameters using the Setup Credit Card checkbox in Image 2. If the patient has a card saved in the system, the user can select it from the Saved Cards drop-down.
Fields: Name on Card, Credit Card#, Expiry Date, CVV, Merchant ID, Billing Zip
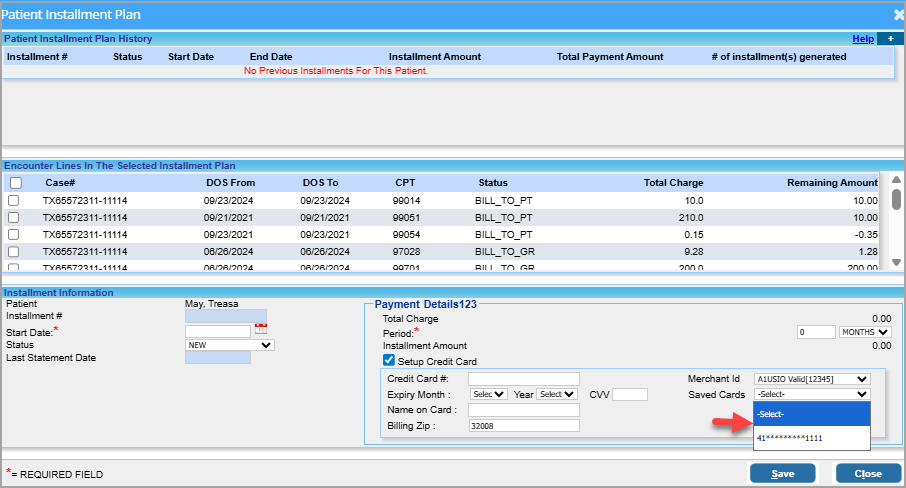
5. Merchant ID is a drop-down listing all available USIO IDs for the practice. Select an appropriate one. To know more about LE-merchant ID mapping, click here.
6. Billing Zip will be defaulted from the patient demographics. If no ZIP code is available in the patient master, the user should enter the ZIP code.
7. Click the Save button. A new plan is created; it is assigned a plan number and is in the NEW status and can be viewed in the top pane.
How Recurring Installment Works
Once a plan is created, PracticeSuite will automatically trigger the request to the payment gateway to charge the card.
For Every Successful Payment
a. A payment is automatically generated in the system with the payment type set to SELF PAY, and the installment count is incremented by one. The system keeps the installment status as Active.
b. An email notification is sent to the patient; see Image 3.
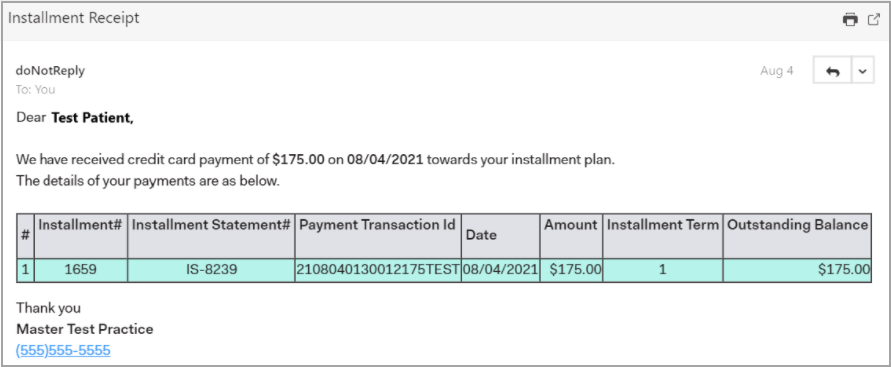 Image 3
c. If Auto-Post Patient Payments is enabled in the Billing Options screen, successful payments will be auto-applied to the encounters included in the installment plan. If Auto-Post Patient Payments is not enabled, the payment will be created, and the user has to manually apply the same to the lines.
d. Users can see the payment request status in the I18 Report. The users can identify the installment payment requests by verifying the value in the Source column in the I18 Report. The source column will be updated as Practice-Installment.
e. Once every installment is completed and there’s no remaining balance, the system automatically changes the status to PAID. f. If there are outstanding line balances, the installment status changes to Period Complete on completion of the installment period. g. Users can update the installment status to Pre-Closure/Inactive prior to the installment completion date.
For Every Failed Transaction
The installment status and count will remain unchanged.
1. Installment letters will not be generated in case of recurring installment plans.
2. C8. Installment Detailed Report has a column to indicate whether recurring payments have been enabled for the installment plan.
3. C9. Installment Statement Summary Report has columns to display Payment#, Gateway Transaction ID, Gateway Transaction Message, and Recurring Enabled.