

General Ledger Accounting
General ledger accounting is used for recording all the financial transactions of the practice. The setup and configuration for the general ledger accounts are done through the GL Master in the Advanced Setup.
GL Master
1. Go to Advanced Setup-> GL Master. GL Master can be used to view all the accounts created in the practice (Image 1a) and create new accounts.

2. To add a new general ledger account, click on the ![]() icon on the top right-hand side of the GL Master page and to edit any account click
icon on the top right-hand side of the GL Master page and to edit any account click ![]() on the far right (see Image 1a).
on the far right (see Image 1a).
3. Enter the details for the new General Ledger account to be set up.
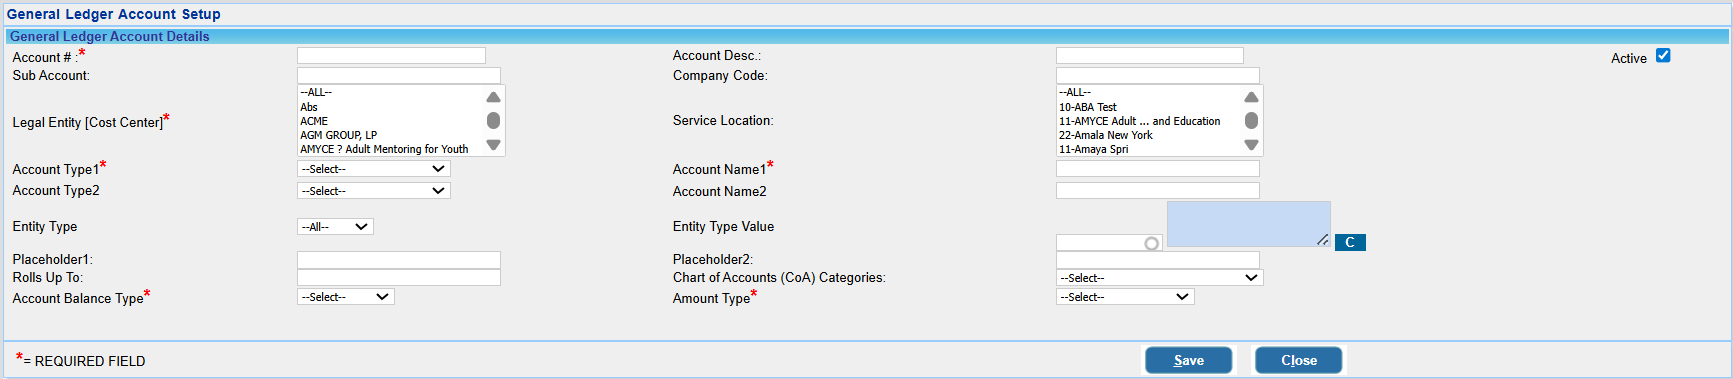
4. Table 1 explains the fields in detail.
| Field Name | Description |
| Account # | Enter the internal General Ledger Account # |
| Sub Account | Optional sub-classification under the main account for detailed tracking. |
| Legal Entity (Cost Center) | Select the legal entity against which the account is being created |
| Account Type1 | Dropdown includes:
Adjustment Type |
| Account Type2 | Shares the same dropdown options as Account Type1 for layered categorization. |
| Value | Multi-select combo box that dynamically updates based on the selected Account Type (e.g., selecting “Adjustment Type” shows relevant adjustment options). |
| Entity Type | Defines the nature of the entity linked to the account. Options include: All, Insurance, Patients, Guarantor. |
| Entity Type Value | Multi-select field that loads context-specific values based on the selected Entity Type. |
| Amount Type | Dropdown field with options such as Charge Amount, Contract Amount, Payments, Adjustment, Withholds, On Account, Applied Reversal, Deposit Refund, Transfer, Closing Balance (A/R), Opening Balance (A/R), Running Balance (A/R). |
| Account Type* | Primary classification of the account (e.g., Asset, Liability, Expense). |
| Account Desc | Description or purpose of the account. |
| Company Code | Code representing the company within a multi-entity setup. |
| Service Location | Geographic or operational location tied to the account. |
| Account Name* | Full name of the account for identification and reporting. |
| Placeholder 1 | Reserved field for future use or custom configurations. |
| Placeholder 2 | Another reserved field for future or custom use. |
| Chart of Accounts (COA) Categories | Classification within the chart of accounts for financial reporting. |
| Active (Checkbox) | Indicates whether the account is currently active and usable. |
GL Report
To run the GL report, go to Advanced Setup->GL Report. Provide appropriate search parameters and click on Search.
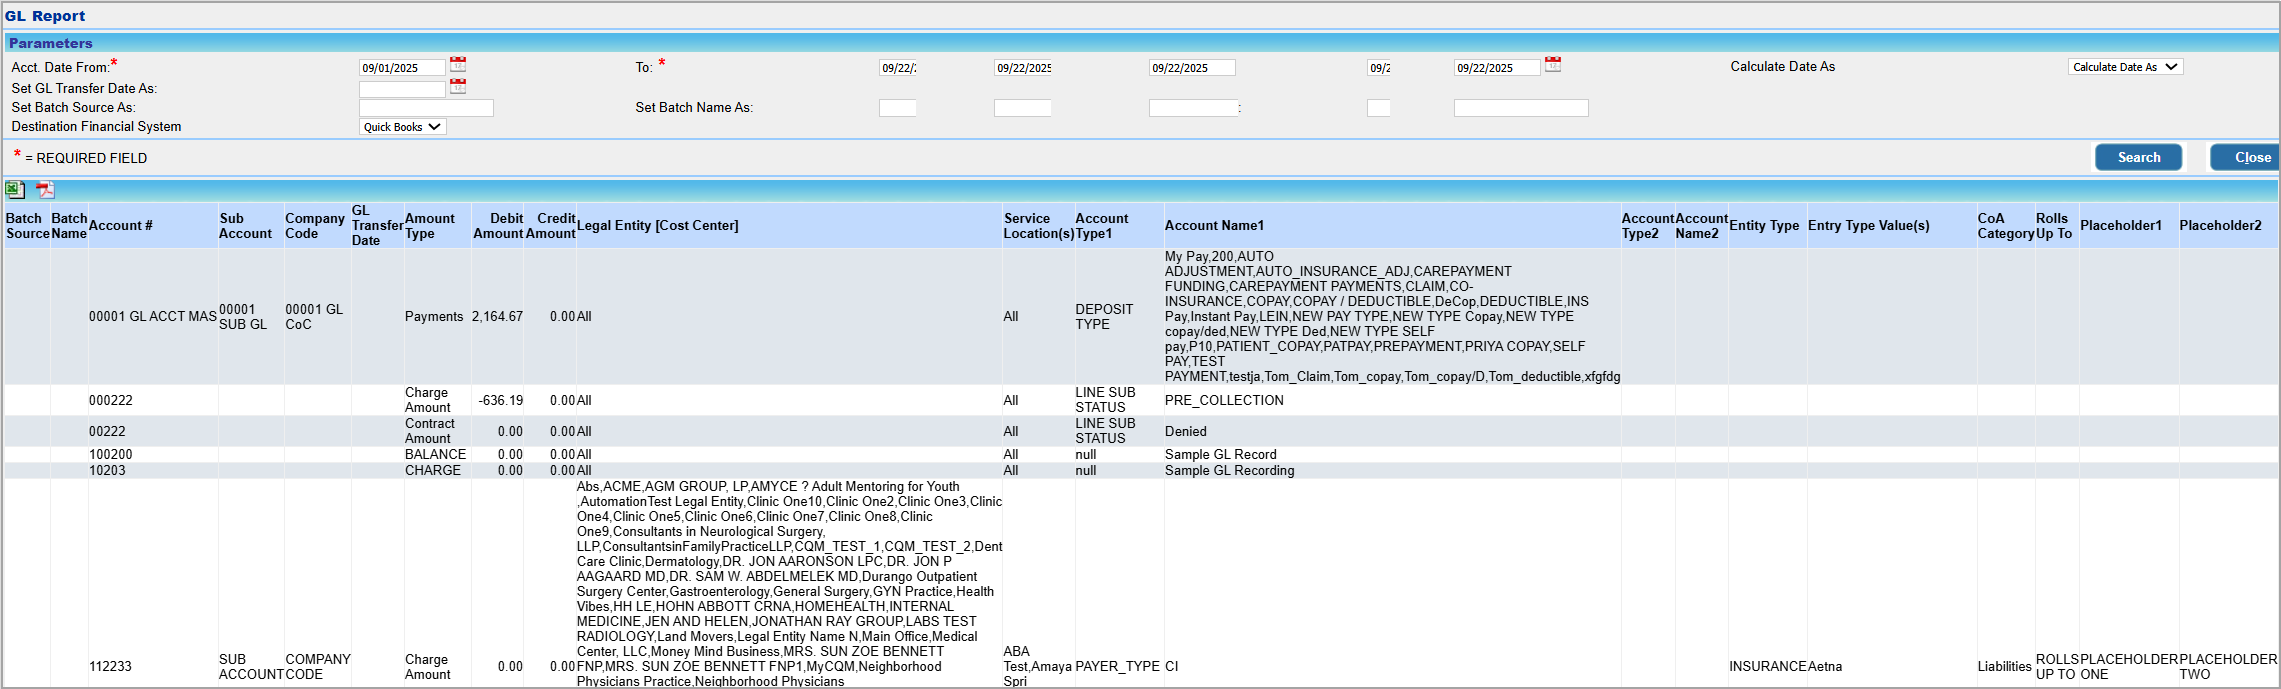
The report can be exported into PDF and Excel outputs.
GL Detailed Report
This report displays patient-wise debit and credit amounts generated. To run the GL Detailed Report, go to Advanced Setup → GL Detailed Report. Provide the necessary search parameters and click on Search; see Image 5b for a sample GL Detailed report.
Search Filters

| Search Fields | Description |
| Acct Date | Select an accounting date range |
| Set Batch Source As | Provide a name for the batch source |
| Set Batch Name As | Provide a batch name |
| Set Journal Template As | Provide a journal template name |
| Destination Financial System | Drop-down with the following options: Quick Books/Net Suite/Work Day/Peach Tree/Great Plains |
GL Detailed Report

The GL detailed report has three Excel outputs and a PDF output.
Excel 1- The Advanced GL report in Excel Format
Excel 2- Custom GL Detailed Excel
Excel 3- Detailed Accounts and Service Reconciliation Report
Custom GI Detailed Excel
The important columns in the Excel file, along with their descriptions, are given below.
| Column | Description |
| Journal Template Name | The Journal template name provided in the search field will appear here. |
| Journal Batch Name | The journal batch name given in the search field will appear here. |
| Line No | This will contain a serial number with increments of 10,000. |
| Account Type | The destination financial system chosen in the parameter section |
| Account # | GL Account# |
| Posting Date | For GL accounts, if the amount type is either Payments or Adjustments, this will be the payment date |
| Document No | – (Leave it blank.) |
| Description | For Credit Amount, this will be the Legal Entity + insurance company name For Debit Amount, this will be the insurance company name with the prefix “Receivable” |
| Debit Amount | GL Debit Amount |
| Credit Amount | GL Credit Amount |
| Source Code | Batch source (provided in the search section) |
| Your Reference | Patient PCRef# |
| External Document No. | – |
| Dimension Set ID | – |
| Transaction Information | – |
| Comment | – |
| Class Code (Dimension) | “00” |
| Department Code (Dimension) | LE code of the concerned legal entity |
| SubAccount Code(Dimension) | Subpayer ID in the Insurance Master |
Detailed Accounts and Service Reconciliation Report
This export delivers transaction-level details – such as accounting date, patient name, date of service (DOS), procedure code, units, amount balance type, account number, sub-GL account number, amount type, legal entity code, and insurance name.
| Field |
| Accounting Date |
| Patient Name |
| DOS |
| Procedure Code |
| Units |
| Debit |
| Credit |
| Account# |
| Sub GL Acct# |
| Amount Type |
| Legal Entity Code |
| Insurance Name |