

ORM Redressal Survey questionnaire configuration is done from the EHR Admin page. The following explains the steps in configuring a redressal survey and preparing the survey questions.
1. Log in to Practicesuite.
2. Select EHR Advanced from the main menu and select EHR Admin.
3. Click on the ![]() on the top right of the EHR Admin page to add an Encounter Sheet (see Image 1).
on the top right of the EHR Admin page to add an Encounter Sheet (see Image 1).

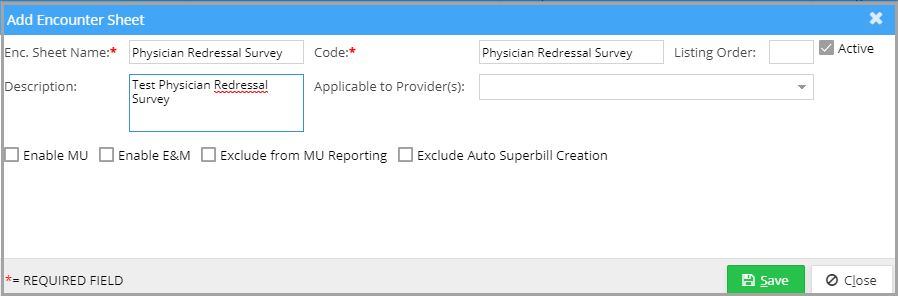
4. In the Add Encounter Sheet page, enter the Enc. Sheet Name and Code as Physician Redressal Survey. Make the chart applicable for all providers in this account and click on Save after selecting the Active checkbox to create an Encounter Sheet (see Image 2).
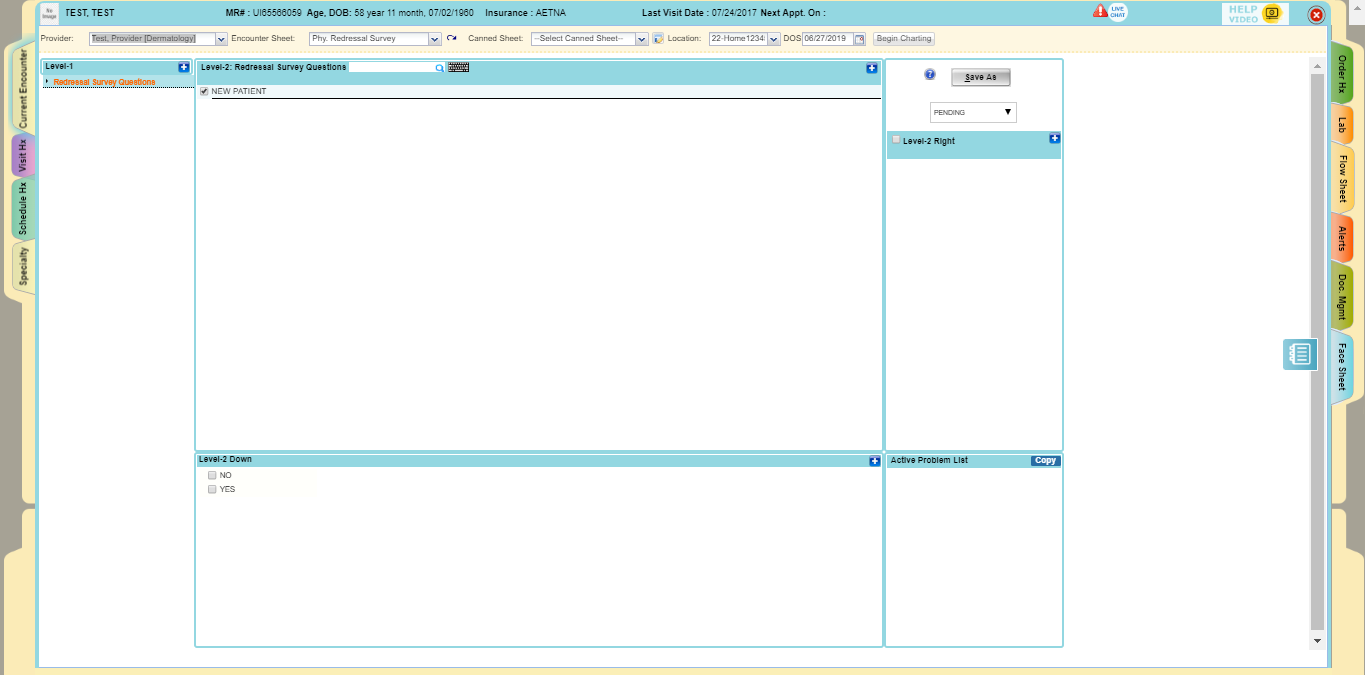
5. Now go to Clinical Desktop. Search for a patient and select Physician Redressal Survey to add the questionnaire.
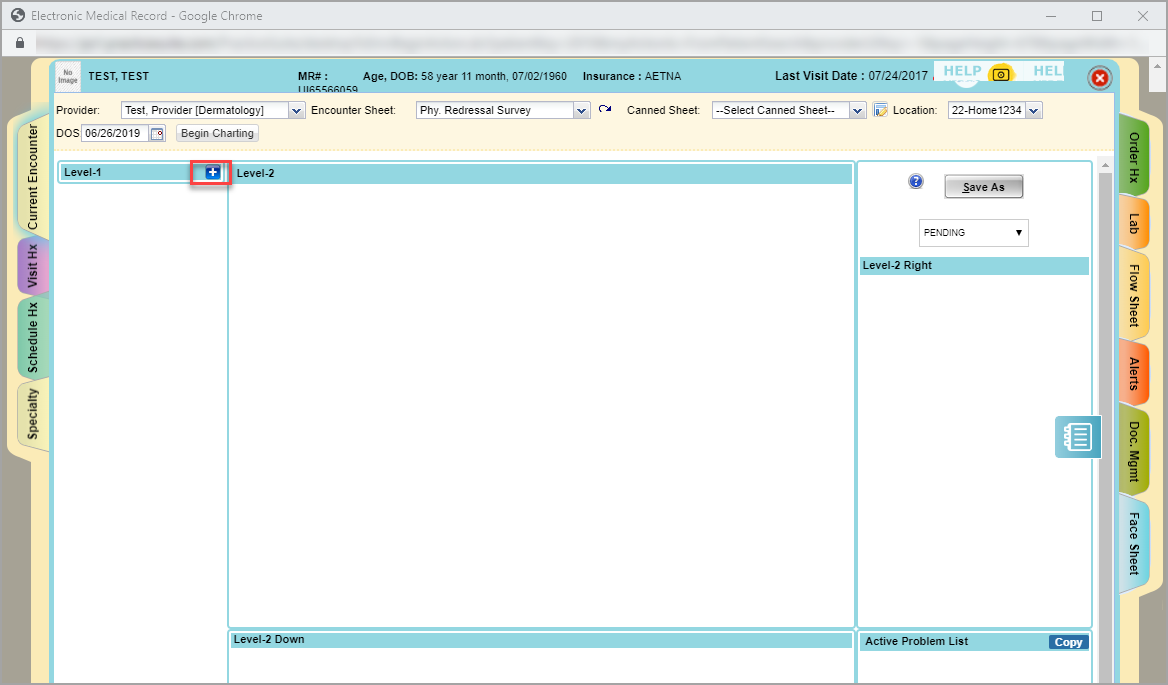
6. To create a level 1 component in the selected Enc. Sheet, click on the ![]() button highlighted in Image 3.
button highlighted in Image 3.
On clicking the![]() button, the level-1 details screen (see Image 4) opens up.
button, the level-1 details screen (see Image 4) opens up.
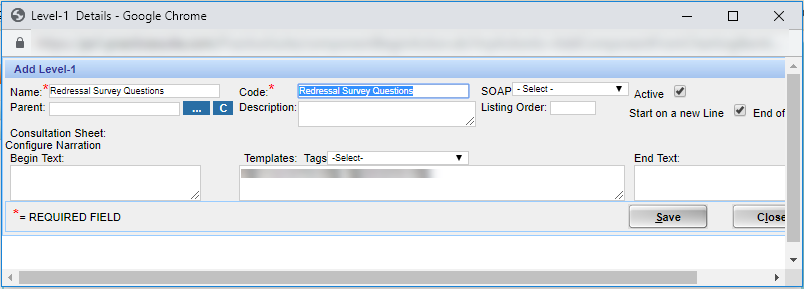
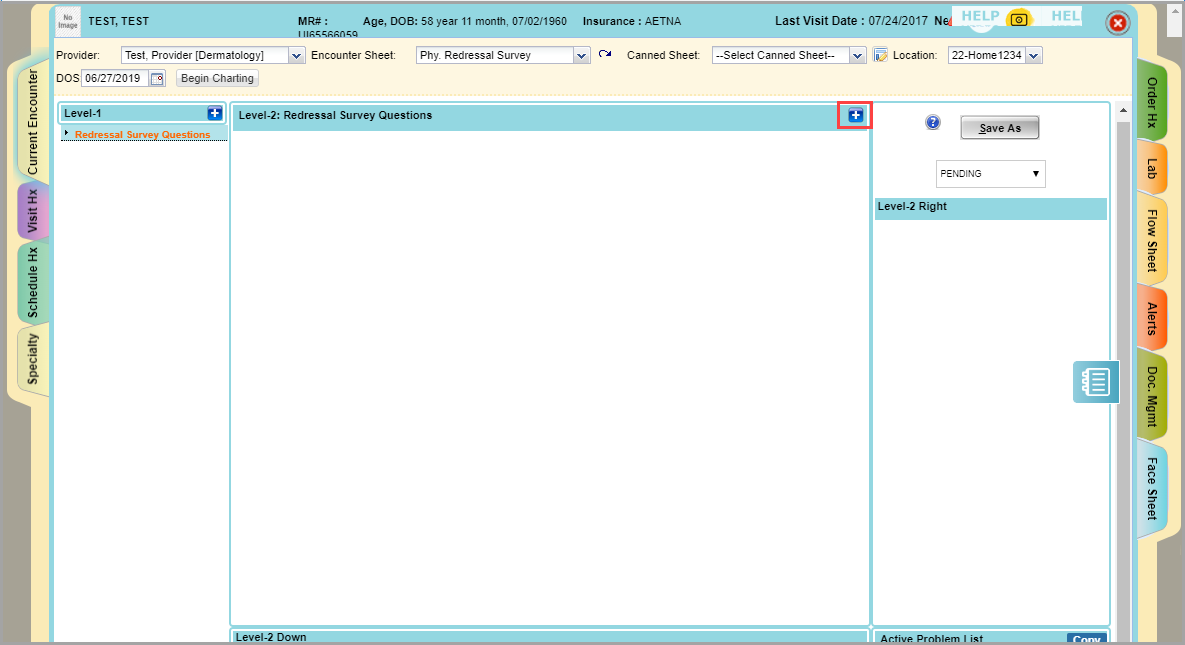
7. Enter the name as REDRESSAL SURVEY QUESTIONS. Fill up the code and other fields and click on Save. To create the questions, click on the Level 2 button ![]() (highlighted in Image 5) under the selected Level 1 component “REDRESSAL SURVEY QUESTIONS.”
(highlighted in Image 5) under the selected Level 1 component “REDRESSAL SURVEY QUESTIONS.”
8. In the screen that opens up, enter the question in the Name field.
9. The Level 2 Code should be of the type RATING, QUESTION, or COMMENTS.
1. RATING: Provides rating stars to rate the items.
2. QUESTION: Provides preloaded options to answer the questions.
3. COMMENT: Provides text area to answer the questions.
10. If the question type is QUESTION, then update the options for this question under Level 2 Down.

11. Click on Save. The screen will be as shown in Image 7.
12. Create all the questions likewise with Code as either RATING, QUESTION OR COMMENTS. After creating the complete questionnaire, select all questions generated in the Level 2 section.
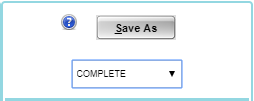
13. Save the Chart as Complete (refer to Image 8).
14. From the Chart Save confirmation page, click on the link ![]() (see Image 9).
(see Image 9).
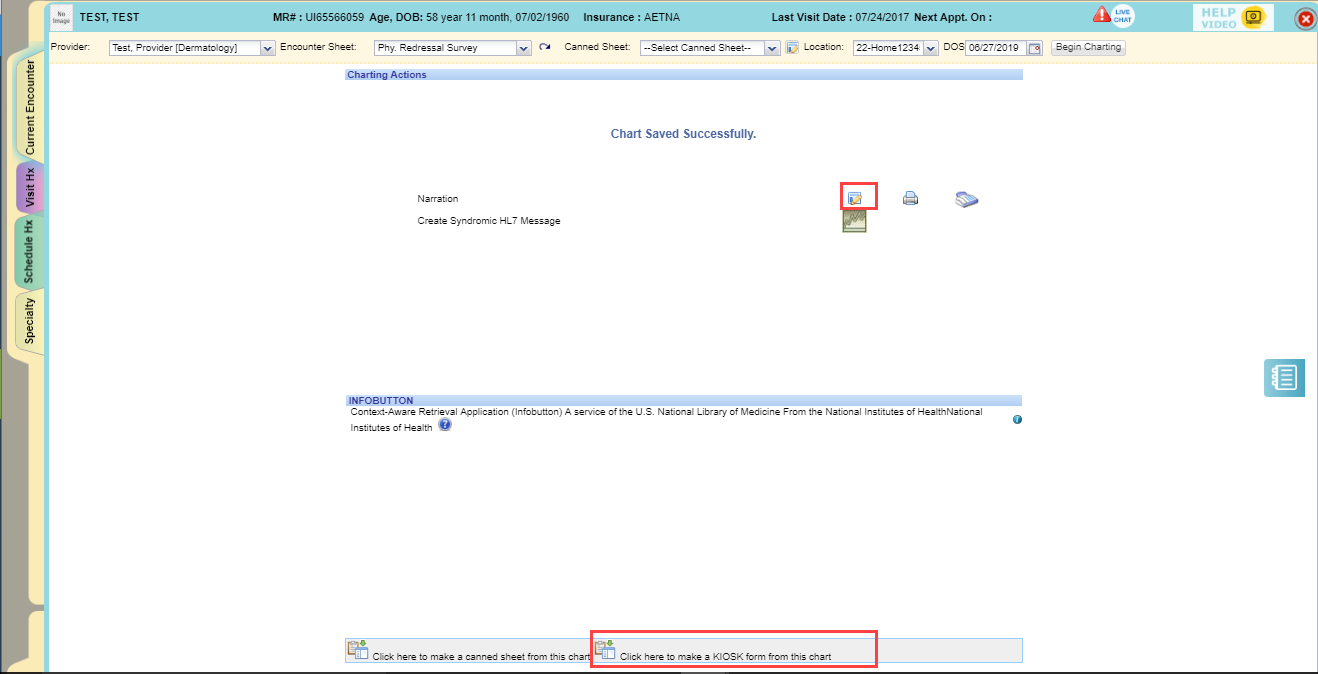
15. Create a KIOSK form using the completed chart with the KIOSK name as Physician Redressal Survey.
16. Patient Survey Questionnaire creation is complete.
17. To edit the Questionnaire, select a patient, and choose the Encounter Sheet Physician Redressal Survey.
18. Click on ![]() edit icon next to Canned Sheet drop-down after selecting Physician Redressal Survey – KIOSK from the Canned Sheet drop-down.
edit icon next to Canned Sheet drop-down after selecting Physician Redressal Survey – KIOSK from the Canned Sheet drop-down.
19. From the Canned Sheet chart edit page, make the necessary changes and Save as Complete.