How to Setup Two-factor Authentication
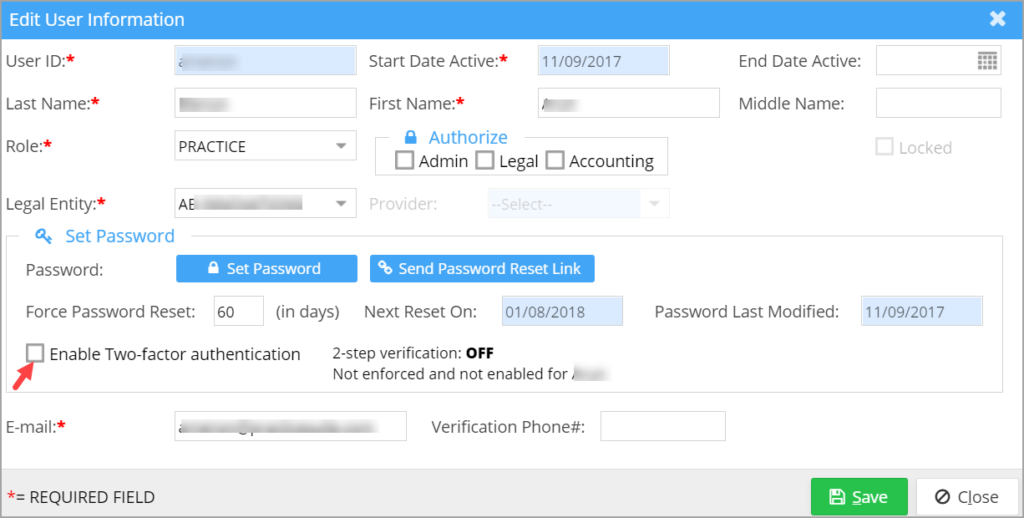
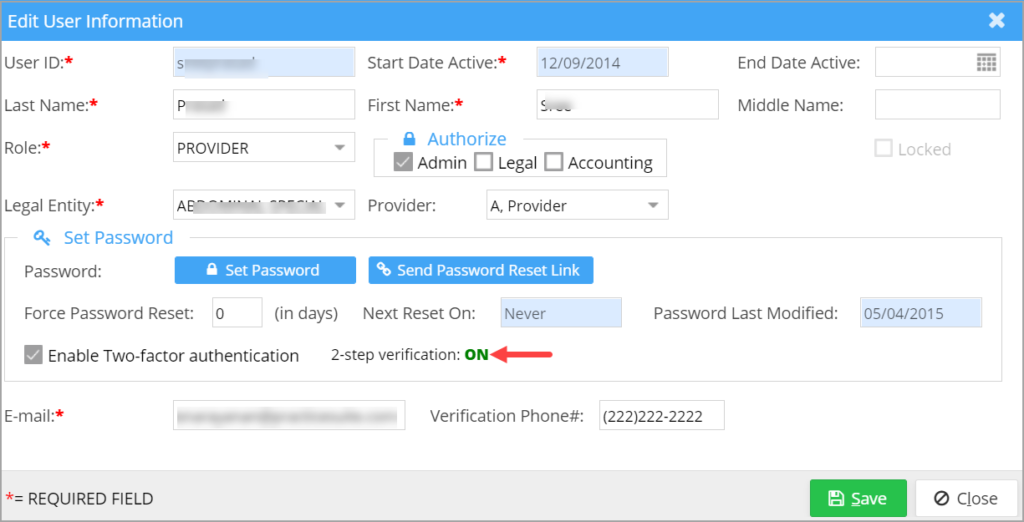
1. Two-factor authentication can be enabled for all users in PracticeSuite. It is available for group/single sign-on logins as well. The user information screen has a checkbox named ‘Enable two-factor authentication’ (see Image 1). Prior to 2FA enabling, the screen will show 2FA status as in Image 1.
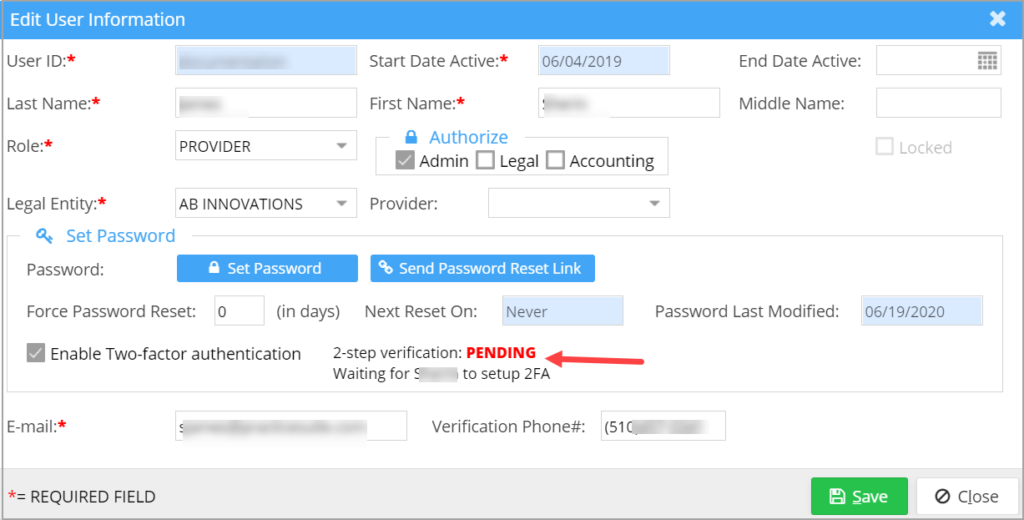
2. Check this box as the first step towards enabling 2FA for the user. The screen will then show the 2FA status, as shown in Image 2.
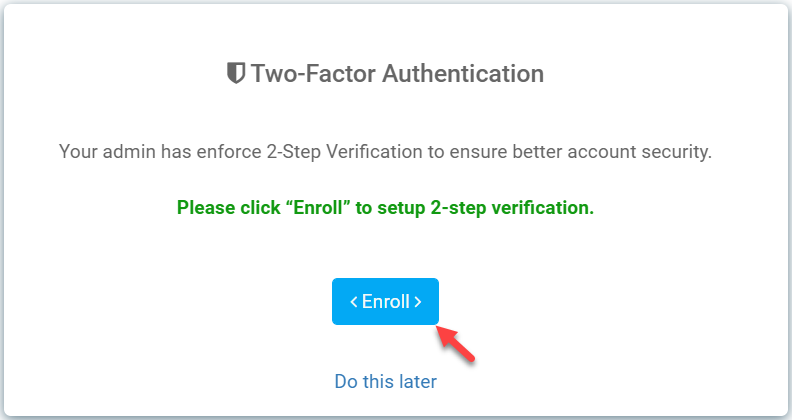
3. The user, on logging into the system, will be prompted to set a 2FA key by clicking on the Enroll option in the 2FA pop-up window; refer to Image 3.
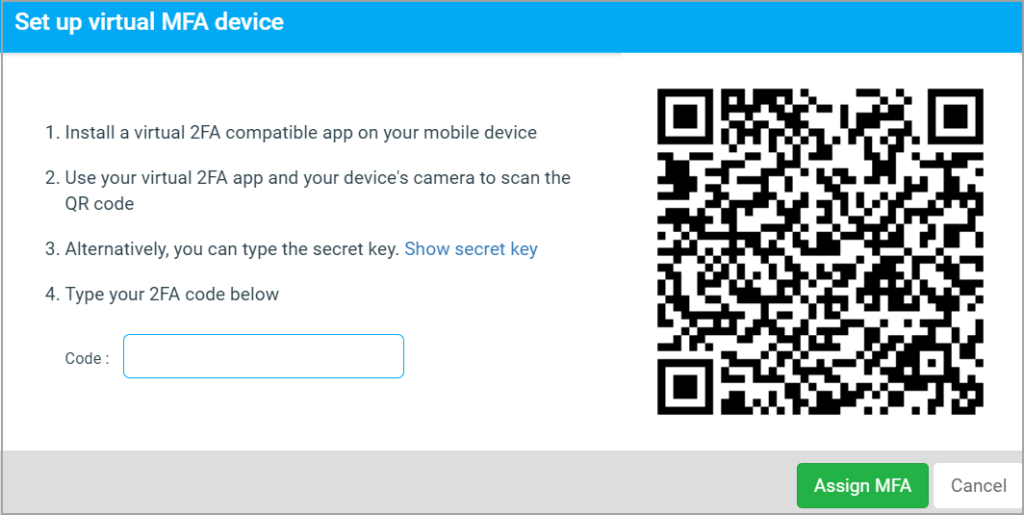
4. On clicking Enroll, the user is redirected to the 2FA setup screen to complete the setup (Image 4).
5. Follow the instructions and click on Assign MFA to set the key for the user.
6. Thereafter, the user is prompted to complete the secondary verification on every login to the system.
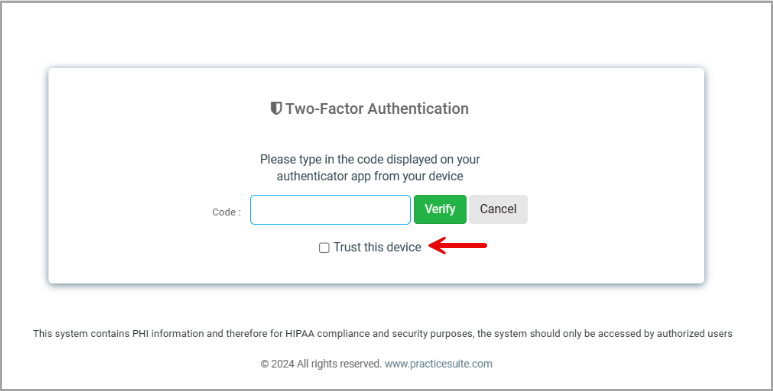
Note: Users can skip 2FA on a device: Once the two-factor authentication (2FA) is enabled, the user can choose to skip the prompts for future logins from the same device. A checkbox labeled Trust this device (see Image 4a) is included in the popup, permitting access from the device for future logins without requiring secondary authentication.
7. The user information after 2FA enrollment is shown in Image 5.
7. Users can change the 2FA key anytime by repeating the same setup process.
Setting the Grace period for 2FA override
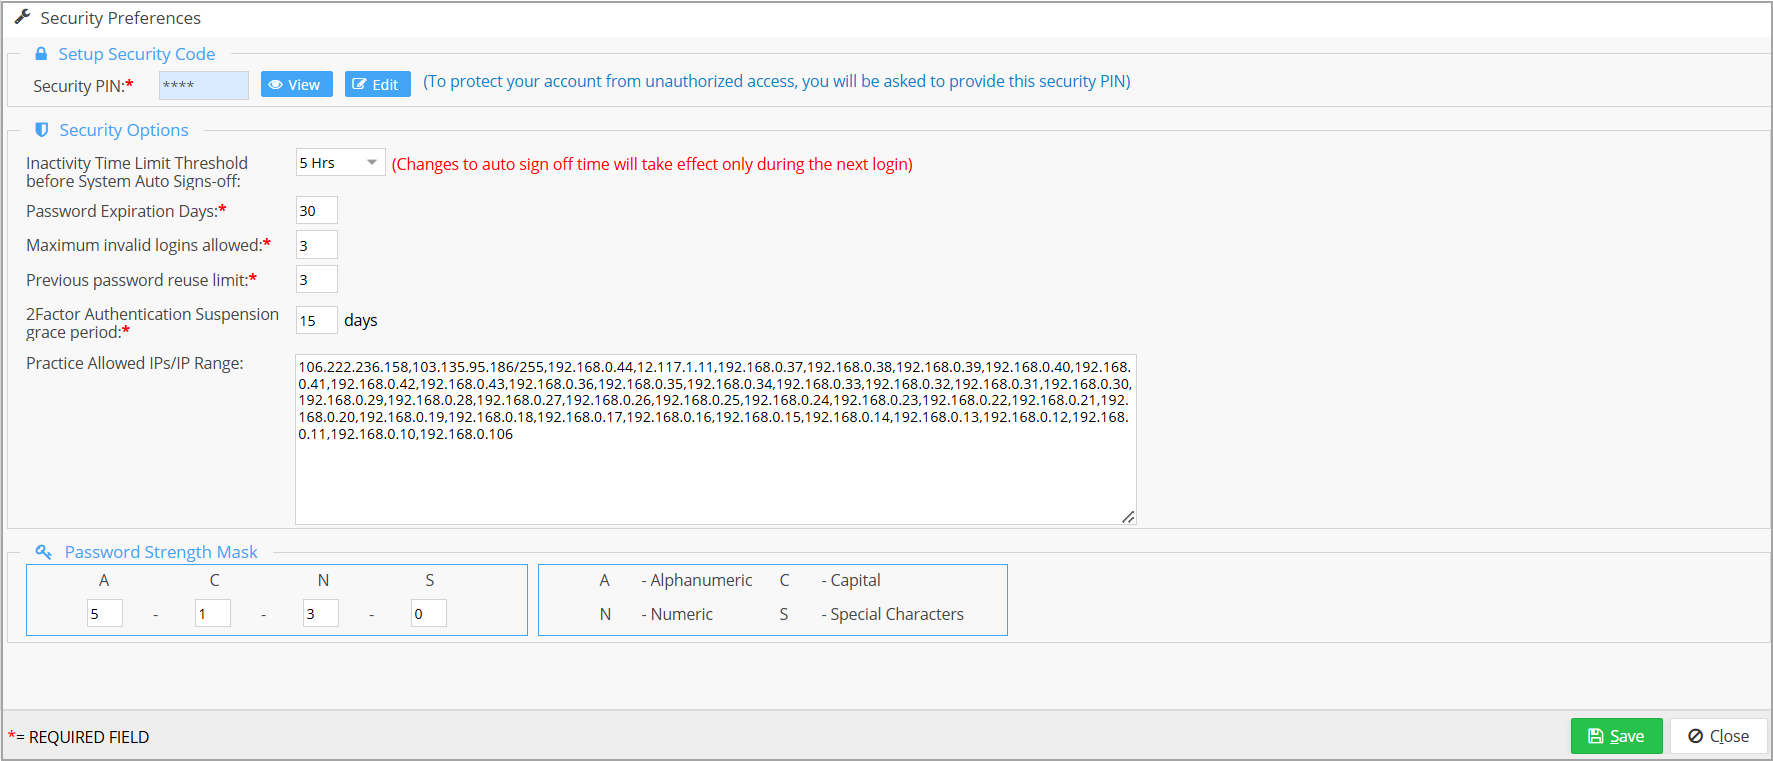
Earlier, users could indefinitely skip the two-factor setup for user authentication. From now on, the administrator can set the expiry period within the user configuration screen (Security –> User Preferences) to limit the 2FA override.
After the grace period ends, the user will be required to sign in using the 2FA method. For the users who have not enabled the two-factor authentication, on login into the system, the date (until when they can override the 2FA) will be displayed before it becomes mandatory.


