

EHR Dashboard
As part of our User Interface (UI) upgrades, the EHR “Clinical Desktop” has been upgraded to the new UI. The new “Clinical Desktop” comes with an informative dashboard that gives you a hyper-focused view of the clinical workflow and provides a real-time summary of appointments, charts, pending orders, refills, etc. (See Image 1).

Highlights
1. The dashboard has split panes with the provider and visit info on the left-hand side and the appointment, chart status, and order information on the other side.
2. In the provider pane, there are separate tabs for users to view the upcoming and recent chart notes of the provider. By default, recent charts will be selected. If the logged-in user has signing rights on the chart, the signed status of the chart will also be shown here.
3. The provider’s appointment counts are displayed at the top of the page.
4. In the section below the appointment count, users can see the numbers for pending, complete, ready-for-exam, and for-review charts.
5. Rx refill requests and reminder counts are displayed next on the dashboard. Clicking on the pop-up will lead to the Rx Renewal Request page. This page has a tab named ‘Rx Status Page’ that mirrors the contents of the NewCrop status page. Users can view the contents; however, no changes can be made to the screen.
6. Lab Order Status displays the count of processed, unprocessed, and for-review ones.
Click on ![]() to open our new ‘Connect to lab’ screen, where you can retrieve lab results. Clinical Desktop has five other tabs apart from Dashboard. They are explained below.
to open our new ‘Connect to lab’ screen, where you can retrieve lab results. Clinical Desktop has five other tabs apart from Dashboard. They are explained below.
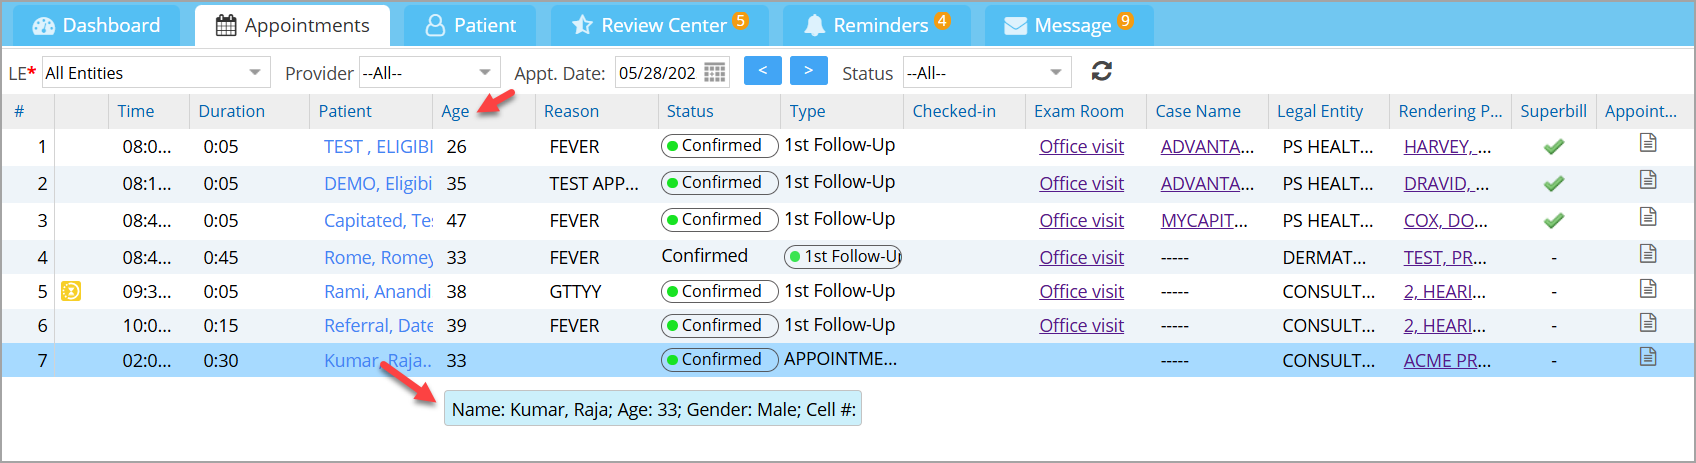
Appointments Tab
* This tab is used to pick up appointment patients for chart creation.
* By default, the Appointments tab displays the list of patients with appointments for the current date. To choose another date, use the calendar or the forward and backward buttons.
* Either the Status field or the Type field will be color-coded—this depends on the default option selected in the Scheduler, and the color will appear as a small dot beside the label.
* The appointments tab has a field to display the superbill status of the appointment. A separate column shows the patient’s age as well (see the highlighted column in the image below).
* At the far end of the appointments listing is the Notes icon (see image below). Any notes added from here will be saved in the Scheduler Notes area.
* Users can mouse over the patient’s name to see the patient’s full name, age, gender, and cell phone number.
* Clicking on a patient from the appointment list opens the chart of patient if the chart exists; otherwise, the Facesheet opens up.
* Refresh button is provided to refresh the list in real time.
Patient Tab
The patient tab can be used to search for patients using various filters provided. This is useful for creating charts for walk-in patients.
* Clicking on a patient from the patient list opens the Facesheet of the patient.

Patients Tab also has the following options to manipulate patient records.
| Option | Description |
| Mailing Address list | |
| Mailing Address list of Template Avery 5160 | |
| To merge patients | |
| To create a new patient record |
Review Center
The “Review Center” tab consolidates and displays the encounter notes of various statuses onto a single screen. The Clinical desktop no longer holds the tabs ‘For Review’ and ‘Ready for Exam’. Review Center has distinct sections for ‘Ready for Exam’, ‘For Review’, and ‘Pending e-Sign’ charts. (To learn more about e-signing of charts, click here.)
* Patient’s age is displayed as a separate column. Users can mouse over the patient’s name to see the patient’s full name, age, gender, and cell phone number.
* Refresh button is provided to refresh the list in real time.
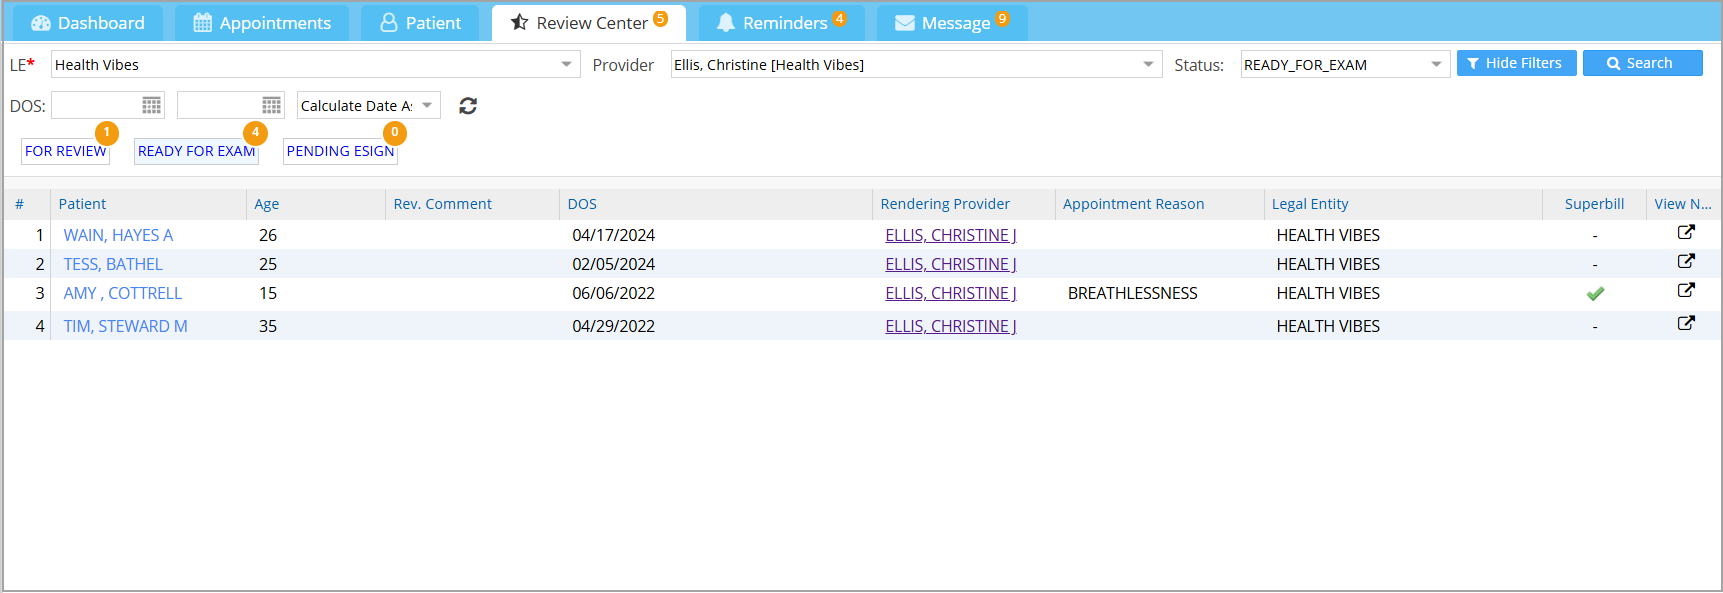
Ready for Exam bucket
The ‘Ready for Exam’ bucket displays the charts that are ready for examination. Typically, when patients walk into the clinic on appointment, the nurse/staff concerned opens the chart and records their vitals. They then save the chart as “Ready for Exam”.
For Review Bucket
Charts put up for review for the user will appear here. The review comments will be visible to all users. Typically, if charts need to be reviewed by another person (who is a clinical user), they need to be saved as “For Review”. While saving a chart as ‘For review’, a pop-up appears prompting the user to select the name of the user who is supposed to review the chart. Select the user from the list and click on Save; thereupon, the chart will appear in the review bucket of the assigned user.
Pending e-Sign Bucket
On the listing, completed charts will show the status as either signed or unsigned for the provider user. Use the checkbox Pending E-Sign to filter the charts that have a pending e-signature. The View Note opens the encounter note in a pop-up window.
Reminders Tab
Charts for which reminders have been set will be listed here. To learn how to set reminders for charts, click here.
* Clicking on a patient in the Reminders tab opens the Alerts Tab of the patient.
* Refresh button is provided to refresh the list in real time.

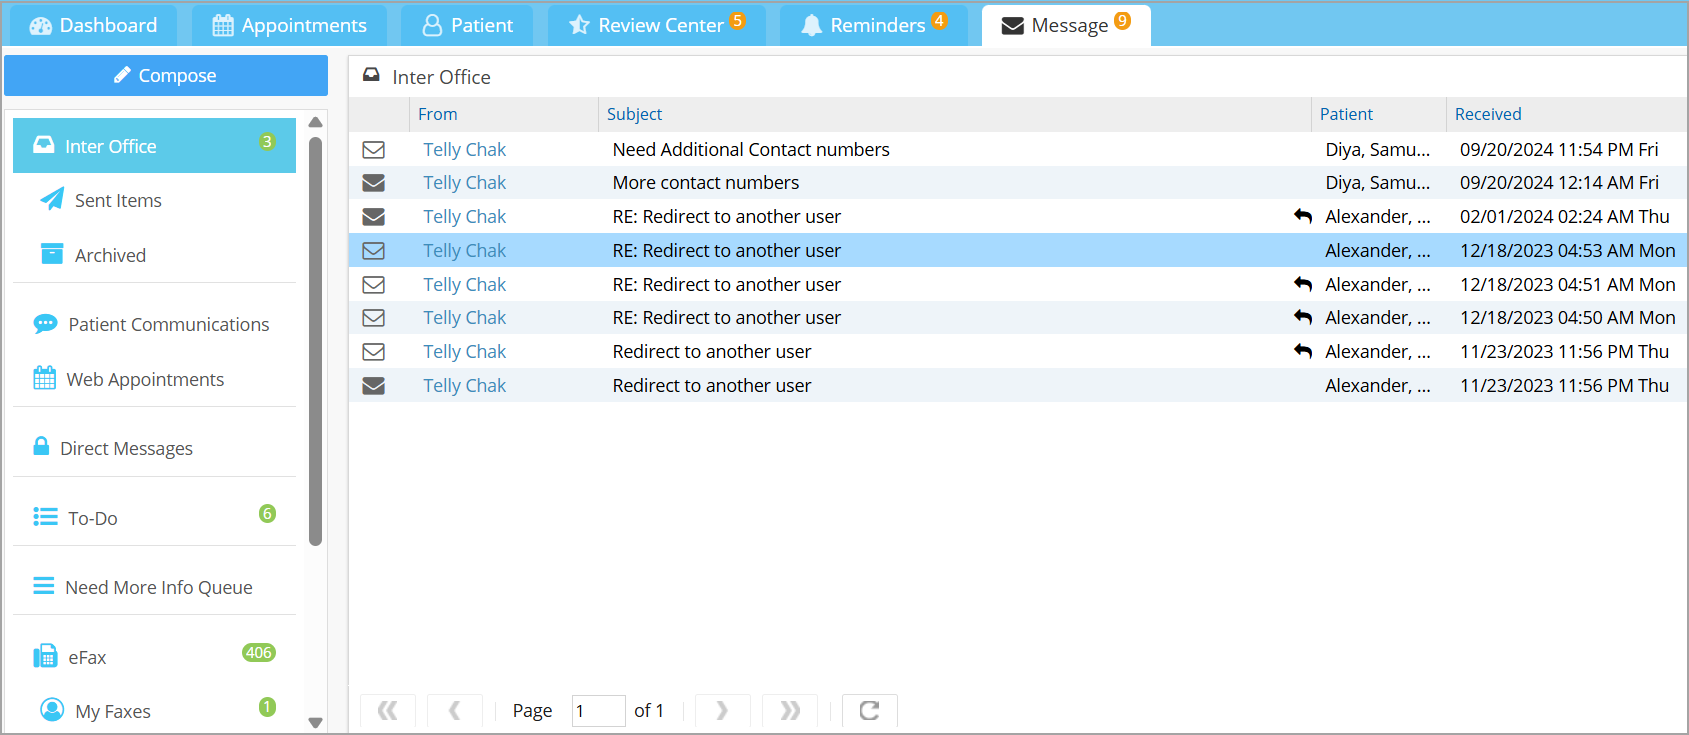
Messages Tab
This takes you to the interoffice message facility, where you can compose messages or view your Inbox and To-Do list. The unread message count will be displayed on the tab header.
Pending Charts Pane
To the right end of the clinical desktop, we have the pending charts pane, wherein all charts saved as pending will be listed with the latest on top for quick retrieval of charts for editing.