![]()
Charge Entry
The charge entry process is the initial and crucial stage of the billing cycle. This article explains the different fields in the charge entry screen. The Charge Entry Screen has two main panes: the Appointments pane and the Charge Entry pane (Image 1).

The pane helps to easily identify patients for charge entry. It displays the appointments for the selected legal entity (see Image 2). All appointments except the cancelled ones are displayed here date-wise. The search filters are appt date, legal entity, and provider.
a. To view appointments for all legal entities and providers, select ALL from the legal entity and provider drop-downs.
b. To view appointments on another date, click on the left or right arrows or the calendar icon beside the Appt. Date.
c. The appointment pane is a collapsible pane on the left. Use the icon on the top right corner to collapse and show the pane (see the highlighted portion in the header part of Image 2).
d. To search for any particular patient from the appointment list, type in the name of that patient in the search field.
e. We can create an appointment from the charge entry screen. Click on the appointment (see the left icon in the highlighted portion of Image 2) to open the Scheduler. The right icon in the highlighted portion will create a fresh new charge.

f. Table 1 explains the color legend of the appointment charge status.
| Color | Description |
| This indicates that no charge has yet been created against the appointment. | |
| Charges that are partially complete, slated to be completed at a later date. Charges from EHR appear with New status. Only charges in the NEW state can be edited from Charge entry. | |
| Those charges saved as ‘BILL_TO_PR,’ ‘BILL_TO_PT,’ or ‘BILL_TO_GR.’ | |
| Those charges submitted for the claims | |
| Charges kept on ‘HOLD.’ | |
| Charge saved as ‘VOID.’ |
Table 1
a. Select a patient from the appointment list or enter either the MR # or patient name in the Patient field. (Patient field is a Smart search field.)
* To add a new patient from the charge entry screen, click on the + button beside the Patient field.
* Once a patient is selected, patient details such as Name, DOB, Gender, and insurance case information, such as case#, primary, secondary, and tertiary insurance, get populated in the appropriate fields with patient alert(s), if any (see Image 4).
* To make changes to the patient demographic information, click on the Edit button; this will take you to the Patient Demographics Screen.
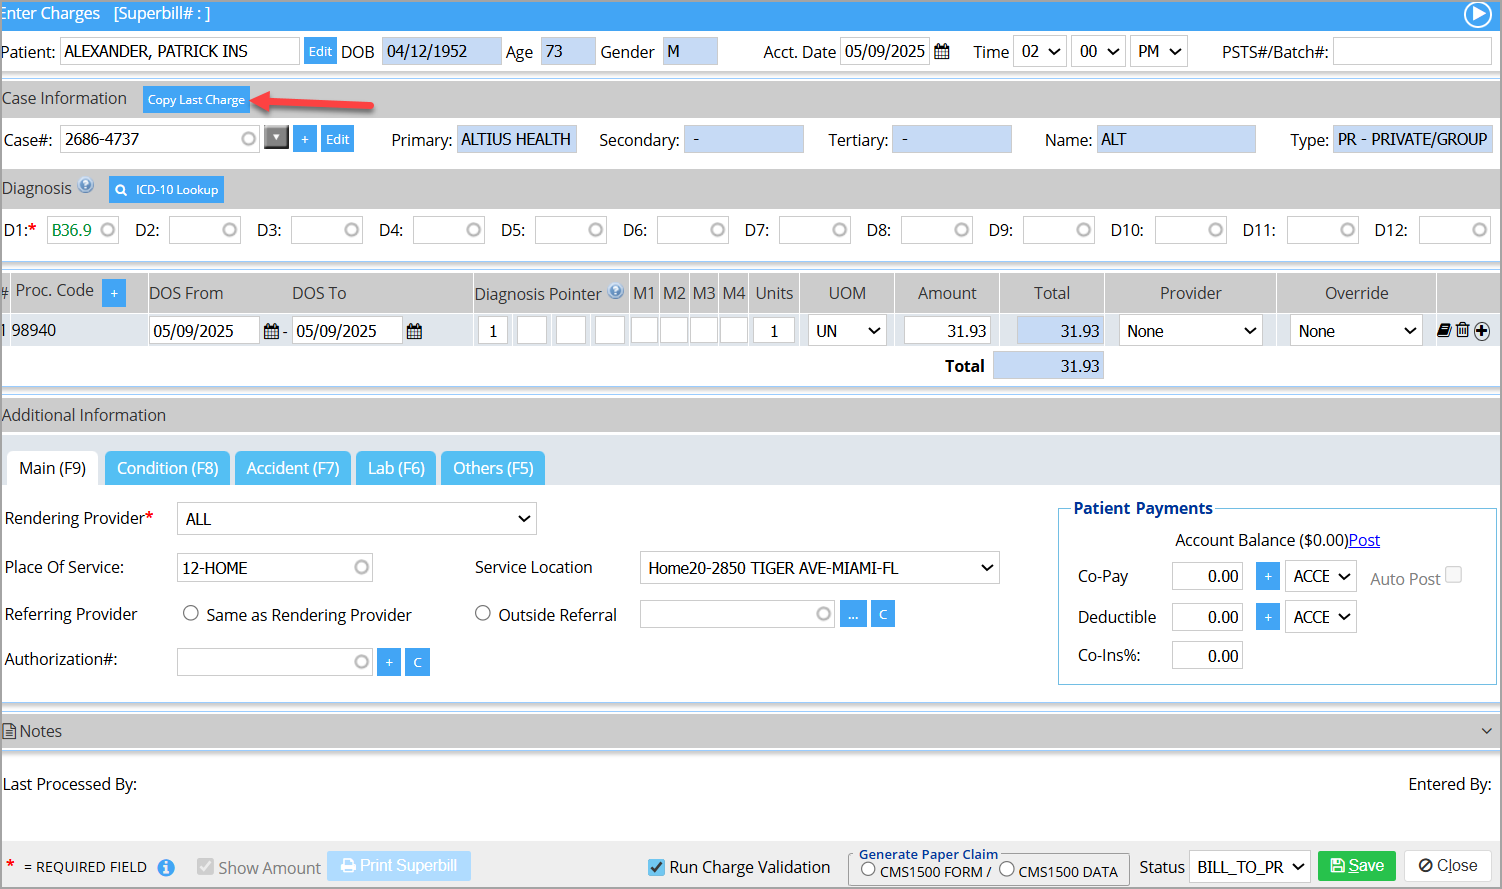
Copy Last Charge: Highlighted in Image 3 is the ‘Copy Last Charge’ button, which will copy all the charges from the patient’s previous visit to the current encounter. All diagnoses and procedure codes will be copied. This saves time during charge entry.
If a chart is taken for the patient, a ![]() icon appears on the top right corner of the Charge entry screen. This will open up the Clinical summary of the patient.
icon appears on the top right corner of the Charge entry screen. This will open up the Clinical summary of the patient.
b. By clicking on the Case# box, a list of present cases for the patient will be displayed, if any. Click on the Edit button to edit the case information. Click the + icon to add a new case.
c. After selecting a case, enter the diagnoses in the Diagnosis fields. You can enter up to twelve diagnoses for a patient in the D1, D2, D3, … D12 boxes in the decreasing order of importance. To search a diagnosis by description, enter the description, press the down arrow key, select from the list, or enter the diagnosis code and hit tab. Enter three or more characters to search. PracticeSuite also provides ICD-10 LookUp for easy selection of ICD-10 codes.
d. In the Procedure section, enter the procedure codes for the diagnoses that you have entered. When you choose a procedure code, the corresponding details for each procedure code will be displayed below.
e. Next to diagnosis pointer Boxes are the Modifier Boxes marked as M1, M2, M3, and M4. Enter the modifiers, if required, in the Modifier Boxes. Enter the values of Units or Minutes in the Units field & select appropriate values from the drop-down under the UOM field. The charge of the procedure code will automatically populate in the Amount Field. Select the provider from the provider drop-down.
f. Before clicking on Save, appropriate action to be taken on the encounter can be selected from the drop-down beside the Save button such as BILL_TO_PR, BILL_TO_PT, BILL_TO_GR, NEW, or VOID. The chosen action would apply to each procedure code entry in the encounter.
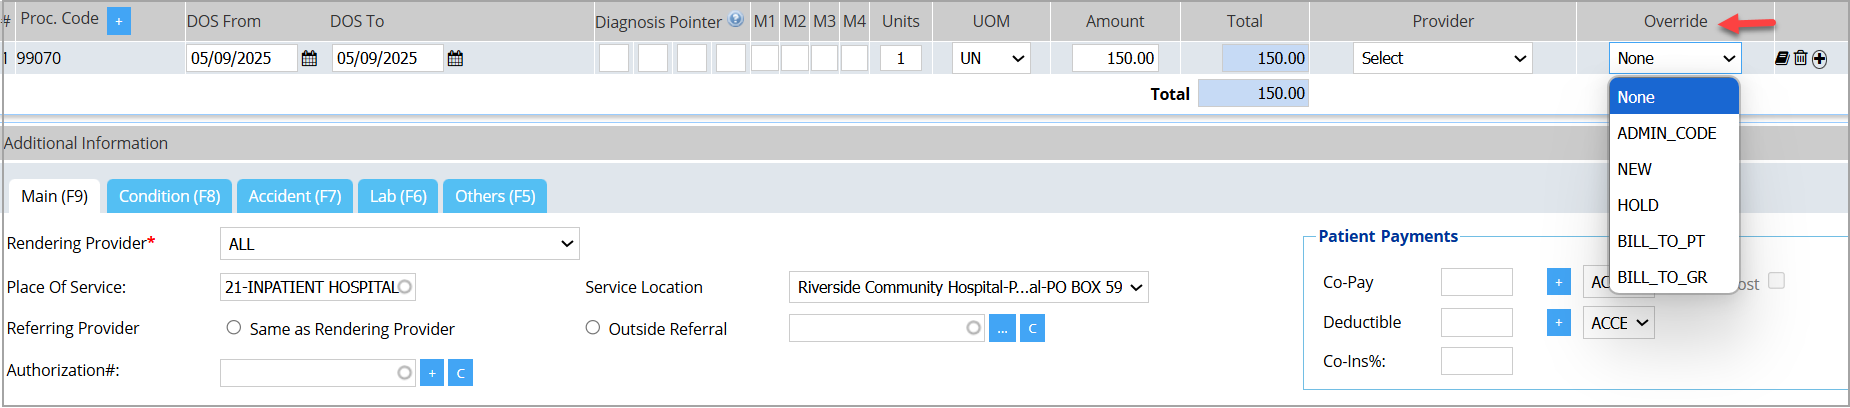
Override: An override drop-down is provided for each procedure code entry to override the encounter action and to set the procedure code’s charge action separately (see Image 4).
g. Other important icons in an encounter line are the following:
Notes ![]() : To enter notes for reference purposes.
: To enter notes for reference purposes.
Delete ![]() : To delete the line.
: To delete the line.
New Line ![]() : To add a new line of charge
: To add a new line of charge
Additional Information
This section specifies the Superbill details, classified under five different tabs: Main, Condition, Accident, Lab, and Other.
Main tab (F9)

Information entered in this section are:
Place of service, service location, rendering provider, referring provider info, authorization #.
Authorization#: If authorization exists for the insurance in the selected case, then those authorization numbers will populate when we click on the authorization field. To add a new authorization, press the + and use C to clear the authorization field.
Patient Payments
In the Patient Payment Field, the total account balance of the patient is displayed.
We can post the on-account balance payment directly from here by pressing the Post link marked in the Account Balance. The copay and deductible status can also be set here. We can perform the payment entry for Copay & Deductible amount by clicking the + button aligned against the copay & deductible fields. If the Auto Post checkbox is checked and a Copay payment entry is already created for that copay, then copay will automatically post while generating the charges. If we need to enter the percentage of coinsurance, provide the same in the ‘Co-ins%’ field.
Note: Any custom payment types categorized as COPAY can be auto-posted from the Charge Entry screen. Also, partially applied co-pay payments can be auto-posted from here.
Condition Tab (F8)
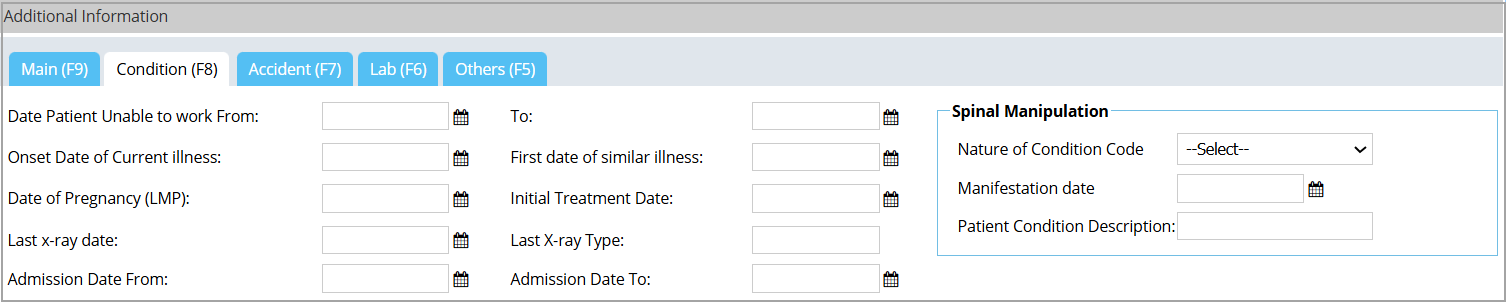
The initial treatment date gets defaulted in the charge entry from the case screen.
Accident Tab (F7)

Lab Tab (F6)
CLIA # & lab charges can be entered here if necessary.

Others Tab (F5)
Major information entered here is the following:
Supervising Provider, Ordering Provider, PCP, Service Auth. Ex. Code, etc.
The Service Authorization Exception Code is necessary when providers are required by law (e.g., New York State Medicaid) to obtain authorization for specific services but, for the reasons listed in REF02, performed the service without obtaining the authorization. Check with your state Medicaid to see if this applies to your state.

Notes Section
The notes section is present beneath the Additional Information section, and different kinds of notes can be entered by clicking on it.

Save and Print
Print Superbill: To view and print the superbill; this is enabled only after saving the charge.
Show Amount: This option was previously used to display or hide the amount on the superbill prior to saving a charge. It is now deprecated, as superbills can no longer be printed before the charge is saved.
Statuses: NEW, BILL_TO_PR, BILL_TO_PT, BILL_TO_GR, HOLD, VOID.
Charges can be saved as either of the following statuses from the charge entry screen, depending on the case selected.