

Creating a Chart Note
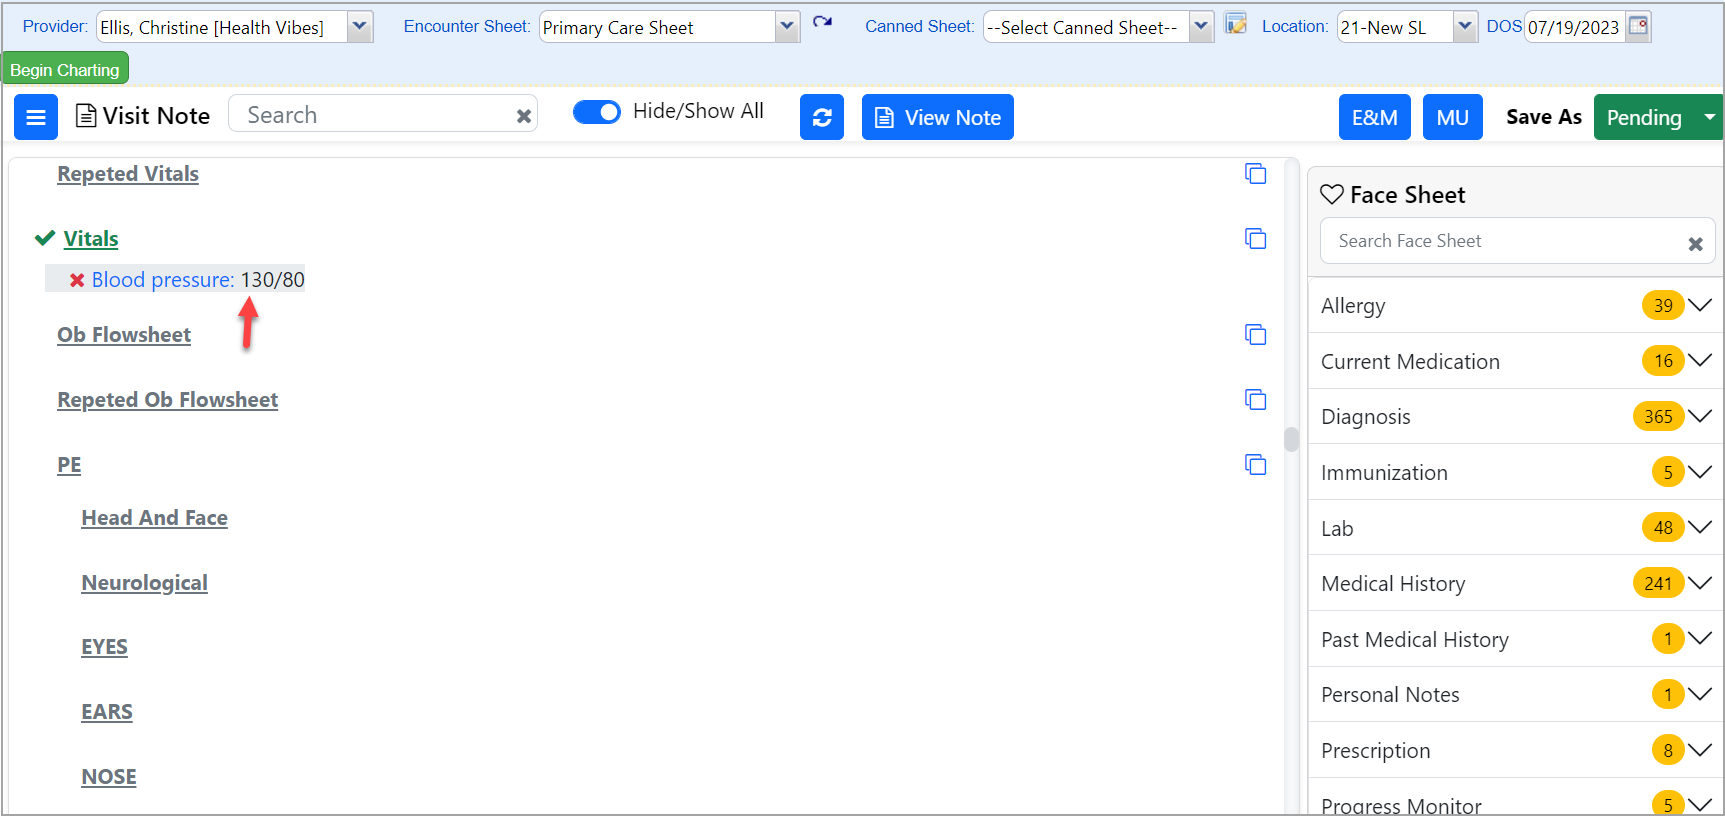
Select a patient from the Patients tab or the Appointments tab (if the patient has an appointment). If no charts are pending for a patient, the Facesheet tab of the patient opens up. Click on Current Encounter to create a new chart. When the charting screen opens up, select the provider and an appropriate encounter sheet, and click Begin Charting’.
Entering and Editing Level-2 Data inside a chart
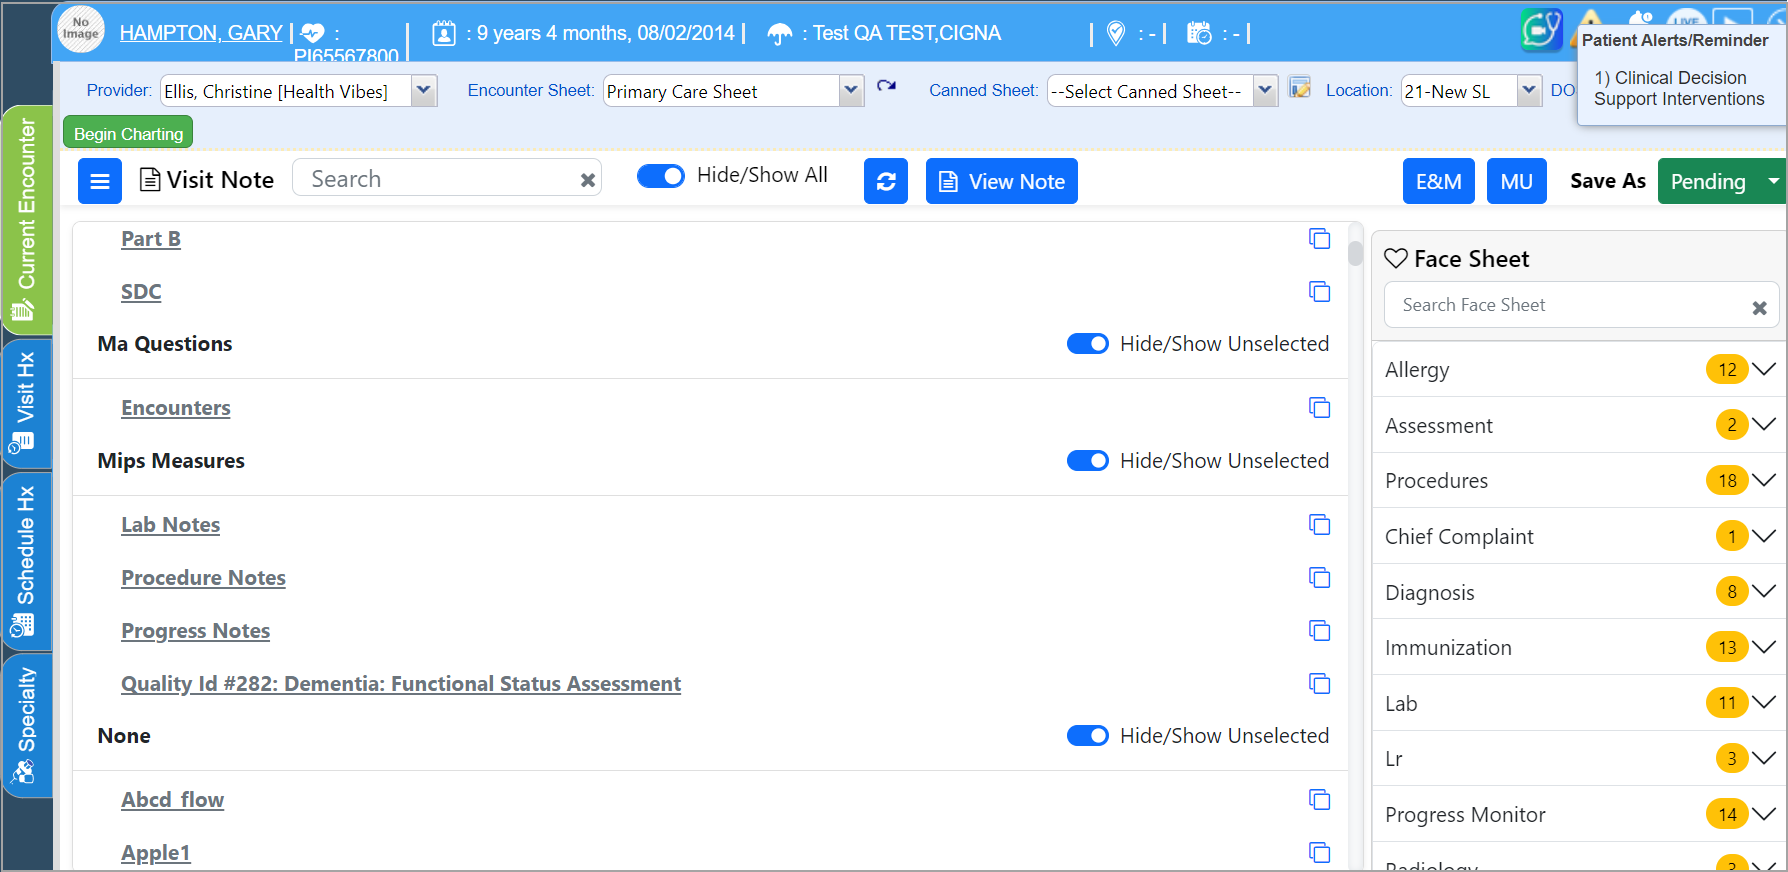
1. Select a level 1 component where data needs to be inserted. You can easily arrive at the desired header by using the search option at the top (see Image 2). Click on the header.
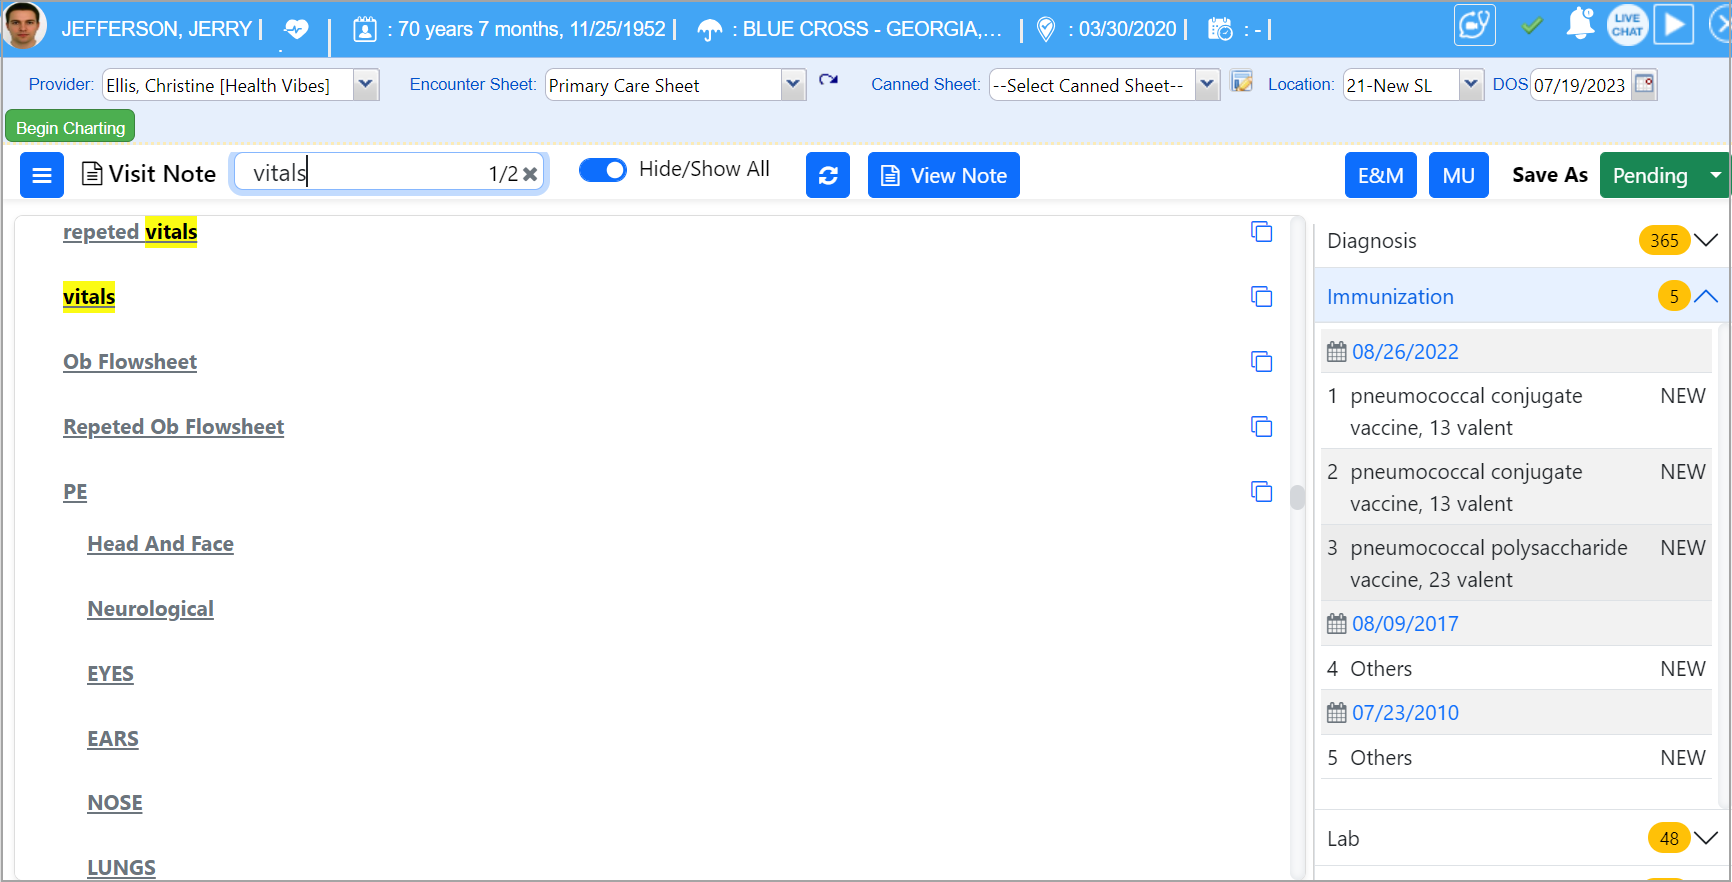 Image 2
2. On clicking the header (level 1), level 2 will appear as a pop-up. Users can type in the data directly or select from any level-2 down options provided. Click on Save after entering the data.
3. For level-1 Vitals, if abnormal values are entered, they appear in red in both the narration editor and the Level 2 pop-up. This applies to fields of type text field and text area. Data can be copied from the Facesheet as well, as explained below.
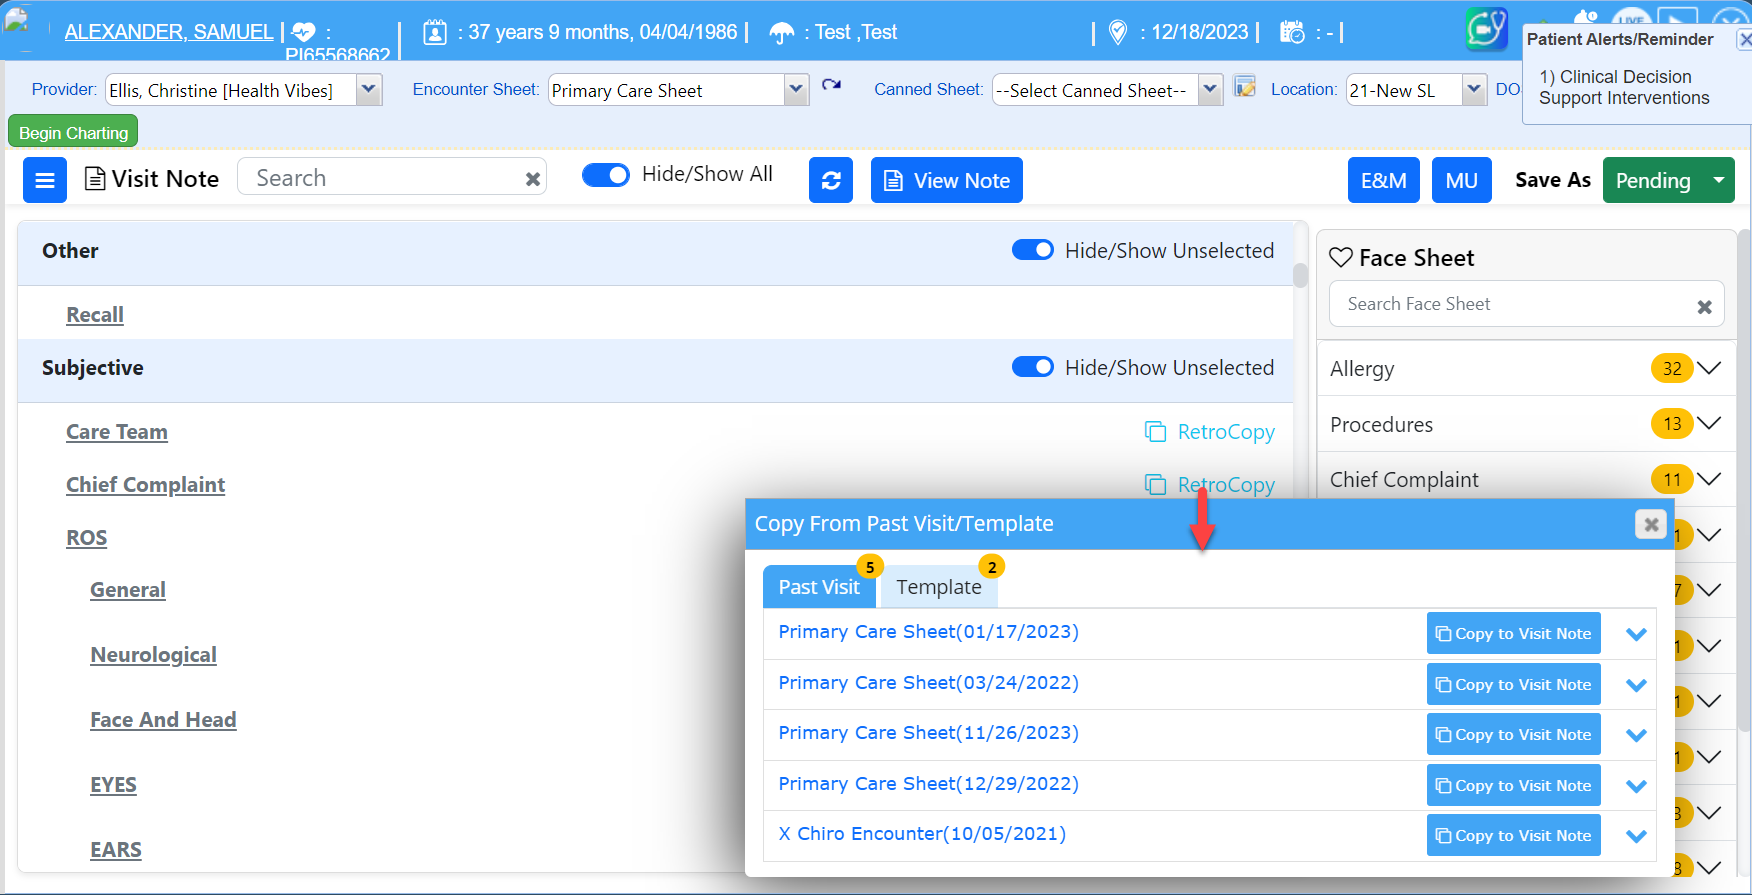
Retro Copy for Level1 Data
The retrocopy feature will copy historical Level-1 data to the current note. Users can either choose to copy from the previous note(s) or a canned sheet template.
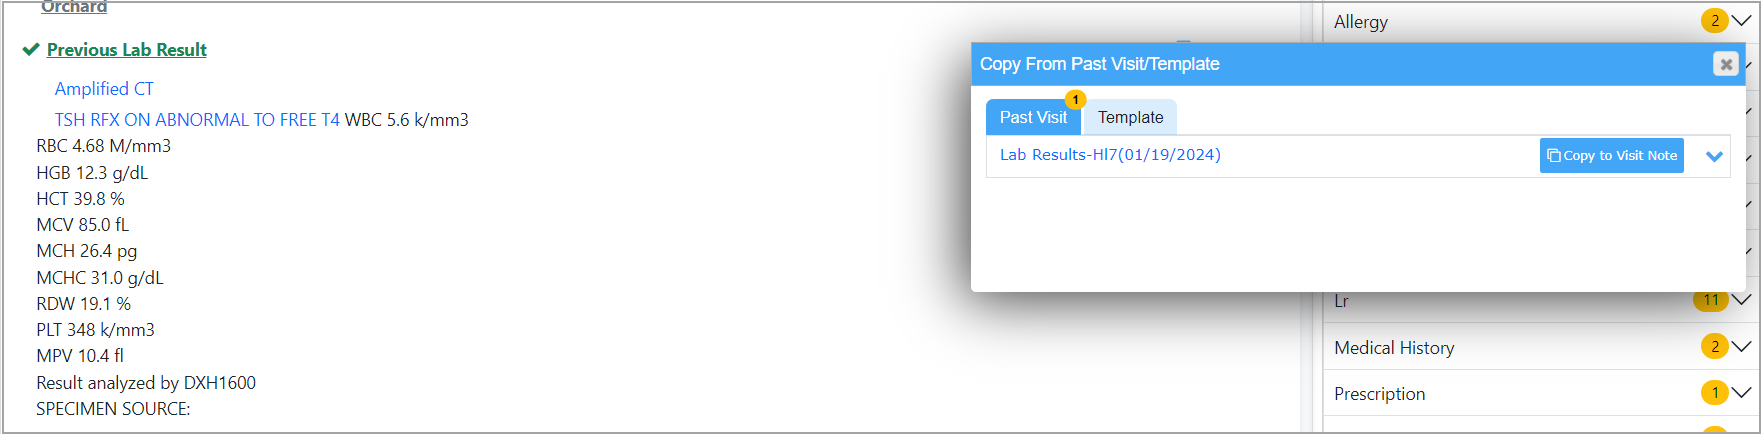
Lab Result Copy
Using this feature, the patient’s lab results can be saved for subsequent encounters (refer to Image 1.1.2b). The following conditions are necessary to copy lab results:
A. Level-1 Code should be LAB_RESULT_HX
B. The patient should have a previous lab history.
Copy from History
Another copy feature that can be utilized on the charting screen is “Copy from History”. This is to copy from previous Level-2s. Using the option, users can copy all data from the corresponding L-2 elements in previous notes or facesheets, regardless of Level 1. Even the information entered straight into the Facesheet and not present in any of the charts can be copied using this feature. The field type of the Level-2 component should be either Long text, Ex-para, or Rich Text editor. To learn more on how to utilize the ‘Copy from History’, click here.
Copy from Facesheet
Note: To easily toggle between the document and the encounter sheet when charting, the Level-2 popup has a minimize button ![]() provided at the top-right corner.
provided at the top-right corner.
* Active Facesheet items (if present for the selected Level 2) will be available on the right-hand side. Users can use the check box to select the items to copy, hit the copy button ![]() to copy the selected Facesheet data into the L2 component, and finally click on ‘Save’ at the bottom of the L2 pop-up screen.
to copy the selected Facesheet data into the L2 component, and finally click on ‘Save’ at the bottom of the L2 pop-up screen.
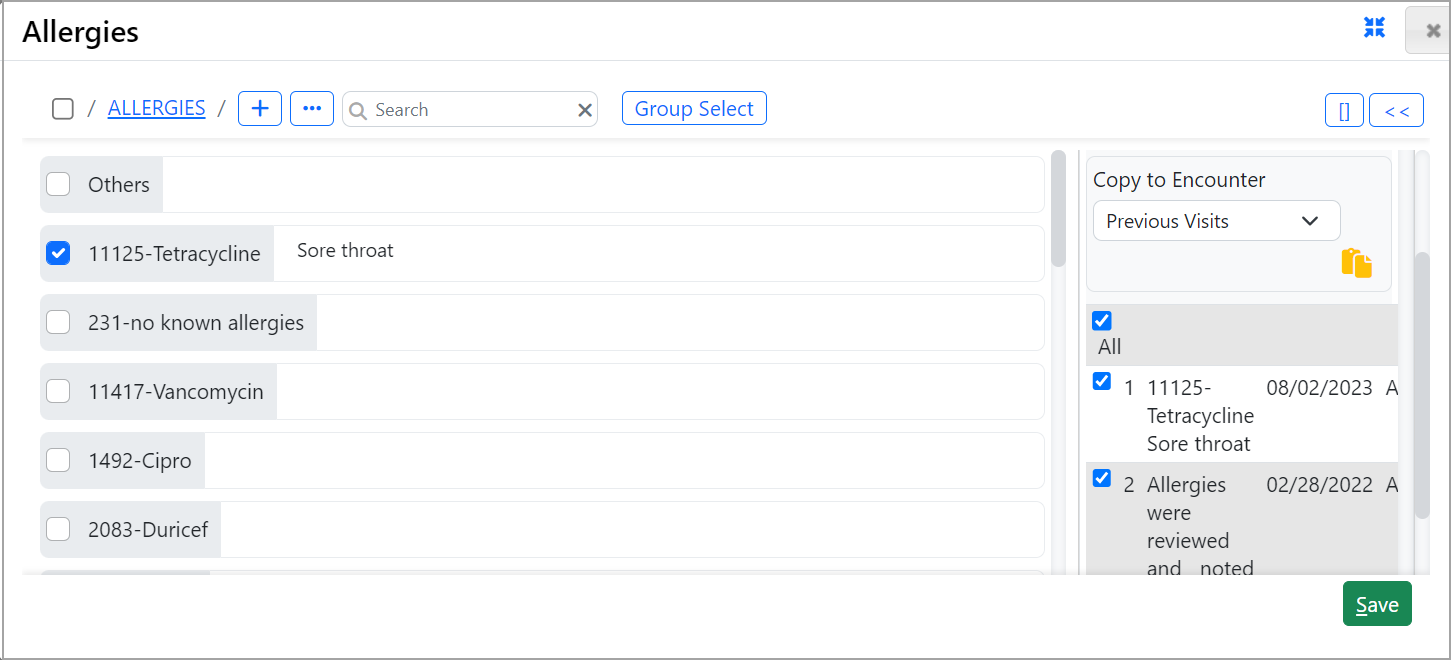
* Use the Canned Sheet copy button ![]() beside the header to copy canned sheet data into the current chart. * Finally, select a status from the drop-down beside ‘Save As’ to save the chart in the selected status.
beside the header to copy canned sheet data into the current chart. * Finally, select a status from the drop-down beside ‘Save As’ to save the chart in the selected status.
Quick editing of a Level-2 component
1. Click on a level-2 item visible under the level-1 header to edit the item.
2. Click on the right side of the L2 to make the area editable. Perform the required edits and press enter to save the changes.
3. Click the red-colored cross mark to delete the item.
Lab and Radiology Order Status Update
Users can update the order status through Radiology Level-2 text by entering the following format: Status: <status> The status gets updated in the status field of the Order Hx tab of the charting screen (please see Image 1.4.11). If no status is entered by the user, the “Active” status will be used for the order.

Completing a Chart note
Select COMPLETE from the ‘Save As’ drop-down to save the chart as complete. * All users authorized with admin privileges can hereafter modify a completed chart.
Voiding a Chart Note
Select VOID from the ‘Save As’ drop-down to void the chart. * All users can view void charts in the Visit History tab.