

Copy From History Feature
This is yet another feature in PracticeSuite to ease the charting process. It allows users to copy data from previous level 2s into the chart. The main highlight of this ‘History Copy’ is that level 1 or level 2 used for copy is irrelevant. This would mean that users can copy any component into another, like allergy into vitals, smoking status into family history, and so on. Also, data entered straight into a Facesheet can be pulled using this feature.
Button Tags
Special template tags called button tags are used for this purpose. The information corresponding to each is given below.
| Button Tag | Information |
| MEDICAL_HISTORY | Medications for the patient |
| MEDICAL_HISTORY_IMPORTED | Medications for the patient imported from other systems |
| LAB_RESULT | Lab results for the patient |
| IMMUNIZATION_HISTORY | Complete immunization History of the patient |
| ALLERGY | Complete Allergy list of the patient |
| PROBLEM_LIST | A complete problem list of the patient |
| FAMILY_HISTORY | Family History of the patient |
Table 1
They are available in the Level-2 add/edit screen in the Templates/Tags drop-down. When the user selects any of the tags described above and saves the Level-2 screen, the ‘Copy from History’ button will show up next to the level 2 component in the chart. Click on the button to fetch the information into the text area, where the user can make the required edits.
Illustration
Example: Assume that the user needs to bring in ‘Smoking Status’ into the ‘Patient Assessment’ component.
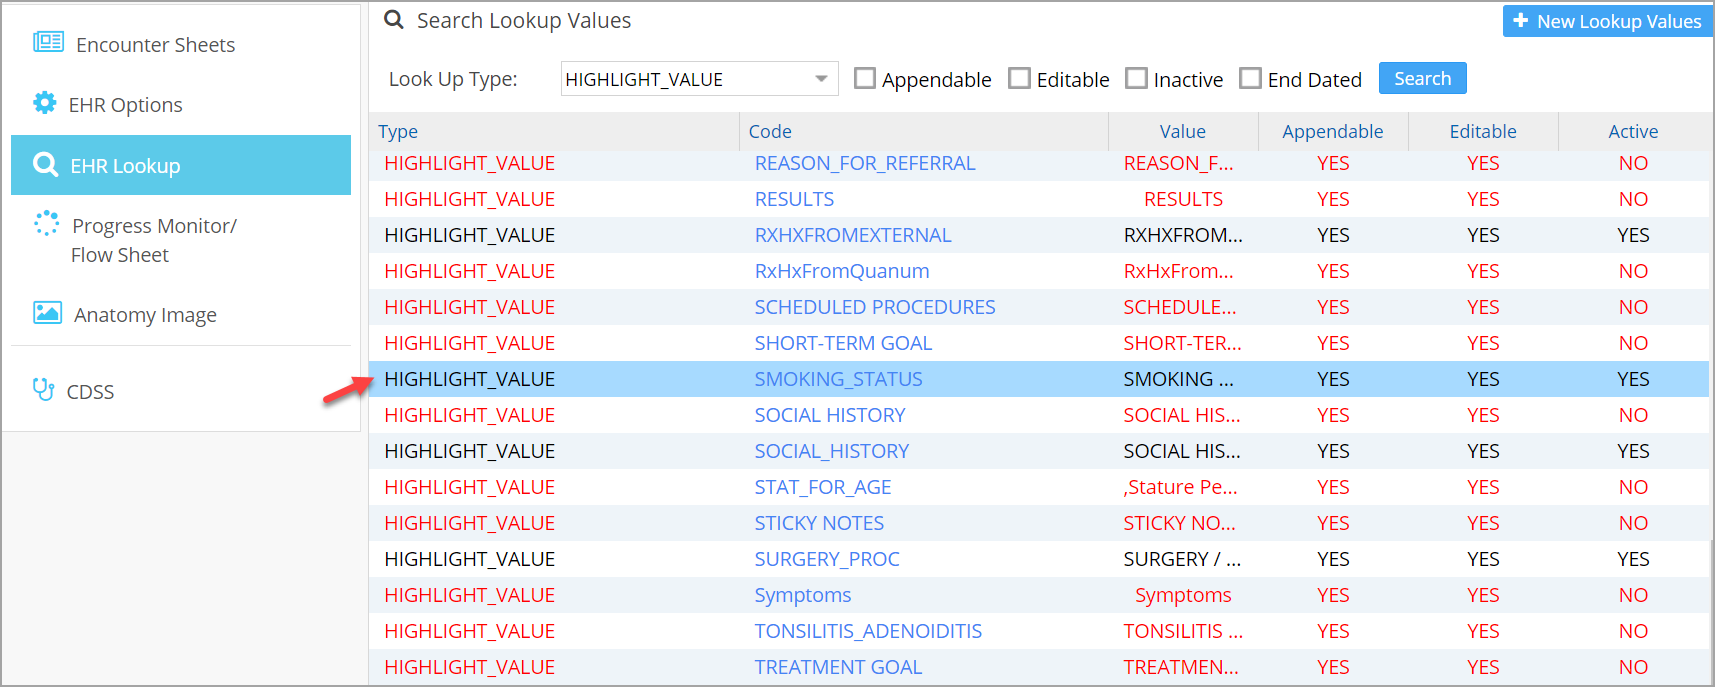
1. Go to EHR Advanced >EHR Admin> EHR Lookup, and from the Lookup Type drop-down, select HIGHLIGHT_VALUE.
2. Identify the smoking status in the listing and copy the code field ‘SMOKING_STATUS’.
3. Open the chart for a patient. Locate ‘Patient Assessment’. Double-click on the Patient Assessment level-1 to open the level-2 for the component.
4. Double-click on the needed Level 2 component where the data is to be placed. The level 2 add/edit screen appears.
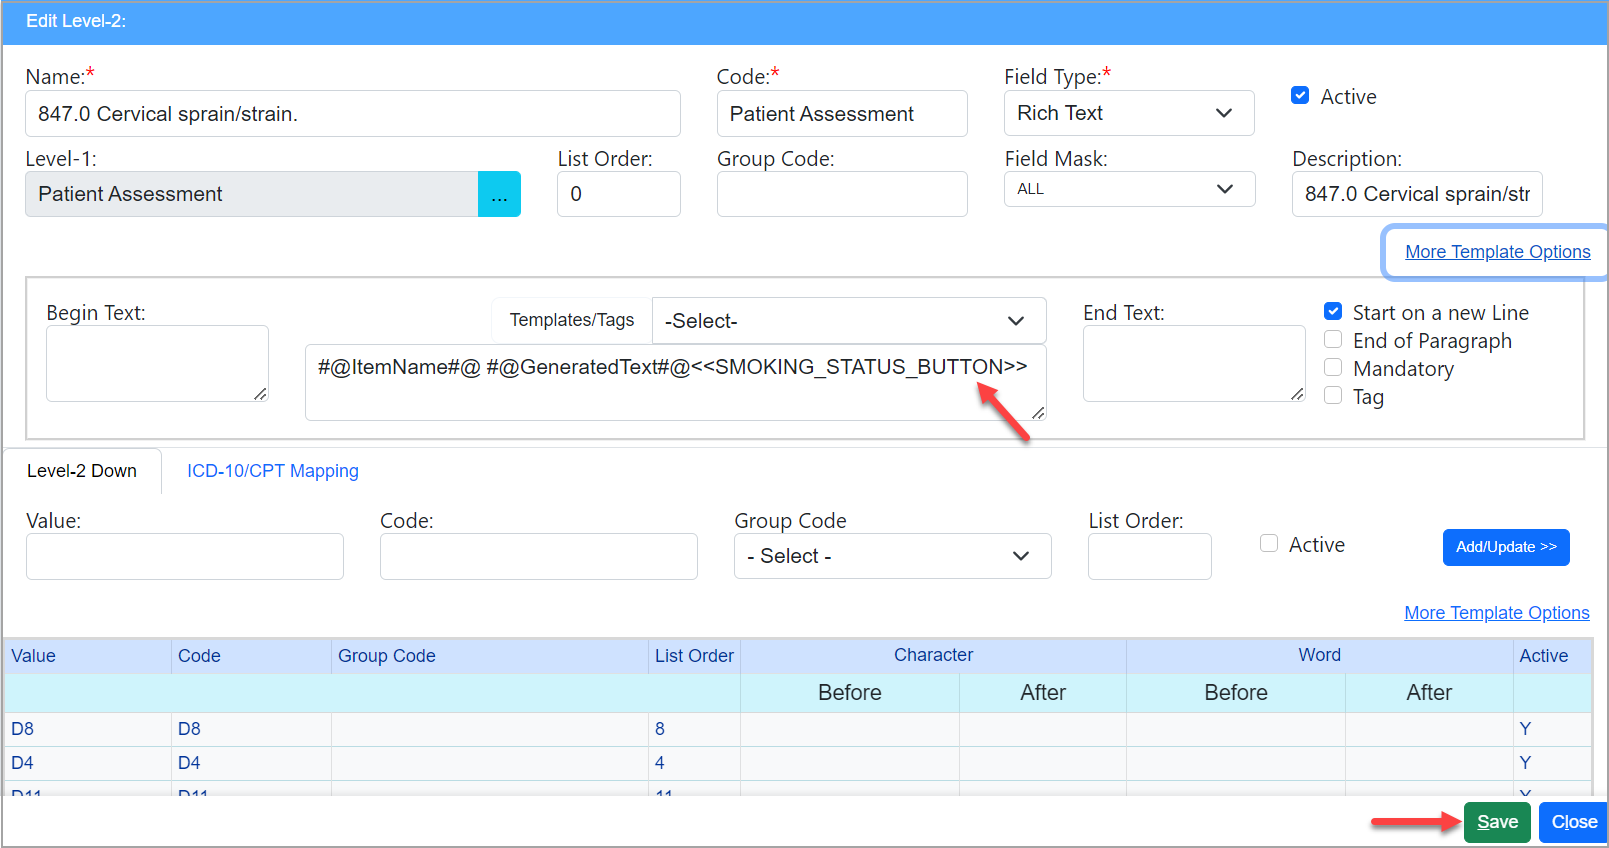
5a. Click on ‘More Template Options’ and paste the copied highlight value code, followed by ‘_BUTTON’ within angular brackets, in the text box provided. Here it will be <<SMOKING_STATUS_BUTTON>>. Click save.
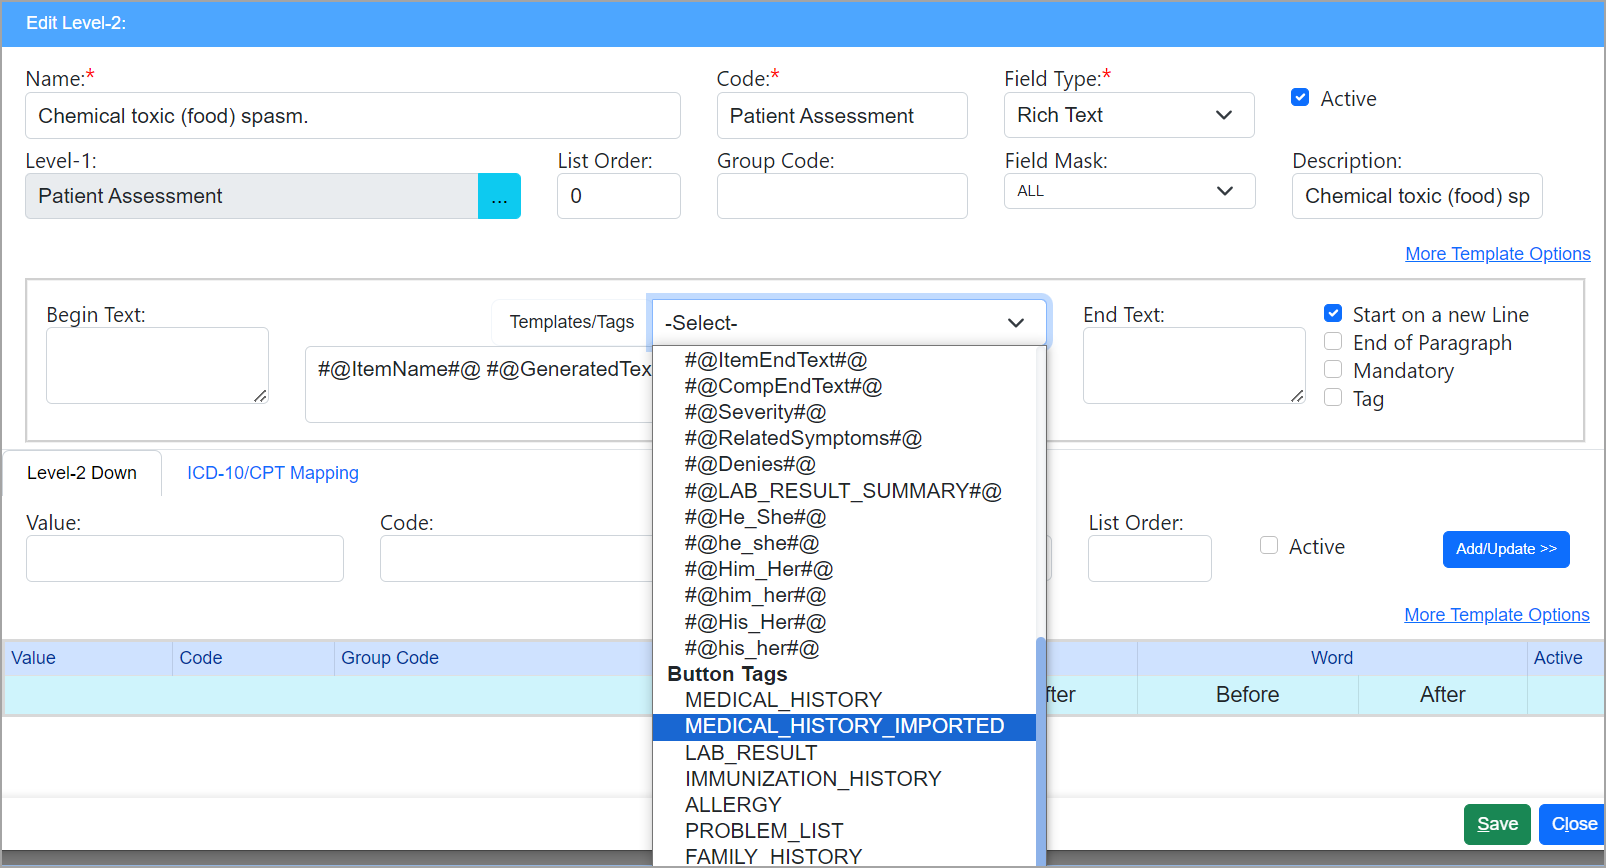
5b. If, instead of smoking status, the user needs to pull any of the data listed in Table 1, then from the Template/Tags drop-down scroll down to the Button tags, select the required button tag, and save.
6. The ‘Copy from History’ option appears beside level 2. Click on it to copy the Facesheet data into level 2.

7. Save Level 2 and the chart.