Introduction
This article explains the workflow of writing lab orders, sending them to the required lab, and processing results received through Lab Hub. Key points to be noted on lab ordering through charts.
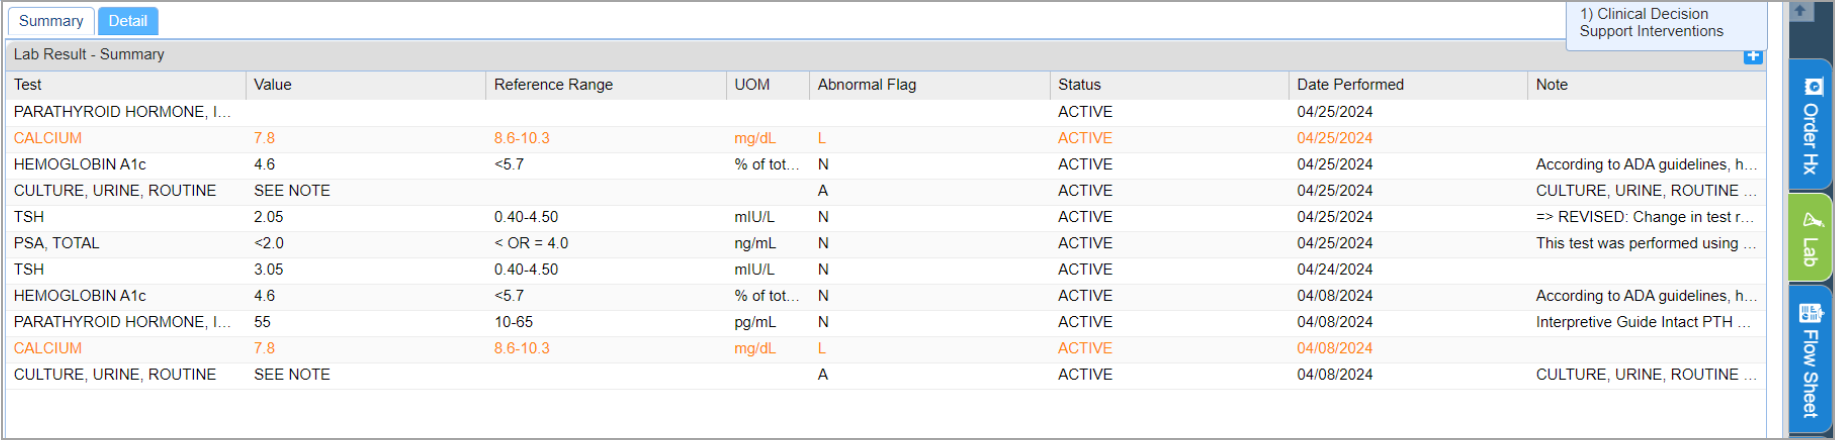
* Users can order lab tests based on past problems, not only those currently listed in the chart. A tab called Past Problems in Level 2 displays diagnoses from previous encounters.
* The lab and radiology orders within the parent chart will not be copied into the follow-up chart.
* Lab remarks can be viewed in the Narration section. Remarks entered from the Lab Hub screen will be included in the resultant HL-7 chart under the Level-1 component labeled Remarks. Use tag #@LAB_RESULT_REMARKS#@ for the ‘Remarks’ component.
Steps in lab ordering and result display in narration
Step 1: Navigate to the left menu and select Clinical Desktop.
Step 2: Select the Appointments tab and choose a patient; you will land on the Face Sheet page of the patient chart.
Step 3: Select the ‘Current Encounter’ tab from the extreme top left. Select the appropriate encounter sheet from the drop-down list and hit the ‘Begin Charting’ button. Add diagnoses to the chart.
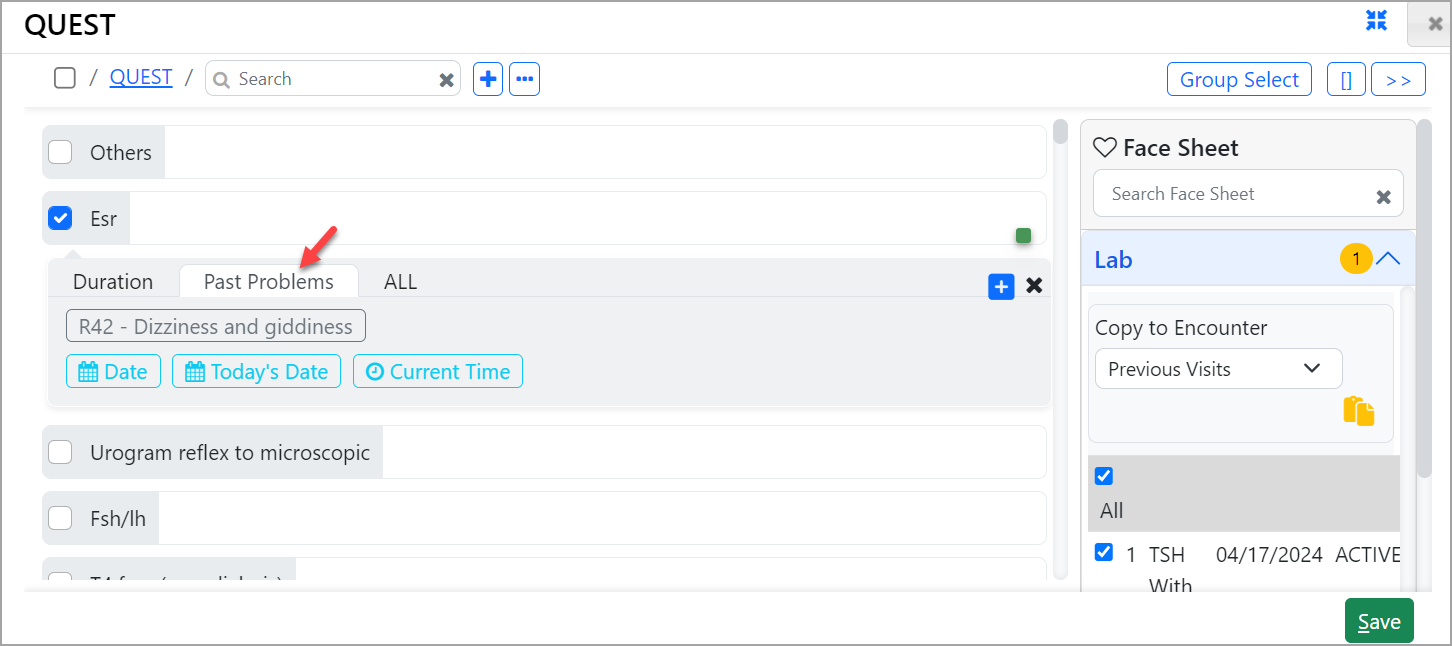
Step 4: In the Modern UI, you can search for the appropriate lab name in the Search Level-1 feature. Refer to Image 1 below.
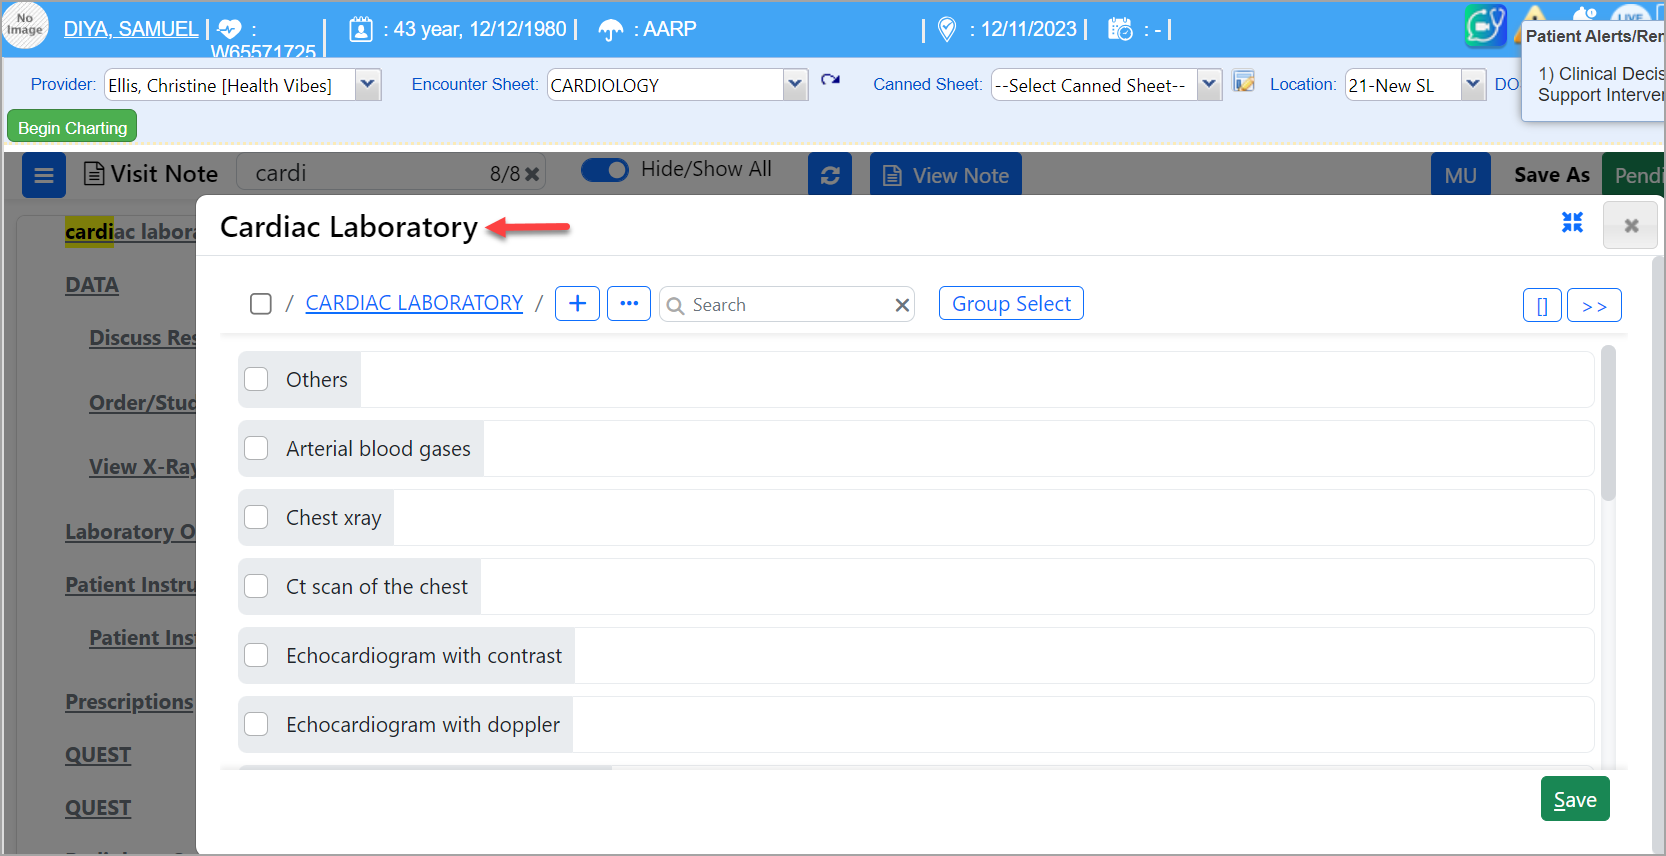
Step 5: Select the correct lab from Level 1 and order the respective labs for a patient from Level 2 for the current visit or encounter. Associate the diagnoses with your lab orders. The diagnosis part is required when ordering labs through the EHR-Lab interface. Only then would the diagnoses appear when we select the lab order (refer to Image 2 below).
Step 6: Please complete the rest of the note by navigating through the different sections and adding appropriate documentation.
Step 7: Choose the pending drop-down from the bottom right of the charting screen and select COMPLETE from the drop-down beside the SAVE AS.
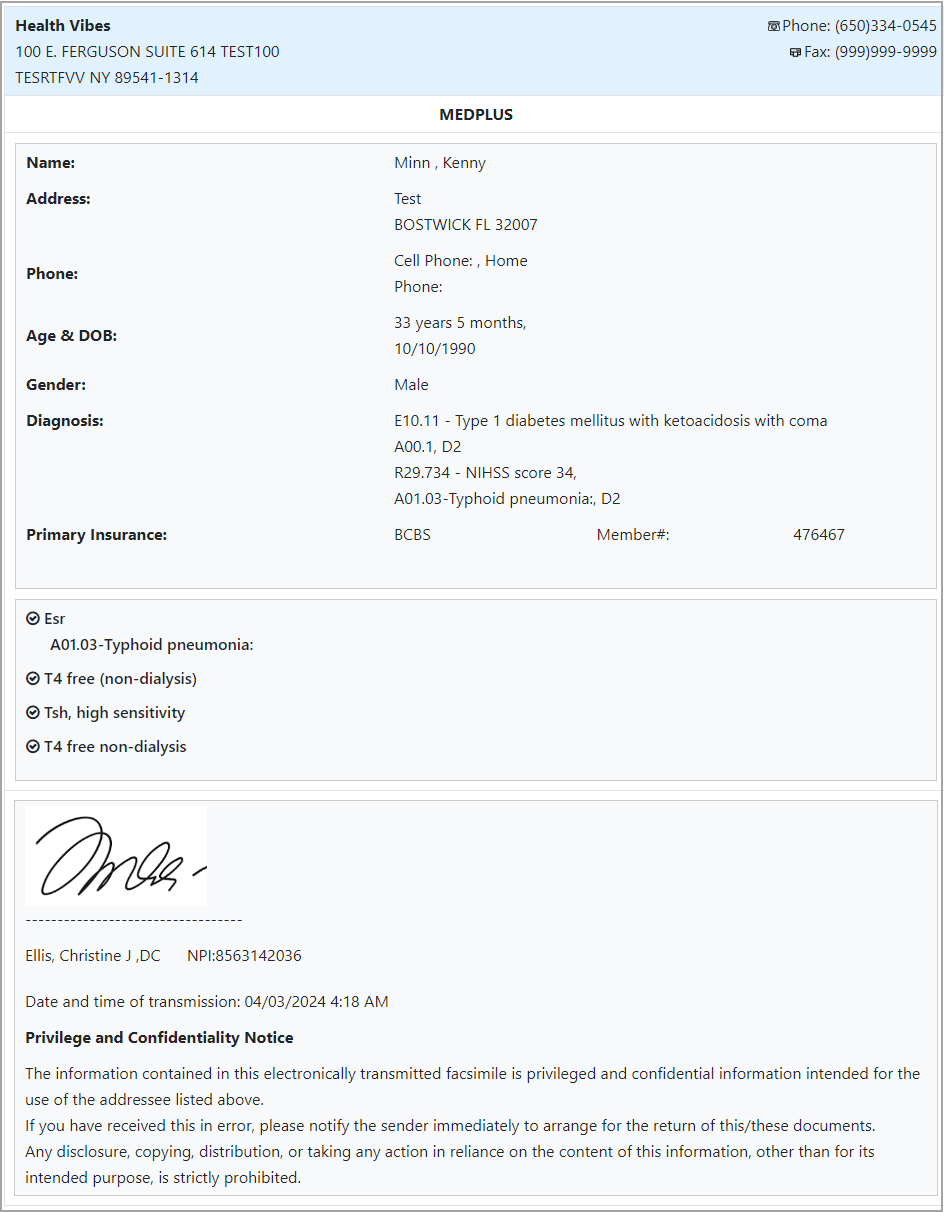
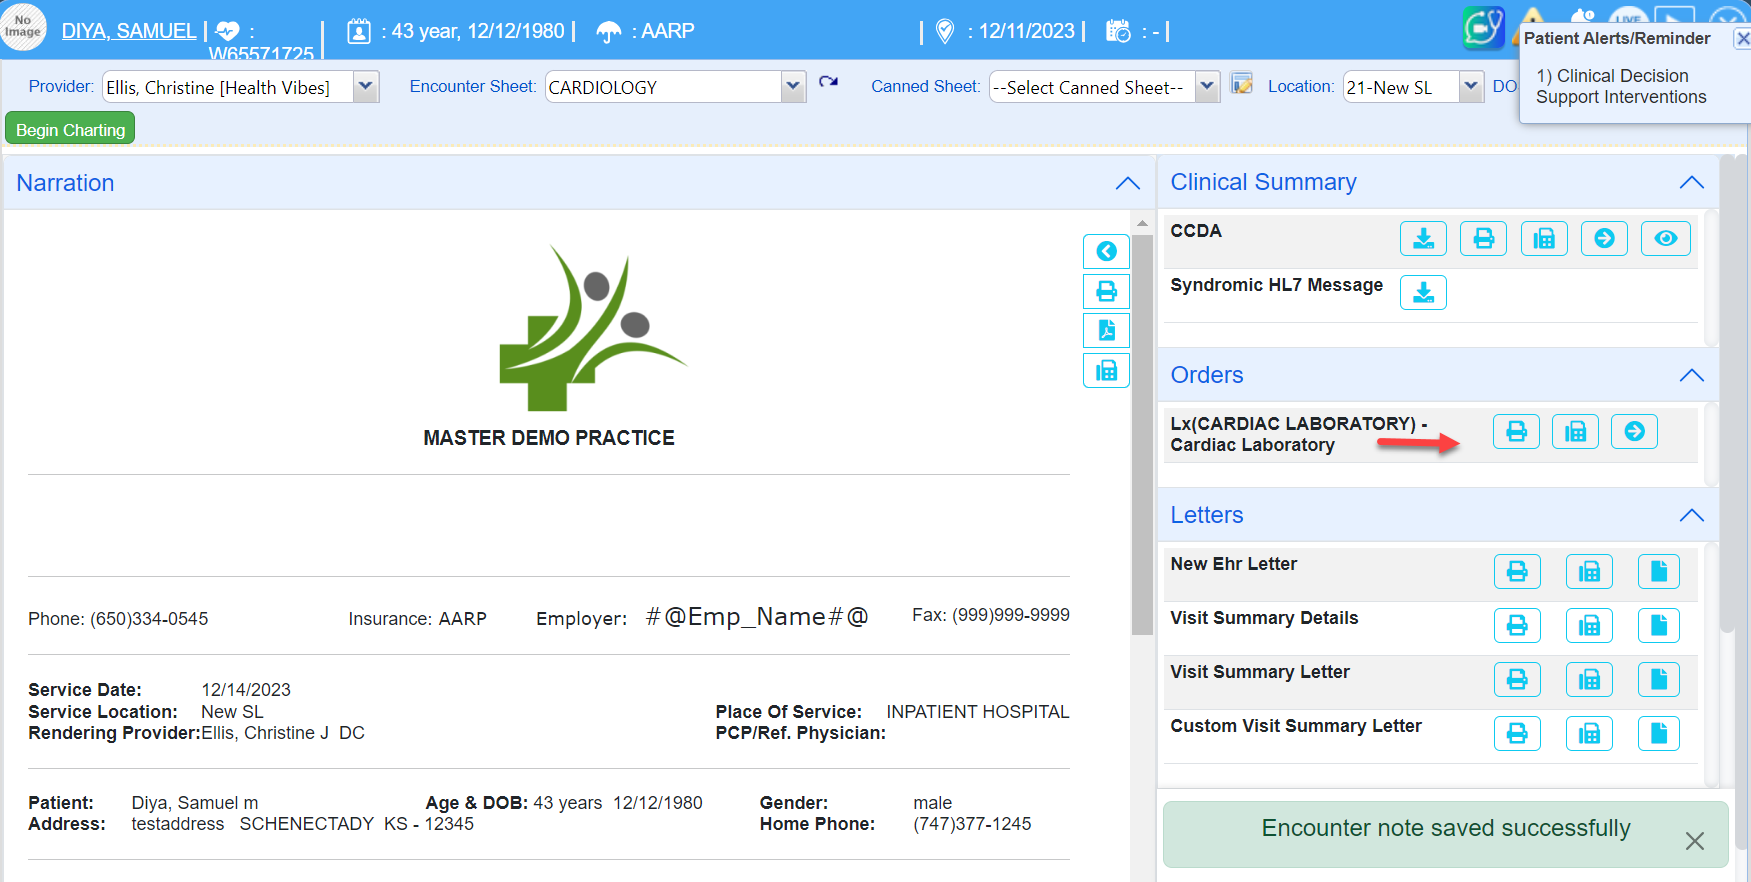
Step 8: Now you can view the completed note as shown below (Image 3). Under the Orders section, we can locate the appropriate lab name with 3 icons (in this scenario, it is Lx (Quest)), and it is explained below.
| To print the order. | |
| To fax the order | |
| To send the electronic lab order. * Upon selection, please fill in the appropriate fields, including the comments section if necessary, and select SUBMIT. Now, the requisition form and other lab order-related forms will be generated. For example: ABN. Note: For Quest, the Generate Lab Order page will have the PSC HOLD option, where PSC stands for Patient Service Center. |
Choose an appropriate option.
Sample Print Order Page
Also, the clinical staff can see all the visit notes for a patient under the Visit Hx tab to locate the ordered labs by selecting the appropriate visit note.
Retrieving Results through Lab Hub
Results sent from the labs through the lab interface are retrieved through the Lab Hub page.
Step 1: Navigate to the left menu and select EHR Advanced > Lab Hub from the home screen. To learn more about Lab Hub, click here. Lab Hub has an auto-retrieval facility. Whenever a user opens the Lab Hub screen, it triggers the sync with all the labs set up in the system and retrieves pending lab results that have been available since the last fetch was done. If it is the first time that the user is attempting to retrieve the results or if the last fetch occurred more than 60 days ago, in either of the scenarios, the system can go back 60 days to bring the pending results. Additionally, users can utilize the ![]() button at the top right-hand corner of the screen (highlighted in Image 4) to manually retrieve the results at any time.
button at the top right-hand corner of the screen (highlighted in Image 4) to manually retrieve the results at any time.
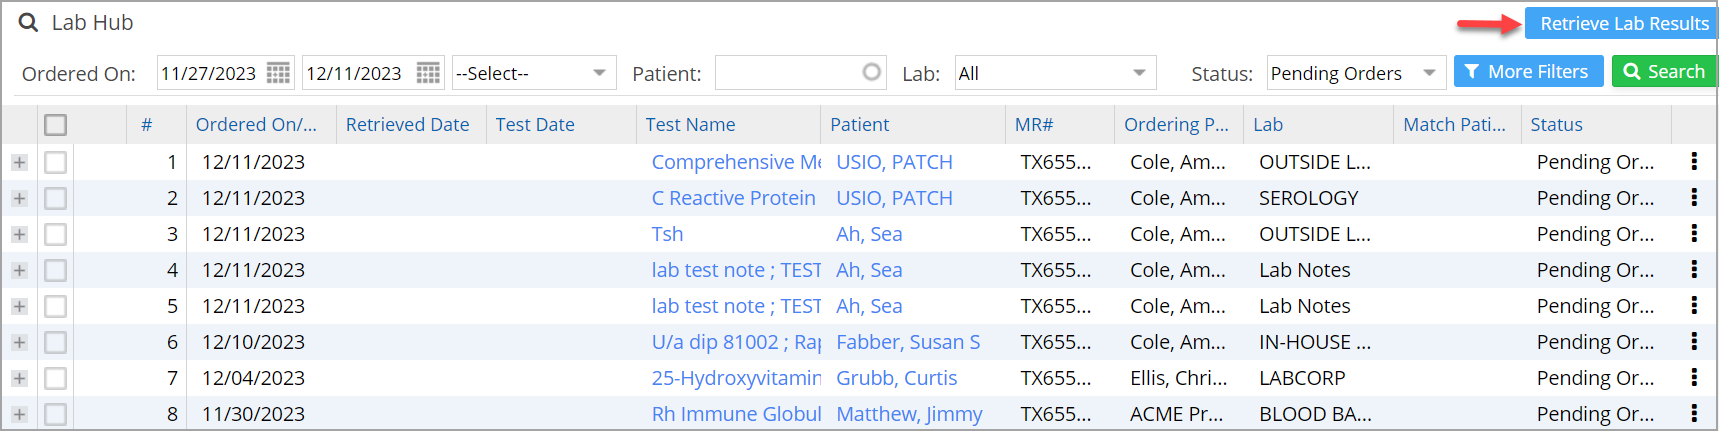
Step 2: To view the results, choose the ordered date range, select the status as Unprocessed Results, and select SEARCH.
Step 3: Now, you can view the results and Requisition from this page by selecting the ellipses ![]() . You may also see that some of the patient results are not matched with the patients due to a provider code mismatch between Lab and PracticeSuite. (Note: This is a rare scenario. If this occurs, we need to manually match the patient.)
. You may also see that some of the patient results are not matched with the patients due to a provider code mismatch between Lab and PracticeSuite. (Note: This is a rare scenario. If this occurs, we need to manually match the patient.)
Processing the Results
1. After matching the patients for the unmatched results, select the required results by selecting/ checking the box provided on the left.
2. If the provider code in the result does not match the provider in the system, our system compares the last name and first name and picks the provider with the matching name. If this fails, the provider assigned to that patient in demographics will be associated.
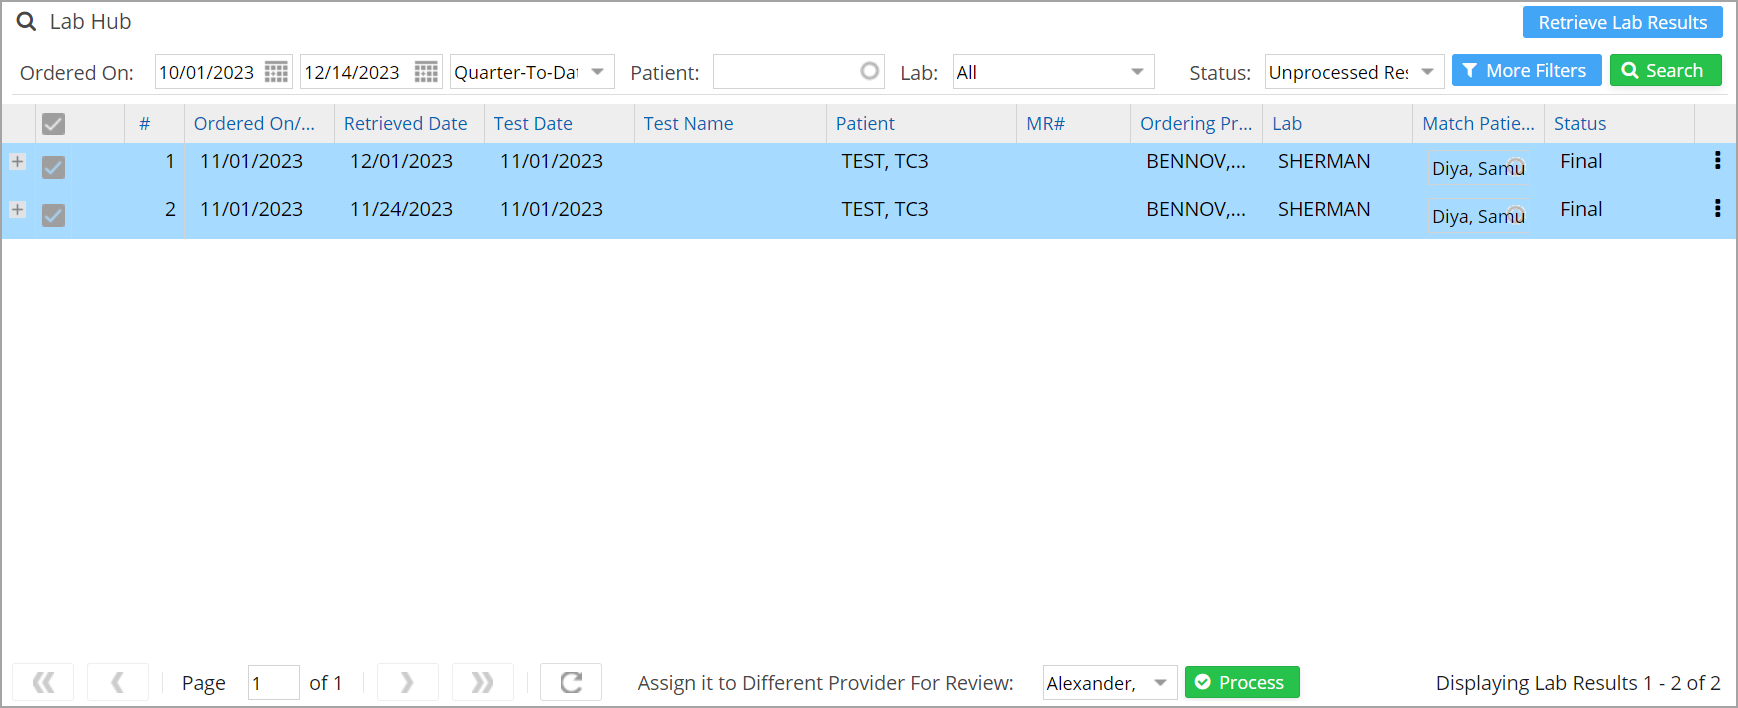
3. If the result needs to be processed under a different provider, select the provider from the “Assign it to Different Provider For Review” drop-down beside the ![]() button. Refer to Image 5 below.
button. Refer to Image 5 below.
4. Once the result is processed, a new chart will be created for this patient in EHR with the encounter sheet name Lab Results-HL7. The result can be viewed from the EHR Lab tab.
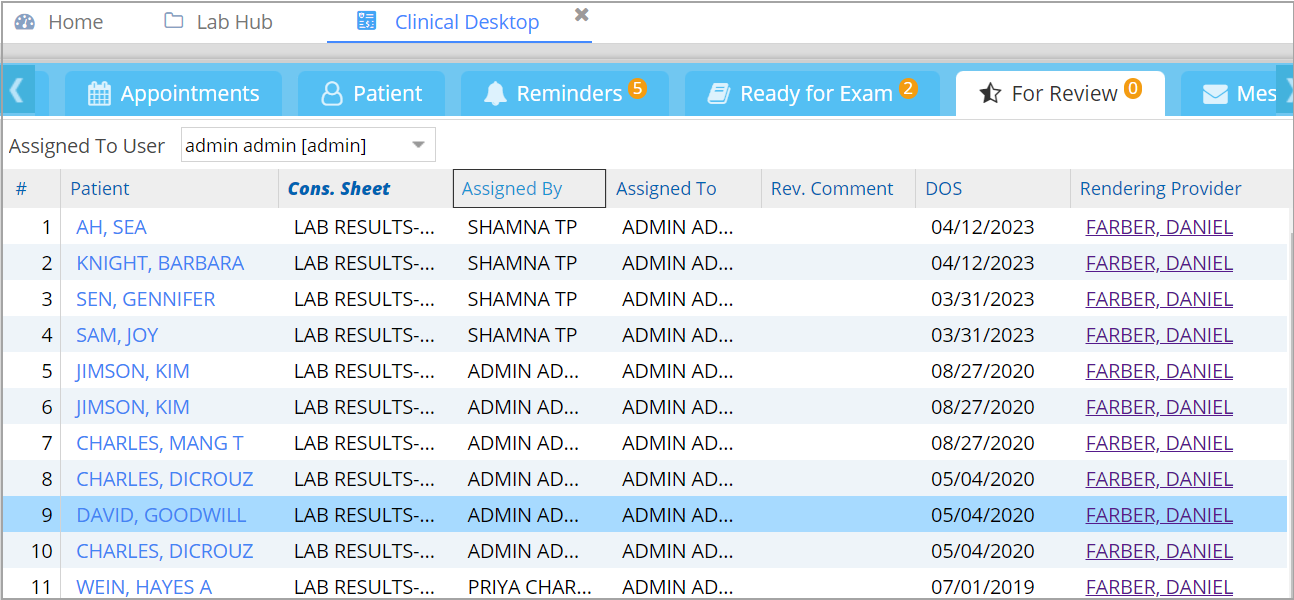
5. Navigate to Clinical Desktop, select the FOR REVIEW tab, and make sure the Assigned to User is set to your name (provider).
6. Filter the Cons. Sheet by Lab Results HL-7 to view only the lab results and choose the patient’s name to view the results (refer to Image 6).
7. You will be taken to the Lab Results Page to review the results and to enter any additional comments if necessary. Please make sure to change the status from FOR REVIEW to COMPLETE beside the Save As to finalize the results. Remarks entered from the Lab Hub screen will be displayed under the Remarks level 1 component. The narration will also display the results in color-coded format in tabular representation.
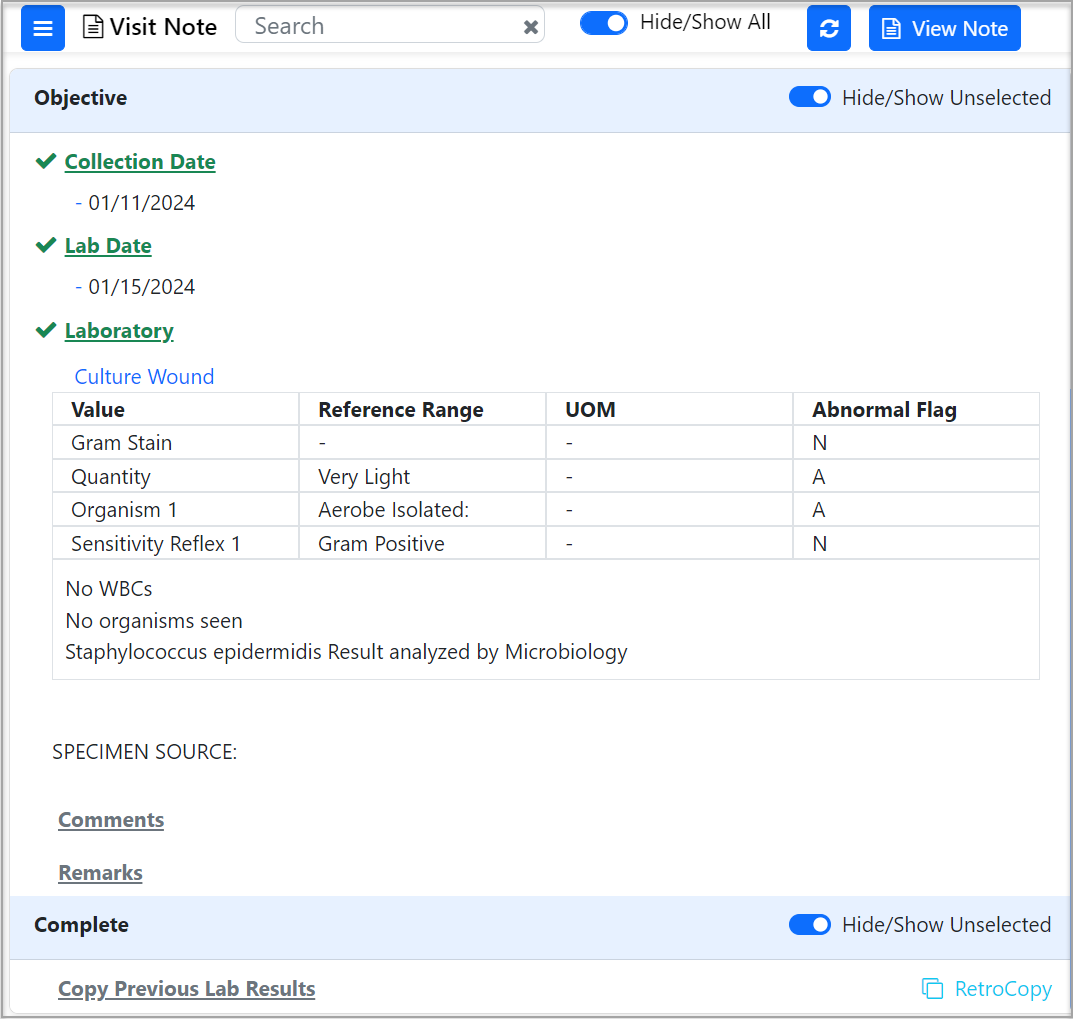
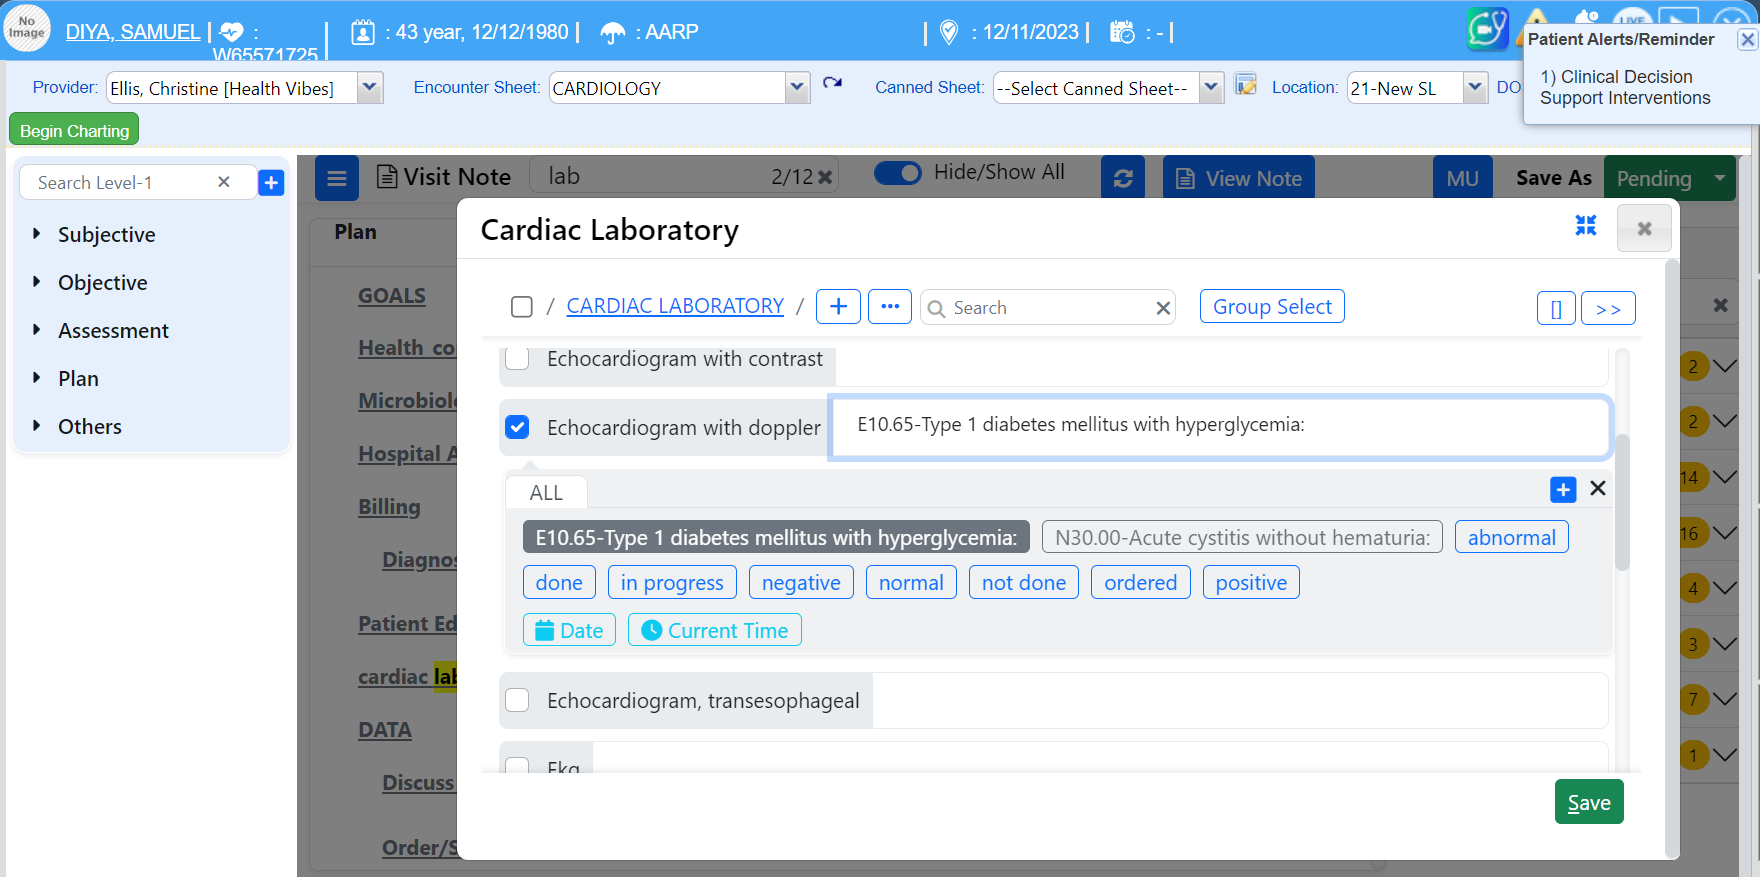
8. You can always view the lab results for a patient under the Lab menu, as shown in Image 8. Both the summary and details tab display the results in color-coded format. Color coding is based on the abnormal flags sent from the lab.