

Initiating the Charting Process
This article explains the steps to initiate charting for walk-in patients as well as for patients with appointments. Click on ‘Clinical Desktop’ on the main menu. This opens the Clinical Desktop screen which comprises of Dashboard and the Pending Charts section. To know more on Dashboard, click here.
Points to be noted before charting
A. Clicking on the patient name from either the Patients tab or from the Appointments tab (if no chart is associated with the appointment opens up the patient’s Face Sheet.)
B. The Alerts screen pops up when the user clicks on the patient’s name from the Reminders tab in the Clinical Desktop.
C. When a chart is associated with the appointment, clicking on the patient’s name in the Appointments tab pops open the chart created for that appointment.
Charting for a Patient with Appointment
We can schedule an appointment in two ways- Appointment through Scheduler and online appointment scheduling through patient portal. All scheduled appointments are reflected on the clinical desktop Appointment tab; see Image 1.
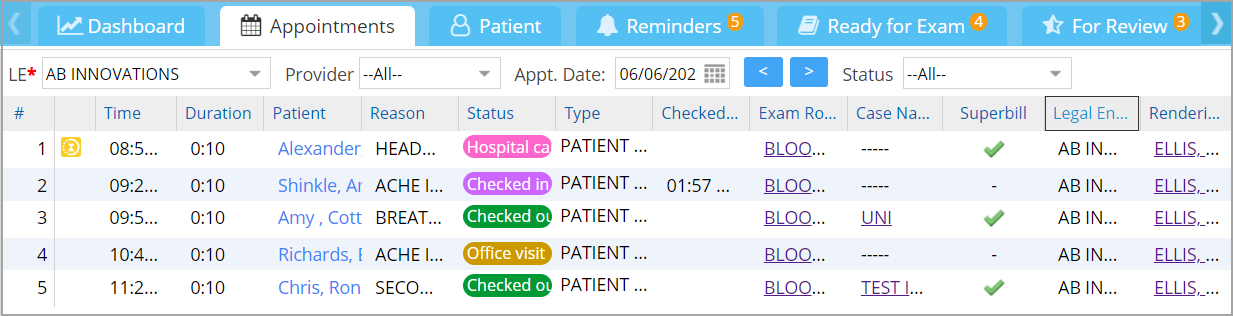
When the Clinical Desktop screen opens up, all appointments of the current day will be displayed (Missed and cancelled appointments are excluded). Use various filters to search. Use the Previous and Next buttons to look for appointments preceding or following the current date. Click on the name of the patient from the list to open the Facesheet of the patient. Click on ‘Current Encounter’ tab on the left corner of the screen to open the charting page.
Charting for Walk-in Patients (Without Appointments)
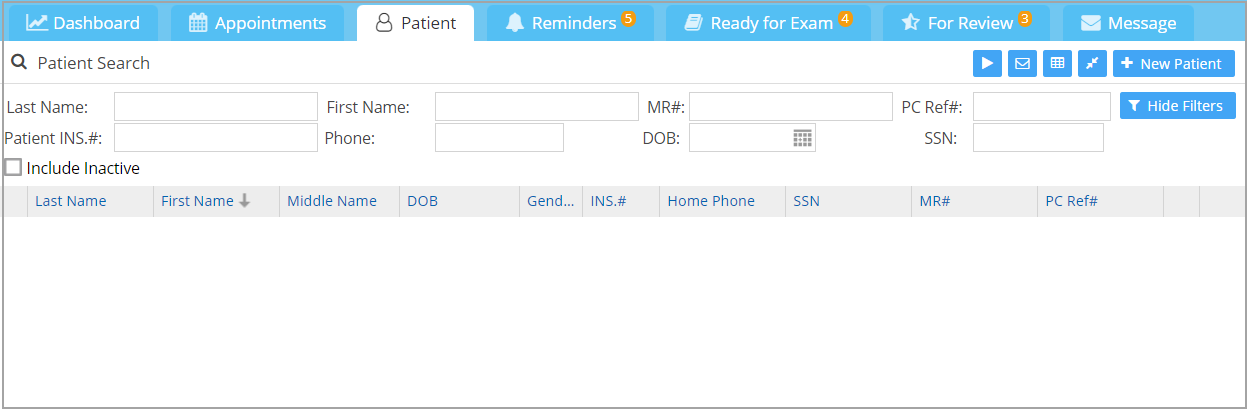
1. From the Clinical Desktop click the Patient tab to open the Patient Search screen; see Image 2.
2. Search for a patient using any of the search criteria (Last Name, First Name, Insurance ID, SSN, Home Phone, MR#, and DOB).
3. To add a new patient from here, click on![]() button seen on the top right.
button seen on the top right.
4. Click on the name of the patient from the list to open the Facesheet of the patient. Click on ‘Current Encounter’ tab on the left corner of the screen to open the charting page.
The EMR Screen
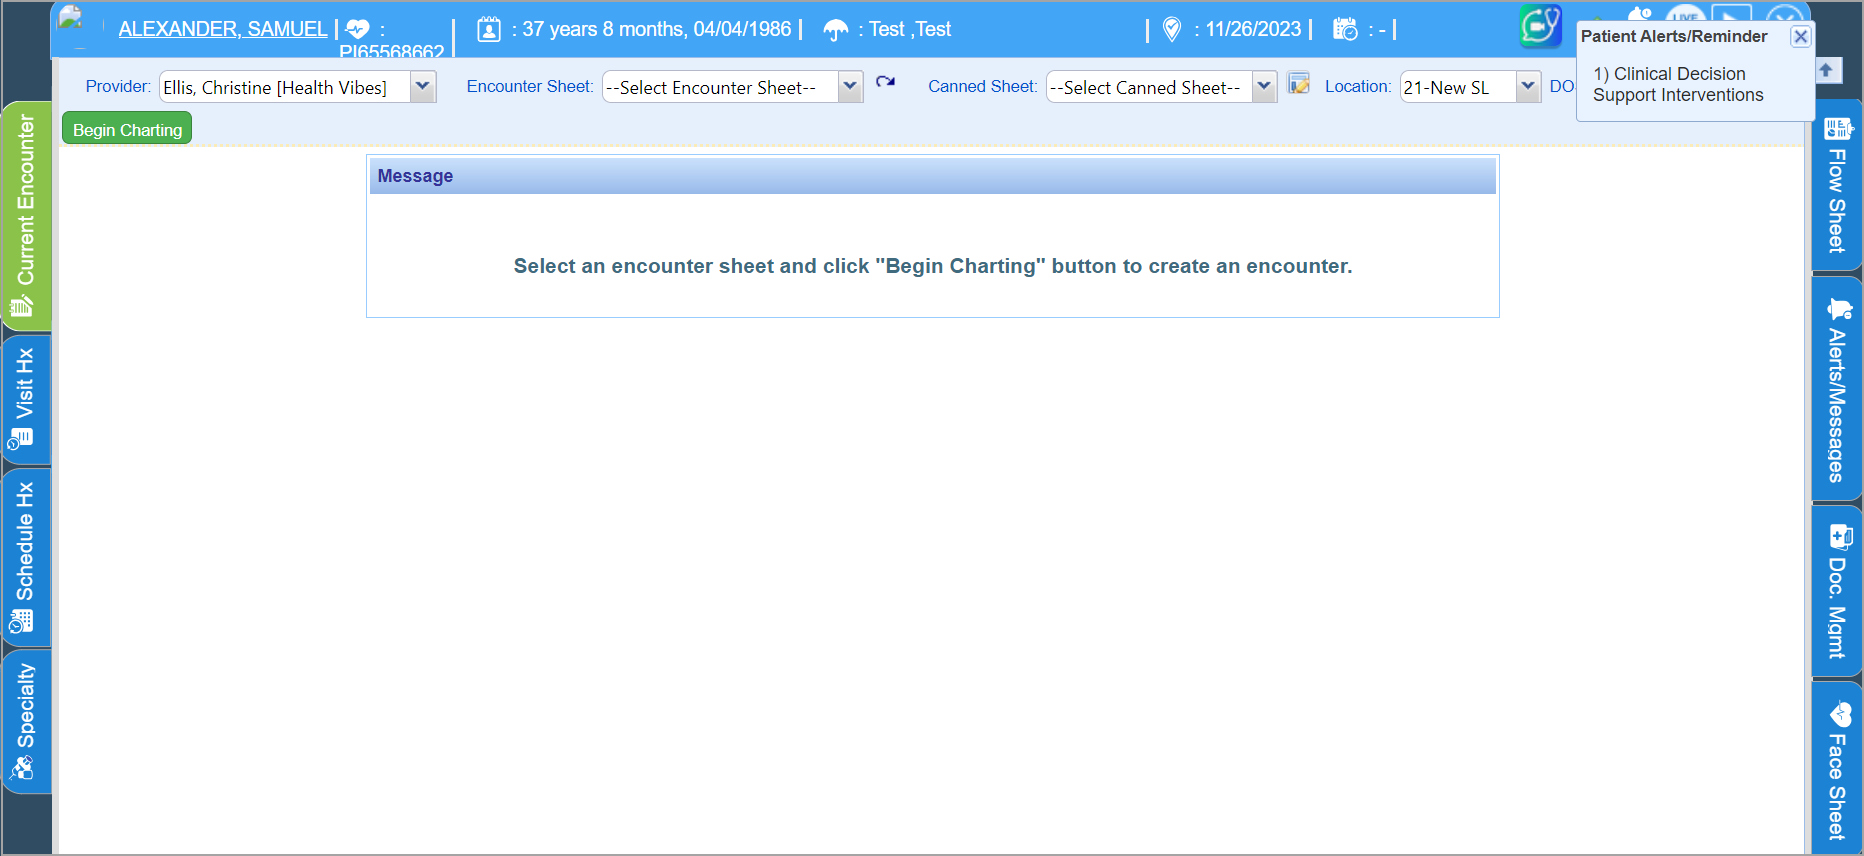
Image 3 is the EMR screen. On top of the page is the charting selection area from where you can select the type of charting sheet required. The header will have the basic info like Last visit date, future date, insurance name, and active reminders. A tick mark ![]() beside the TeleMed icon
beside the TeleMed icon ![]() on the top right-hand side indicates portal access enabled for the patient. A warning icon
on the top right-hand side indicates portal access enabled for the patient. A warning icon ![]() is displayed if portal access is not made available to the patient. The patient name on the top left-hand corner of the charting screen is a hyperlink, and clicking on the link opens the patient’s demographic screen. To continue charting, the user will need to first exit the demographics screen. Also, mouse over the patient’s name to view the cell phone number, gender, and home phone number. PracticeSuite easily accommodates multiple complaints, multiple symptoms, and multiple disease chart notes. All the encounter Sheets available for the selected provider will be displayed in the Encounter Sheet list. To begin charting, you have two options:
is displayed if portal access is not made available to the patient. The patient name on the top left-hand corner of the charting screen is a hyperlink, and clicking on the link opens the patient’s demographic screen. To continue charting, the user will need to first exit the demographics screen. Also, mouse over the patient’s name to view the cell phone number, gender, and home phone number. PracticeSuite easily accommodates multiple complaints, multiple symptoms, and multiple disease chart notes. All the encounter Sheets available for the selected provider will be displayed in the Encounter Sheet list. To begin charting, you have two options:
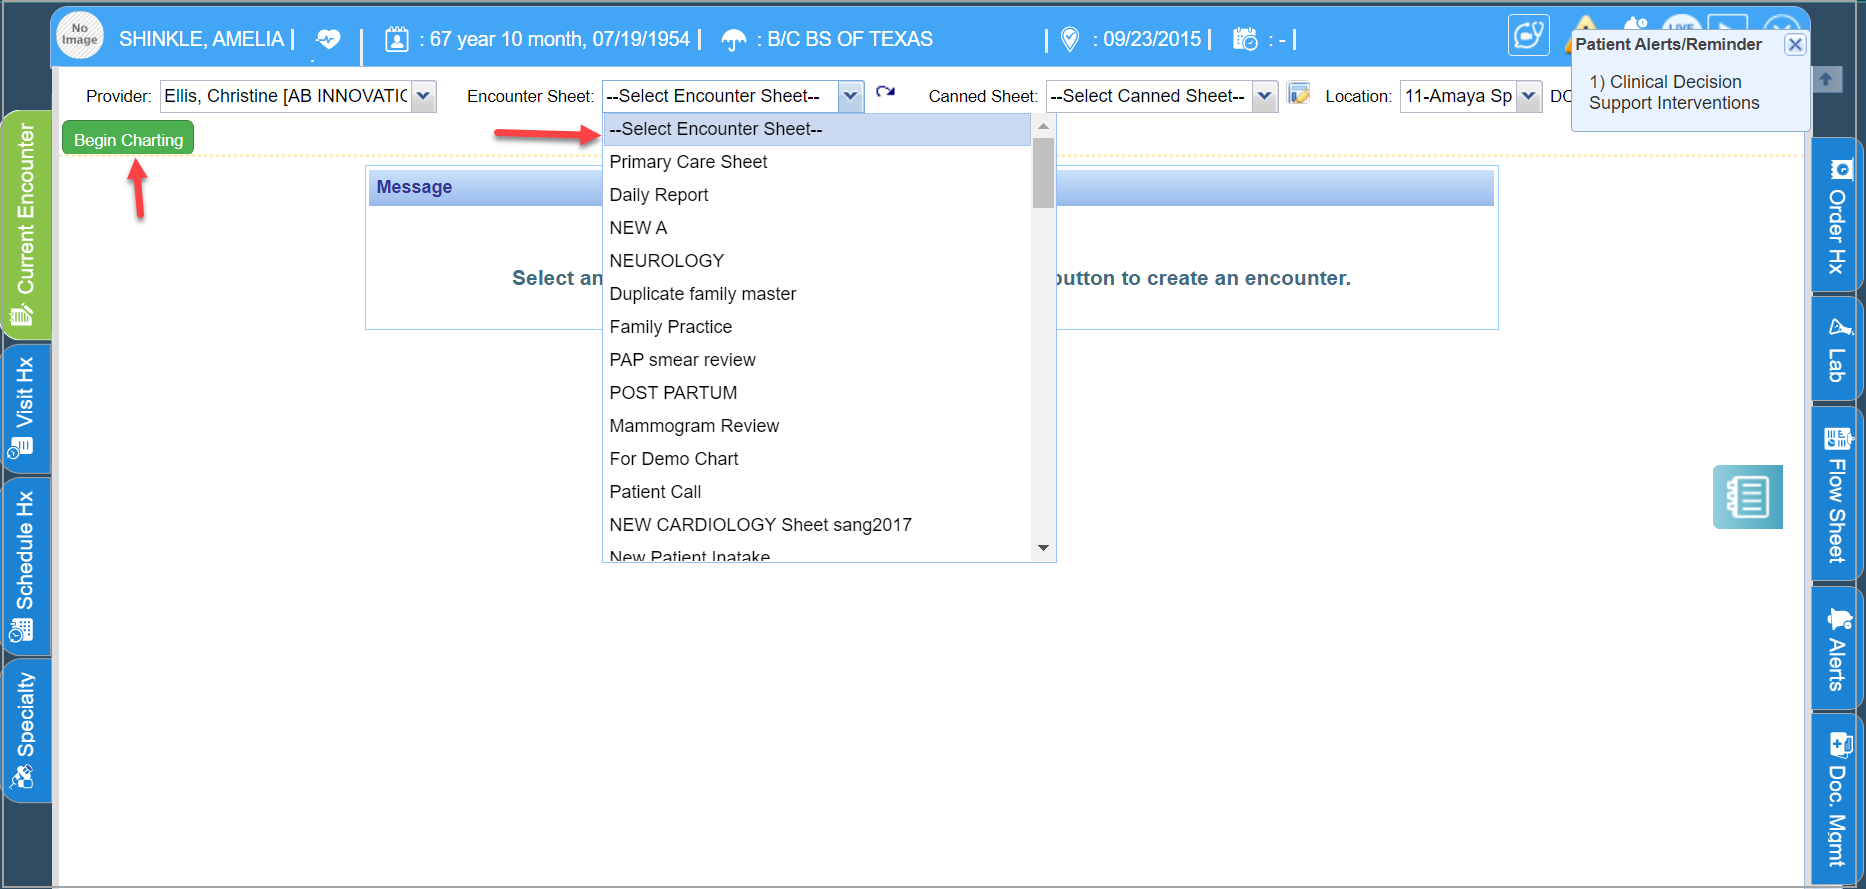
Option 1: Encounter Sheets
Choose an Encounter Sheet from the Encounter Sheet List and click the ![]() button and start charting; see Image 4.
button and start charting; see Image 4.
Option 2: Canned Sheets
PracticeSuite offers users the ability to save common visit-type chart notes as canned sheets or create customizable canned sheets, which makes charting quicker. Simply click on a respective encounter sheet, and all the canned sheets saved under it will be listed in the canned sheet list. Choose the required canned sheet and click the ![]() button to start charting (the name of this button will change according to the type of Sheet selected). To know more on how to create canned sheets, click here.
button to start charting (the name of this button will change according to the type of Sheet selected). To know more on how to create canned sheets, click here.
The Charting Screen
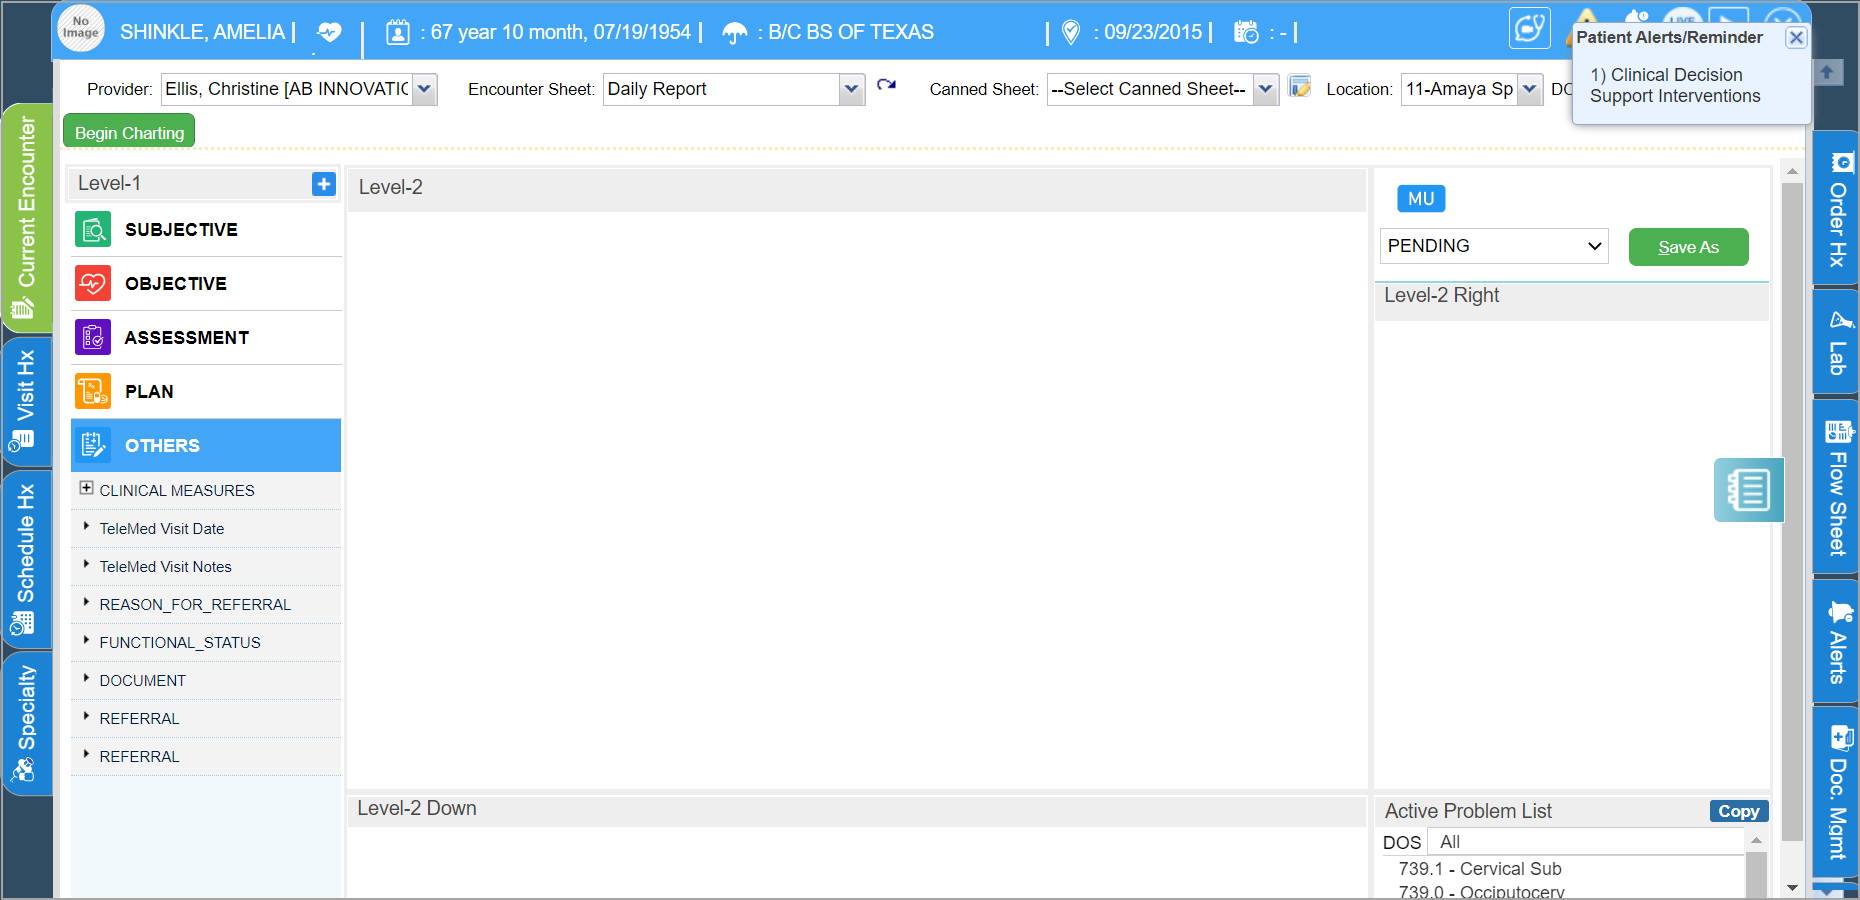
Charting Page Components
The charting screen comprises two main sections; On the left are content headings that can be customized (E.g. ENCOUNTER SHEET, SUBJECTIVE, OBJECTIVE, ASSESSMENT PLAN, OTHERS ). Under these headings, different Level-1 (component)s are listed. When a Level-1 (component) is clicked, a customizable list of items to be included in the chart note is presented on the right called Level-2 (Item). The chief complaint here includes a few common visit reasons at the top followed by an alphabetical listing of items. You may as well use the virtual keyboard interface ![]() to search. With PracticeSuite, you may type, handwrite, dictate, point and click or let your transcriptionist do the work. Any combination works fine.
to search. With PracticeSuite, you may type, handwrite, dictate, point and click or let your transcriptionist do the work. Any combination works fine.
Saving a Chart
1. The Chart can be saved in four different statuses:
| Chart Save Option | Icon | Description |
| COMPLETE | To save a chart which is completed | |
| FOR_REVIEW | If the chart needs review from another user, select this from drop-down. The system will prompt for the username who has to review. provide user name and click Save. Note: Only clinical users will be listed in the ‘For Review’ Drop-down | |
| PENDING | To save an incomplete chart; pending charts can be completed later. (If the physician is too busy to complete the charts or wants his staff to work on it, he can save it to Pending status). | |
| READY_FOR_EXAM | Charts filled up by patients/ MA to be made available to the physician for examination | |
| VOID | To delete a chart |
2. Intake forms, Allergies, Current Medications, Vital signs, etc. can be filled by patients through Kiosk or else by MA’s and can make this chart available to the physician for examination, click in the Save as drop-down and choose ![]() then click the Save As button. The Charting Saved Successfully message will be displayed, click the Close button. The chart will be saved and placed under the Ready for exam tab on the Clinical Desktop.
then click the Save As button. The Charting Saved Successfully message will be displayed, click the Close button. The chart will be saved and placed under the Ready for exam tab on the Clinical Desktop.
3. Click the Close button to close the charting screen and go back to the Clinical Desktop page and move on to the next patient.