
The Appointment Time Slot
PracticeSuite handles the entire scheduling needs of the practice through a module called Scheduler. To schedule an appointment, follow the below-given steps.
1. Select Scheduler from the main menu.
2. The Scheduler screen opens up, as shown in Image 1.
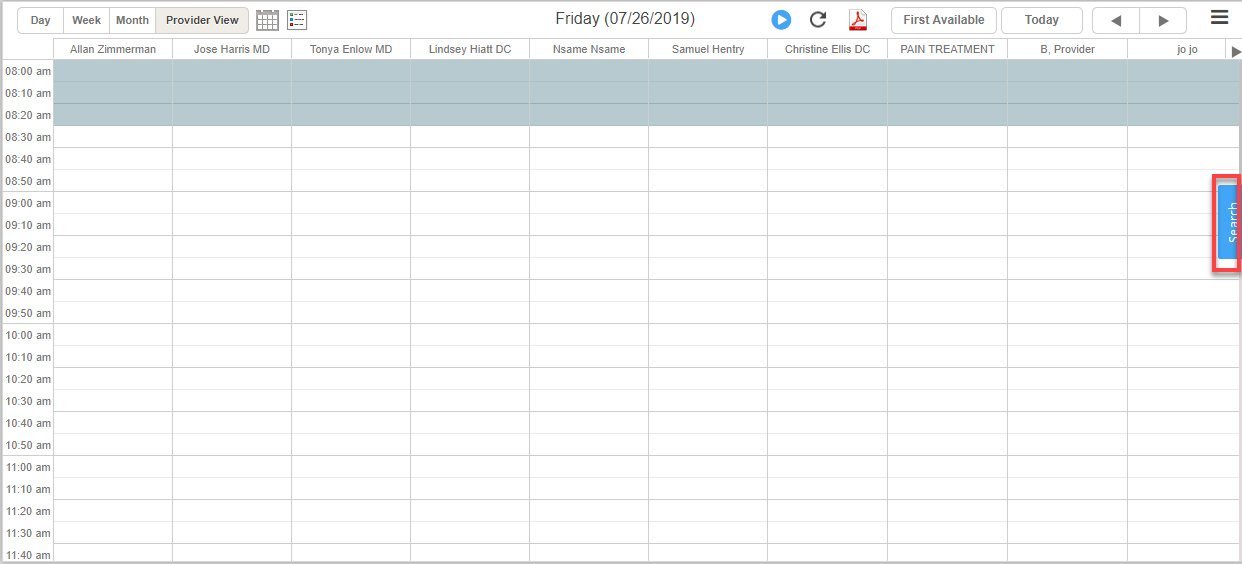
3A. Before starting to schedule, a specific legal entity has to be chosen. Click on the ‘Search’ highlighted in Image 1 and select an LE.
3B. Select All Providers to list all the providers of the chosen legal entity on the scheduler screen. To schedule only a specific set of providers, select them from the list; the provider list is a multi-select drop-down. Close the Search screen.
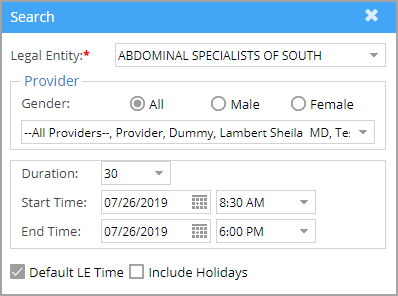
Table 1 shows the different ways to view appointments in the scheduler.
| Field | Description |
| Day-wise listing of appointments | |
| Weekly listing of appointments | |
| Month-wise listing of appointments | |
| Appointments are displayed provider-wise. | |
| Calendar button to select a day. | |
| Move to the previous day/week/month depending on what the user has selected from |
|
| Move to the next day/week/month depending on what the user has chosen from |
|
| Current-day appointments are displayed |
Table 1
4. Click on the required time slot under the needed provider to schedule a patient; the Schedule screen opens up.
Scheduling for an existing patient

1. In the Select Patient field, type in the name of the patient in the format Last name, First name. All matching patient names are listed. From the list, select the patient for whom the appointment needs to be created. On selecting the patient, patient information such as MR #, Last name, First name, DOB, Gender, etc. gets populated in the appropriate fields.
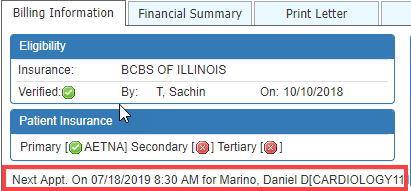
The next appointment of the selected patient will be displayed as shown in Image 4.
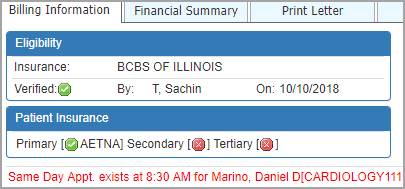
If the appointment is being scheduled for a day on which an appointment already exists for the patient, a message as shown in Image 5 appears.
2. Select the Schedule Status and Scheduled Type.
3. Enter a Reason for the visit.
4. Enter all other fields that are marked as mandatory and click on Save.
5. The saved appointment will be displayed in the scheduler. For patients having alerts added to their account, a bell icon will be visible in the information area of the appointment slot. This is to indicate that the patient has an active alert.
6. The patient name has a tooltip that displays the full name of the patient along with the time allotted.

The scheduler screen also has several tabs namely Billing Information, Financial Summary, Print letter, and Notes.
More on Schedule Details Screen:
Image 7 is the Billing Information section of a patient.
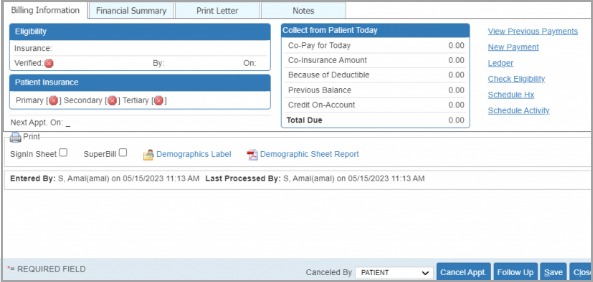
The tab provides details on the last eligibility verification done, primary, secondary, and tertiary (if any) insurances of the patient, and the Total amount due to be collected from the patient and its details. The tab also contains several links such as:
a. ![]() : To view previous payments made by the patient, the patient search screen opens up.
: To view previous payments made by the patient, the patient search screen opens up.
b. ![]() : To make a new payment on behalf of the selected patient, the payment master screen opens up.
: To make a new payment on behalf of the selected patient, the payment master screen opens up.
c. ![]() : The patient’s ledger opens up.
: The patient’s ledger opens up.
d. ![]() : This link takes you directly to the Eligibility Verification page, where a detailed verification history of the patient’s insurance can be viewed and further verification can be done.
: This link takes you directly to the Eligibility Verification page, where a detailed verification history of the patient’s insurance can be viewed and further verification can be done.
e. ![]() : This link takes you to the schedule history page of the patient.
: This link takes you to the schedule history page of the patient.
f. ![]() : This takes you to the audit log of scheduling activities.
: This takes you to the audit log of scheduling activities.
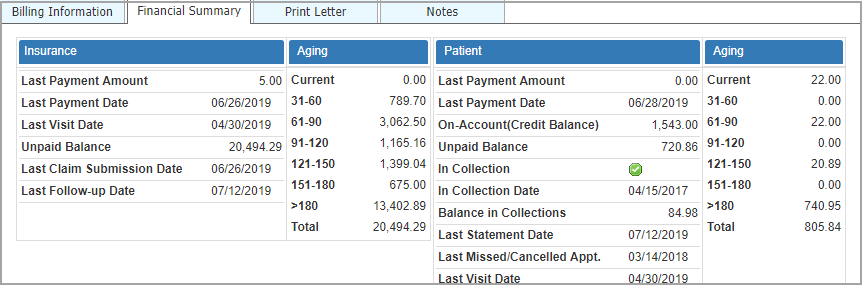
Financial Summary:
The following is the Financial Summary of a patient. It displays the insurance aging and patient aging details and the details of the previous payments made by the patient and the insurance. It also shows the Last Visit date, Last Statement date, Last Claim Submission date, etc.
Print letter:

To print any letter for the patient, select the appropriate one. On clicking Save, the letter is displayed.
Notes:
Any scheduling notes for the patient can be provided in this section.